

Quick Crochet Bunny Basket Pattern: A Cute Handmade Easter Basket
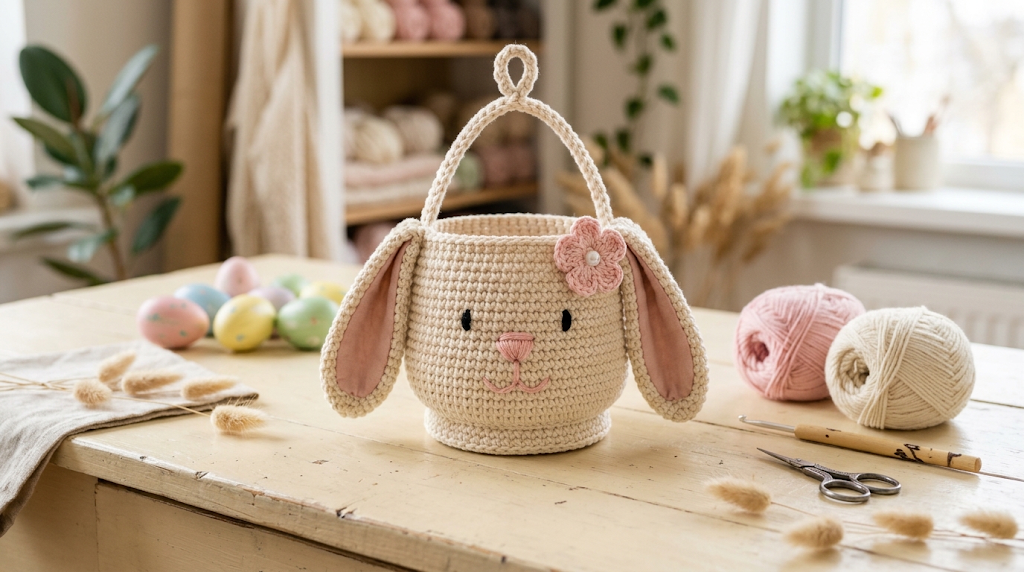
If you love making adorable crochet projects that are both decorative and useful, a crochet bunny basket is a wonderful project to add to your list. With its floppy bunny ears, sweet little face, flower decoration, and practical basket shape, this handmade creation brings a playful touch to Easter celebrations, spring decorating, and gift-giving.
What I particularly like about this style of crochet basket is that it combines simple crochet techniques with charming details. You can use it to hold small treats, wrapped chocolates, yarn accessories, or other lightweight items. You can also customize the colors to create a bunny that matches your home decor or the personality of the person receiving it.
The original design is a compact basket made with worsted-weight yarn and a 5 mm crochet hook. Its small size makes it an appealing project when you want to create something special without committing to a large crochet project. The original pattern estimates that it can be completed in under two hours, although your time will depend on your experience and working speed.
Why You’ll Love This Crochet Bunny Basket
1. It’s Cute and Practical
The combination of a round basket, long bunny ears, and a little flower makes this design instantly recognizable.
Unlike a purely decorative crochet bunny, a basket offers space for small items. You can use it as an Easter treat basket, a nursery shelf decoration, or a little organizer for your crochet supplies.
Its compact shape also makes it easy to display on a desk, shelf, or bedside table.
2. You Can Use Leftover Yarn
This project is a good opportunity to use yarn remaining from other crochet projects.
You’ll need a main color for the basket, a contrasting shade for the flower, and another color for the ears or facial details. Small amounts of yarn can make a noticeable difference to the finished design.
White, cream, beige, and pastel shades are classic choices, but you can experiment with darker or brighter colors for a more distinctive look.
3. It’s Suitable for a Handmade Gift
A finished bunny basket can hold wrapped chocolates, small gifts, decorative eggs, or other lightweight treats.
You could make one for an Easter celebration, a spring birthday, or a handmade gift exchange. Adding a small flower or a fluffy yarn pom-pom gives the finished basket an extra-special touch.
If you plan to sell your finished work, check the original designer’s terms before doing so.
Materials You’ll Need
Before beginning, gather your supplies so you can work comfortably without stopping to search for tools.
Yarn: Choose worsted-weight yarn in three colors. One color forms the basket, while smaller amounts of contrasting yarn can be used for the ears, nose, and flower.
Crochet hook: The original pattern specifies a 5 mm hook.
Yarn needle: A blunt, large-eye yarn needle is useful for sewing the decorative pieces and weaving in yarn ends.
Scissors: Use sharp craft scissors to trim yarn neatly.
Matching sewing thread: This can help secure small decorative details.
Optional pom-pom: A small yarn pom-pom can serve as a decorative bunny tail.
For a classic bunny, consider cream yarn with pink ears and a white flower. For a more modern appearance, try charcoal gray with dusty-pink accents or deep chocolate brown with beige details.

Two Helpful Amazon Product Recommendations
You don’t need an expensive collection of supplies to make this project. A suitable yarn and the correct crochet hook are the most useful items to prioritize.
1. Worsted-Weight Yarn
A smooth, medium-weight yarn is a practical choice for creating the basket, ears, and decorative flower.
When selecting yarn, look for a yarn labeled medium weight or category 4. Choose a fiber that feels comfortable to work with and is suitable for the intended use.
For the basket, stitch definition and fabric structure matter more than choosing the softest possible yarn. If the stitches are too loose, the sides may not hold their shape as well as you’d like.

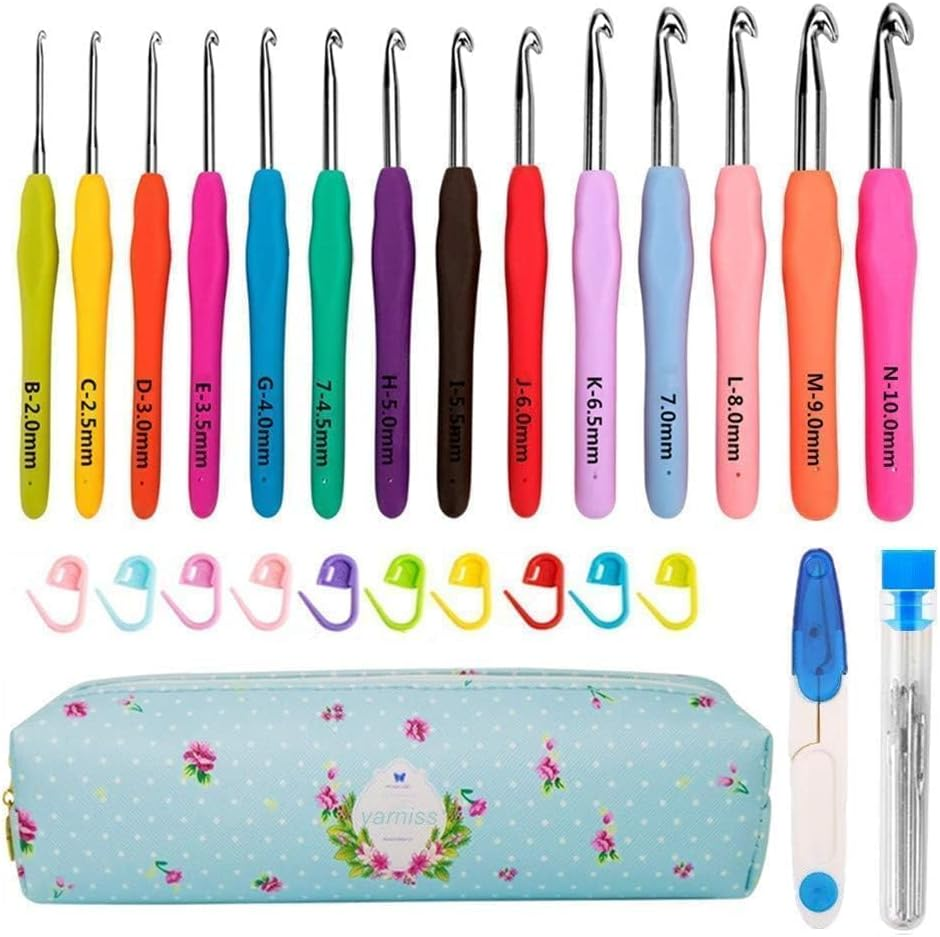
2. 5 mm Crochet Hook
A 5 mm crochet hook is the size specified in the original pattern.
If you already own a suitable hook, there’s no need to purchase another. Otherwise, an aluminum hook or an ergonomic crochet hook with a 5 mm tip can be a useful addition to your supplies.
Choose a comfortable handle if you tend to crochet for longer periods. Remember that changing hook sizes can affect the basket’s dimensions and firmness.
Understanding the Crochet Bunny Basket Design
The basket is made from several sections that work together to create its recognizable shape.
The Circular Base
The project begins with a small ring and develops outward through rounds of crochet stitches.
As you add increases, the circle gradually becomes larger. Consistent stitch tension and accurate stitch counts help prevent the base from curling or becoming wavy.
The Basket Sides
Once the base reaches the required size, the stitches are worked upward to create the walls.
Working into the back loops for the first round of the sides creates a defined transition between the bottom and the walls. The remaining rounds build the basket’s height.
The original design uses half-double crochet stitches for much of the basket, with shaping rounds near the top to create its tapered profile.
The Bunny Ears
The ears are crocheted directly onto the basket in the original design.
Each ear begins with a short row of stitches and develops into a longer, narrow shape. Decreases at the tip help create a tapered finish.
After crocheting, the base of each ear can be pinched and secured with a few stitches to help the ears stand upright.
The Handle and Flower
The handle is crocheted separately, shaped into a firm tube, and attached inside the basket.
The decorative flower adds a contrasting pop of color. Its center and petals are worked with different stitch heights to create a small, recognizable flower shape.
Finally, the nose, mouth, and eyes give the basket its bunny-like personality.
Step-by-Step Guide to Making Your Bunny Basket
The following overview explains the construction process. For the exact round-by-round stitch counts and complete shaping instructions, follow the original designer’s pattern.
Step 1: Crochet the Circular Base
Begin by making the starting ring according to the pattern.
Work the initial round of single crochet stitches into the ring. In the following rounds, increase the number of stitches evenly to expand the base.
The original design uses half-double crochet for the base after the starting round.
As you work, place a stitch marker at the beginning of the round if that helps you keep track of your progress.

Helpful tip: Lay the base on a flat surface occasionally. If the edges curl upward or develop pronounced waves, review your stitch count and tension before continuing.
Step 2: Build the Basket Walls
Once the base is complete, begin working the first round of the sides into the back loops only.
This creates a visible line between the flat base and the upright walls.
Continue working the side rounds according to the original pattern. Keep your tension reasonably consistent so the basket develops evenly.
As the basket approaches the top, follow the specified increases and decreases carefully. These shaping rounds help create the narrower opening.
Don’t pull your stitches excessively tight. A basket that is too stiff can be difficult to shape, while loose stitches may allow the sides to collapse.
Step 3: Crochet the Bunny Ears
Position the basket so the front faces you and the finishing seam is at the back.
Follow the original pattern’s placement instructions to begin the ears on opposite sides of the front section.
Work the rows evenly, maintaining the same number of stitches until the shaping instructions tell you to decrease.

When each ear is complete, weave in its yarn ends.
To help the ears stand upright, pinch the lower portion and sew the base into position. A few small stitches are usually enough to create the desired shape.
Step 4: Create the Handle
The handle is worked as a separate crocheted strip.
Begin with a chain long enough to create the handle length specified by the pattern. Work the rows of half-double crochet, then follow the finishing instructions to form the strip into a tube.
Leave sufficient yarn at both ends for attaching the handle securely.
Before sewing it to the basket, check its length and position. The handle should look balanced and should not pull the basket’s rim out of shape.
Attach both ends to the inside of the basket, hiding the joining stitches as neatly as possible.

Step 5: Make the Decorative Flower
The flower is a lovely opportunity to use small amounts of contrasting yarn.
Start with a small center ring and work the center stitches according to the pattern.
Next, change to the petal color. The original flower uses slip stitches, chains, double crochet, and treble crochet to form five petals.
Because the petals use different stitch heights, take your time when working each one.
Once the flower is complete, sew it onto one bunny ear or near the handle. Position it securely so it doesn’t twist or hang awkwardly.

Step 6: Add the Bunny’s Facial Features
The facial details give the basket its personality.
Use pink yarn to embroider a small triangular nose and a curved mouth. For the eyes, the original design describes using tiny black buttons or crocheted alternatives.
For a basket intended for a young child, embroidered eyes are generally preferable to small detachable pieces, which can present a choking hazard.
Keep the facial features symmetrical and avoid pulling the embroidery so tightly that it distorts the basket.

Step 7: Finish and Shape the Basket
Once all the details are attached, inspect the basket carefully.
Weave in loose ends, check the handle attachments, and make sure the ears and flower are secure.
Gently shape the base and sides by hand.
The original pattern describes a compact basket measuring approximately 5 inches across the bottom, 3 inches across the top, and 4 inches high. Your finished dimensions may vary according to your yarn, hook, and tension.

Tips for a Neat and Sturdy Finish
Keep Your Tension Consistent
Uneven tension can make the base lopsided or the sides lean in different directions.
Try to maintain a steady rhythm as you crochet. If your stitches become noticeably tighter or looser, pause and check the shape before continuing.
Use Stitch Markers When Needed
Working in rounds can make it difficult to identify the beginning of each round.
A stitch marker helps you keep track of your starting point and makes counting easier.
Secure the Handle Properly
The handle is one of the parts most likely to experience pulling during use.
Sew both ends firmly to the inside of the basket and check the attachment before adding any contents.
Avoid Overloading the Basket
This is a small decorative basket, not a heavy-duty storage container.
Use it for lightweight items such as wrapped treats, yarn scraps, or decorative eggs. Avoid filling it with heavy objects that could stretch the handle or distort the shape.
Creative Ways to Customize Your Bunny Basket
One of the nicest things about crochet is how easily a design can be personalized.
Classic Easter bunny: Combine cream yarn, pink ears, and a white flower.
Dark and elegant bunny: Use charcoal, deep brown, or black yarn with dusty-pink or ivory details.
Pastel spring bunny: Try mint green, lavender, pale yellow, and soft pink.
Natural farmhouse bunny: Choose beige or oatmeal yarn with a cream flower and subtle facial details.
Colorful children’s basket: Use cheerful colors and a matching yarn pom-pom tail.
You can also make the flower detachable by attaching it with a securely sewn-on yarn loop, provided the finished piece is intended for an appropriate age group and the attachment cannot come loose easily.

Frequently Asked Questions
Is This Crochet Bunny Basket Suitable for Beginners?
It can be a manageable project for someone who understands basic crochet stitches and working in rounds. Beginners may need additional practice with increases, decreases, sewing pieces together, and shaping the ears.
How Long Does It Take to Make?
The original pattern estimates less than two hours, but this is not a guarantee. Your experience, crochet speed, and time spent on facial details will affect the total time.
What Can I Put Inside the Basket?
You can use it for lightweight wrapped sweets, decorative eggs, small gifts, yarn accessories, or seasonal decorations.
If giving the basket to a young child, consider the safety of every item placed inside it.
Can I Make a Larger Basket?
Yes, but increasing the size may require adjustments to the base, walls, ears, and handle. Simply adding extra rounds may change the proportions, so plan the shaping carefully.
Can I Use Different Yarn Colors?
Absolutely. The design works with many color combinations, from classic white and pink to darker, more modern shades.
How Should I Clean the Finished Basket?
Follow the care instructions for your yarn. If cleaning is necessary, handle the basket gently and reshape it while damp if the yarn’s care instructions permit. Allow it to dry completely before storing it.
Final Thoughts
A quick crochet bunny basket is a charming way to combine a practical container with playful handmade details. The circular base, upright sides, floppy ears, little flower, and embroidered face all contribute to its sweet appearance.
I especially like the possibilities for personalization. You can keep the colors traditional for Easter, choose a dark and elegant palette for a modern look, or use leftover yarn to create a completely unique bunny.
Take your time with the shaping and finishing details, especially around the handle, ears, and facial features. Those small touches can make a real difference to the final result.
lsofrewlyfwugktxhvkqnvnpldljkd
yes?