Easy Crochet Water Bottle Holder Pattern: A Stylish, Hands-Free DIY
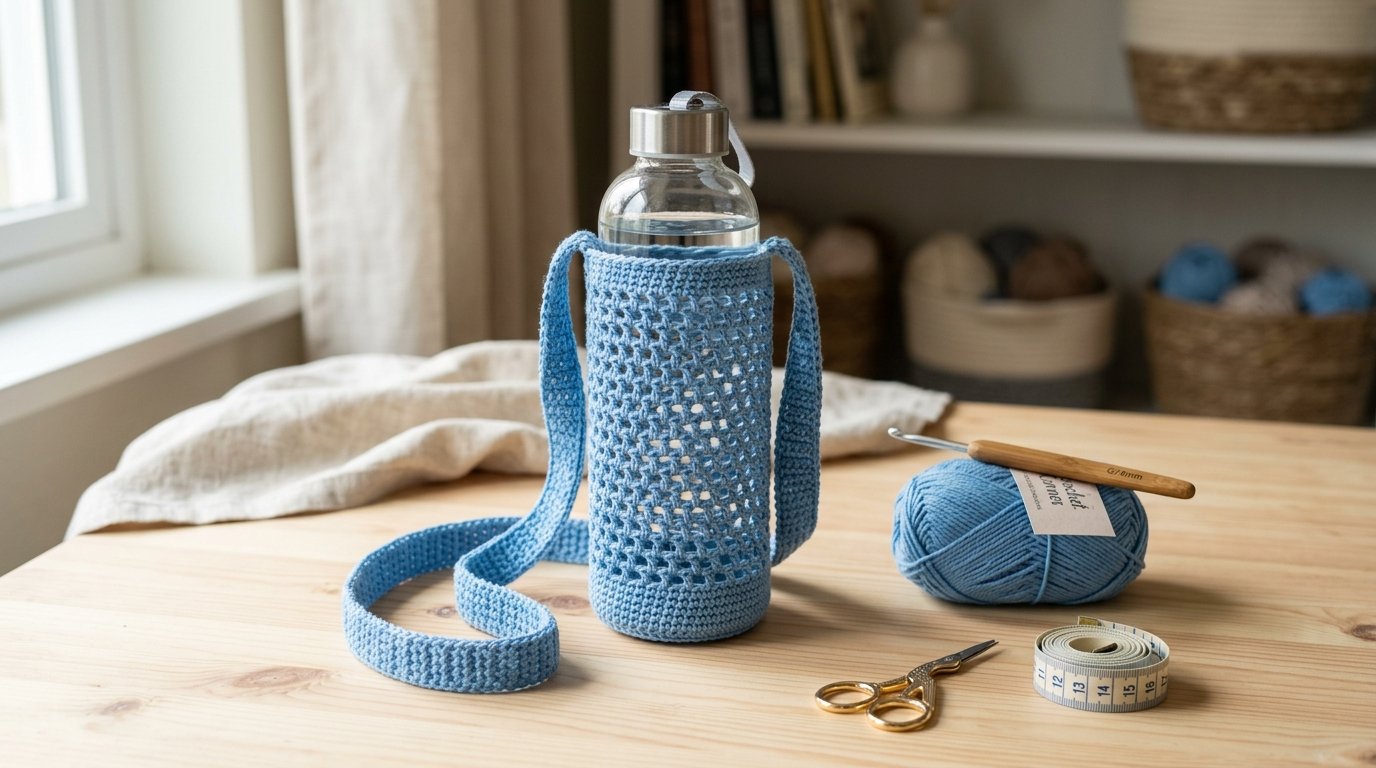
There is something special about making a crochet project that is both beautiful and useful. A crochet water bottle holder is a perfect example! It turns a simple water bottle into a cute everyday accessory while keeping your hands free when you are walking, shopping, traveling, or heading to the gym.
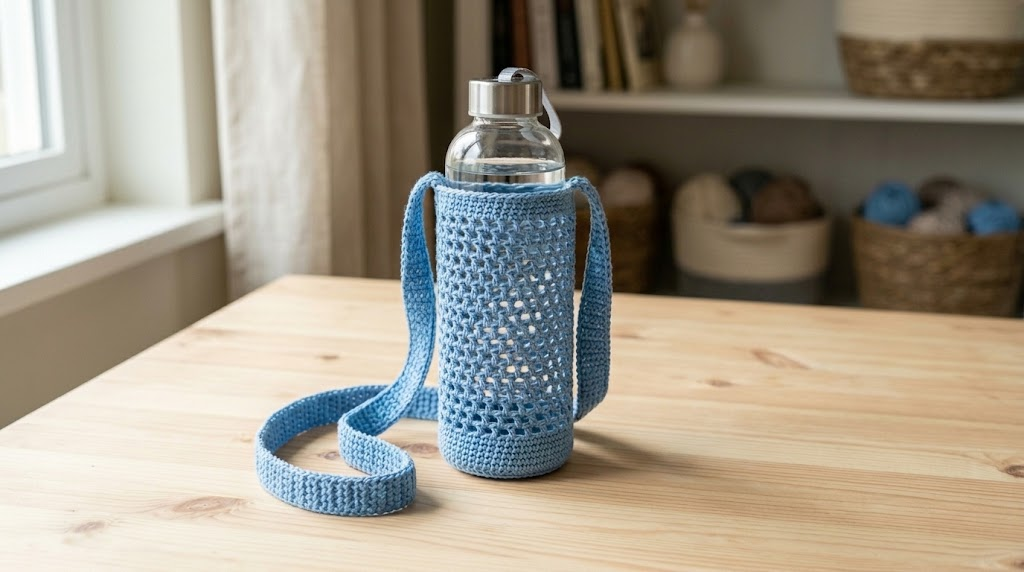
In this tutorial, I’ll walk you through an original, beginner-friendly mesh-style crochet water bottle holder pattern. You’ll learn how to crochet a circular base, build the sides, create a comfortable strap, and adjust the size to fit your favorite bottle.
For this version, I’m using a lovely blue color scheme. Soft sky blue, dusty blue, or navy cotton yarn can all create a beautiful finish. You can also choose cream or white for a fresh, summery look.
The best part? You don’t need complicated stitches or expensive supplies to get started.
Why You’ll Love This Crochet Water Bottle Holder
This crochet bottle holder is a practical project for beginners who want to make something they can actually use.
Here are a few reasons to try it:
- Beginner-friendly construction: The pattern uses basic crochet stitches and simple increases.
- Hands-free carrying: The strap makes it easier to carry your bottle while walking or running errands.
- Customizable sizing: You can adjust the base, height, and strap to suit different bottles.
- A thoughtful handmade gift: Make one for a friend, student, teacher, or anyone who enjoys handmade accessories.
- Great for leftover yarn: Small amounts of suitable cotton yarn can be enough for a compact holder.
The open mesh design gives the holder a lightweight appearance, while the solid base helps support the bottle.
Materials You’ll Need
Gather these supplies before beginning your crochet water bottle holder.
- Approximately 80–120 yards of medium-weight cotton yarn, depending on your bottle size and strap length.
- A 3.75–4 mm crochet hook for the holder.
- A 4–4.5 mm crochet hook for the strap, if desired.
- Scissors.
- A yarn needle for weaving in the ends.
- Stitch markers.
- A measuring tape.
- The water bottle you plan to carry
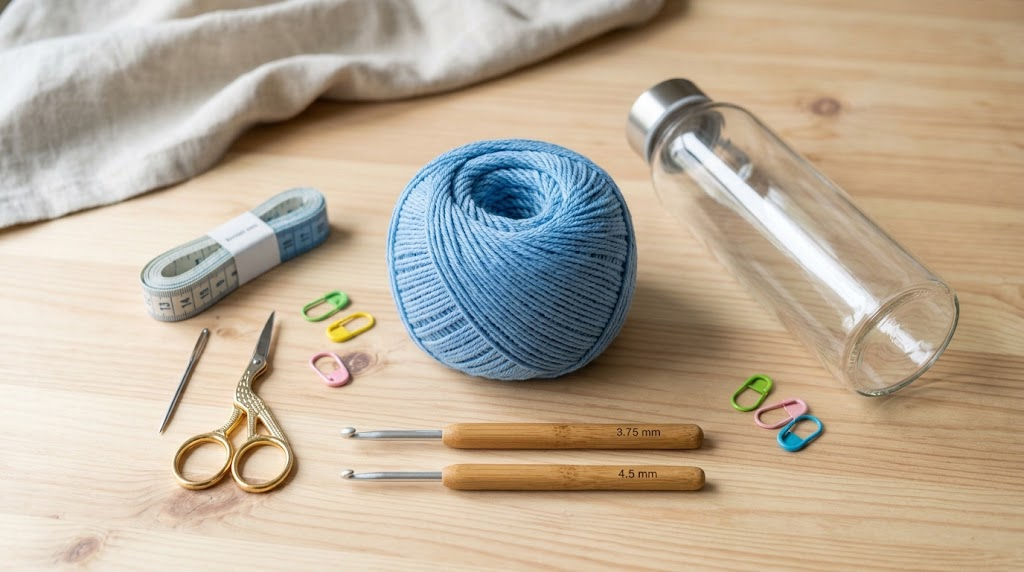
My yarn recommendation: Cotton is a sensible choice for this project because it generally provides more structure than many soft acrylic yarns. Choose a smooth, tightly spun yarn so the stitches are easy to see and the finished holder is less likely to stretch excessively.
Amazon Products Worth Considering
These are two useful supplies to consider for your project. Check the current listing, yarn weight, hook sizes, and customer reviews before purchasing.
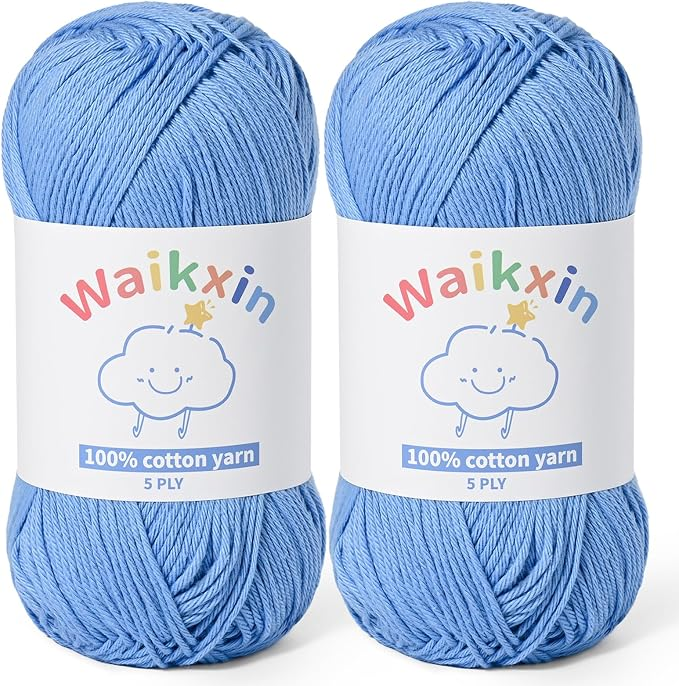
1. Cotton yarn for crochet
Cotton yarn is suitable for a water bottle carrier because it can produce a firm, clearly defined fabric. A medium-weight yarn is a practical starting point for this pattern.
2. Crochet hook set
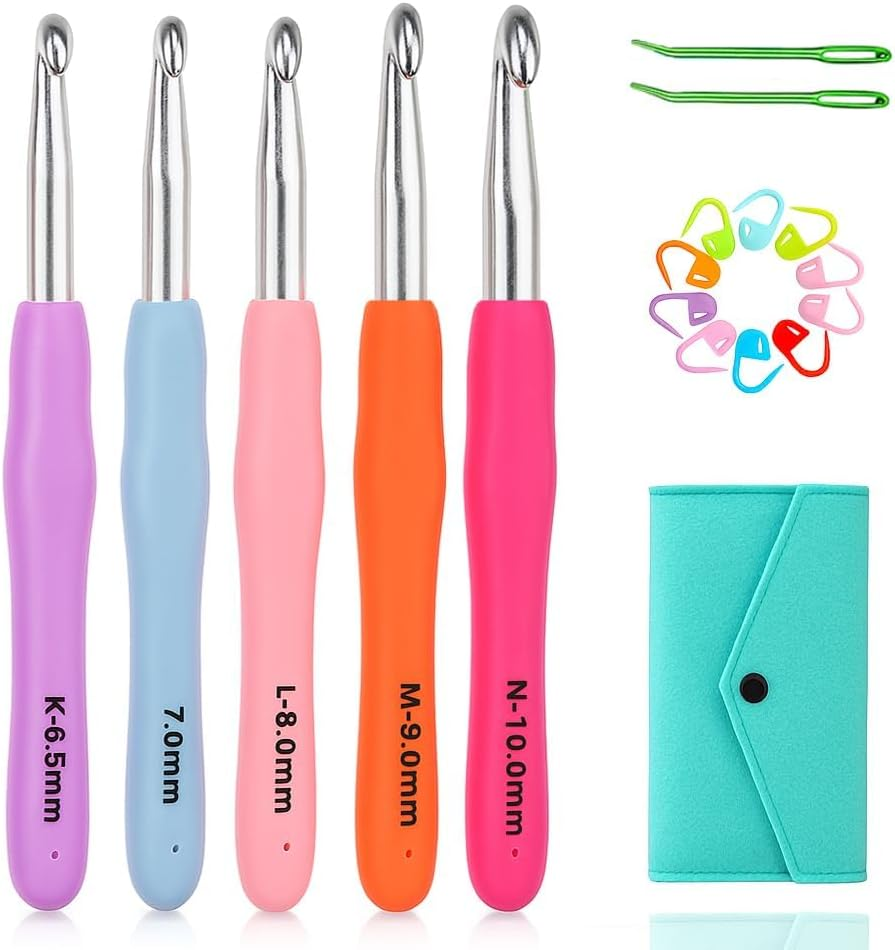
A crochet hook set can be useful if you regularly make bags, accessories, blankets, or other crochet projects. Look for a set that includes the hook sizes needed for the body and strap.
Crochet Abbreviations
This pattern uses US crochet terminology.
- ch: Chain
- sc: Single crochet
- dc: Double crochet
- sl st: Slip stitch
- st: Stitch
- sp: Space
- inc: Increase, meaning two stitches worked into the same stitch
- rep: Repeat
- sk: Skip
Skill level: Easy beginner
Construction: Worked from the bottom upward, followed by a separate strap.
Finished size: Adjustable to your bottle. The sample instructions below begin with a base of 36 double crochet stitches, but your bottle may require a different number.
Step-by-Step Crochet Water Bottle Holder Pattern
Step 1: Crochet the Base
Start with a magic ring. If you find the magic ring difficult, chain four and join with a slip stitch to form a small ring.
Round 1: Ch 2 (does not count as a stitch). Work 12 dc into the ring. Join with a sl st to the first dc. (12 sts)
Round 2: Ch 2. Work 2 dc into every stitch around. Join with a sl st. (24 sts)
Round 3: Ch 2. Work 1 dc in the first stitch, then 2 dc in the next stitch. Repeat around and join. (36 sts)
Round 4, if needed: Ch 2. Work 1 dc in each of the next 2 stitches, then 2 dc in the following stitch. Repeat around and join. (48 sts)
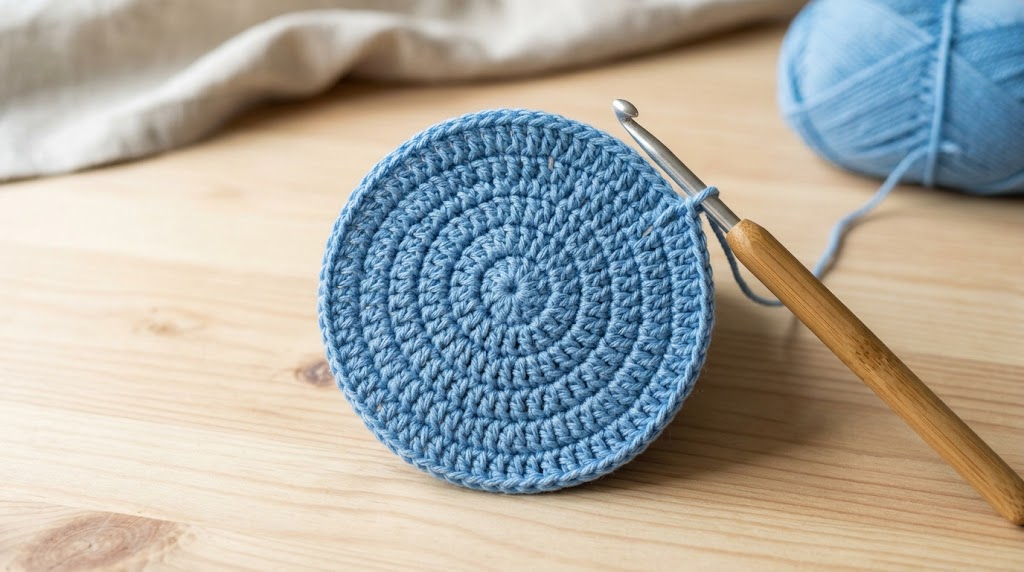
Important sizing tip: Don’t automatically complete every increase round. Place your bottle on the base and compare the diameter. Add another increase round only when necessary to match the bottle’s bottom. The base should lie reasonably flat rather than curl upward or develop ruffles.
Step 2: Build the Bottom Edge
Once the base is wide enough, begin creating the sides.
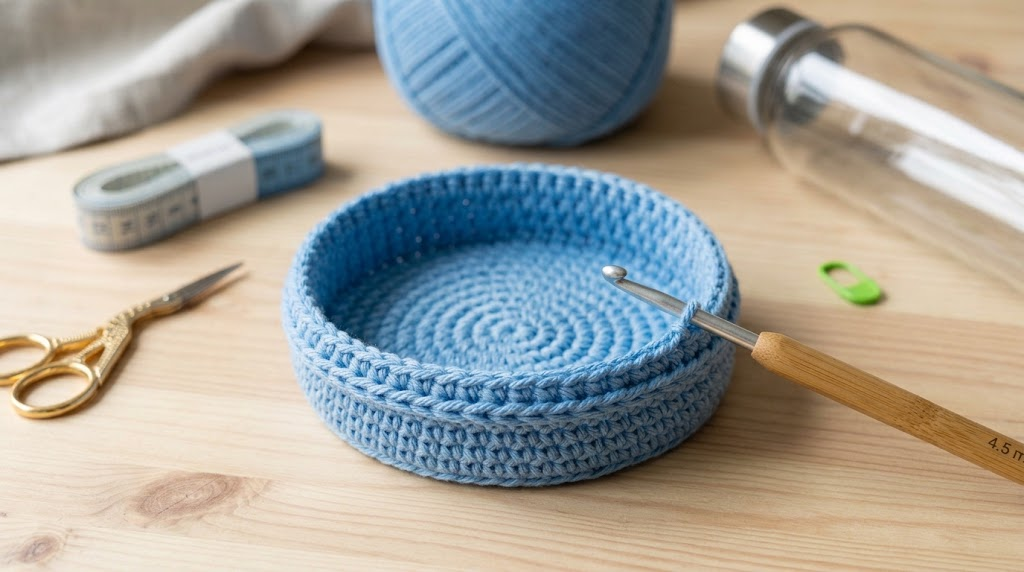
Round 1: Ch 1, then work 1 sc into each stitch around. Join with a sl st.
Round 2: Ch 1, then work 1 sc into the back loop only of every stitch around. Join with a sl st.
This small change in stitch placement creates a subtle ridge that helps distinguish the base from the body.
Step 3: Create the Mesh Body
Now you can begin the openwork section. The chain spaces create a light, airy texture while keeping the design simple.
Round 1: Ch 4 (counts as 1 dc and 1 ch). Skip 1 stitch and work 1 dc into the next stitch. Ch 1, skip 1 stitch, and work 1 dc into the next stitch. Repeat around. Join with a sl st into the third chain of the beginning ch-4.
Round 2: Sl st into the first ch-1 space. Ch 4, then work 1 dc into the same space. Ch 1 and work 1 dc into the next ch-1 space. Continue working dc stitches into the chain spaces with ch-1 spaces between them. Join at the beginning.
Repeat: Continue the mesh pattern until the holder reaches the desired height. For many standard bottles, approximately 5–7 inches of body height is a useful starting point, but measure your own bottle before deciding when to stop.
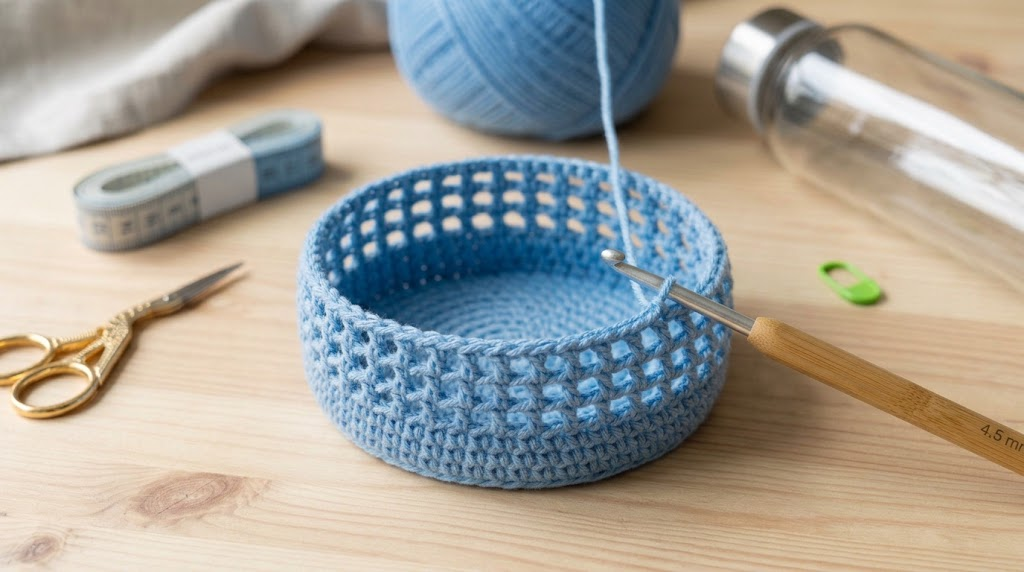
Beginner tip: Keep your chain spaces consistent. If some spaces are much larger than others, the holder may look uneven. Count your repeats occasionally, and use a stitch marker to help identify the beginning of each round.
Step 4: Check the Fit
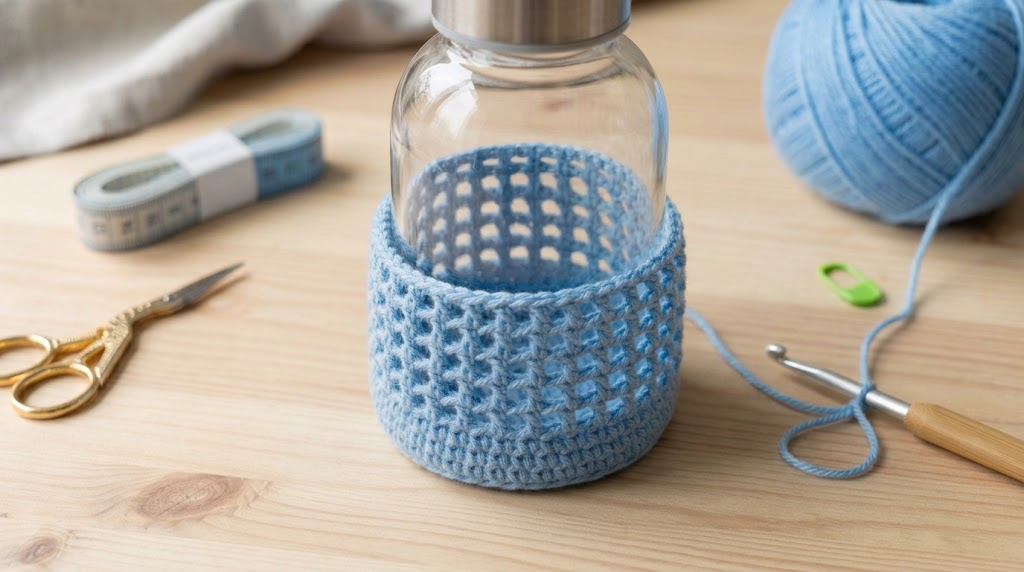
Slide your bottle into the unfinished holder before moving on.
The bottom should support the bottle, and the sides should reach the height you want. Leave enough of the bottle exposed to remove it easily.
If the holder feels too loose, try a smaller hook or tighter tension. If it is too narrow, you may need additional stitches in the base. Remember that open mesh can stretch with use, especially when carrying a heavier bottle.
Step 5: Crochet the Strap
A comfortable strap is essential for a bottle holder that you plan to carry regularly.
Join your yarn securely to one side of the holder.
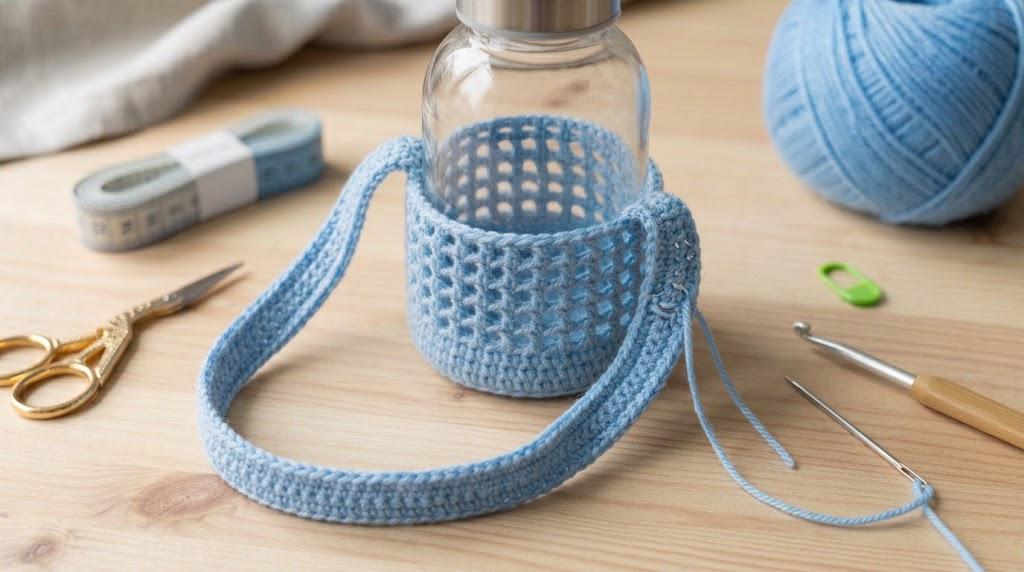
Row 1: Ch 1 and work sc stitches across a section approximately 2–3 inches wide. Turn.
Rows 2–4: Ch 1, sc across, and turn after each row.
Continue adding rows until you have a sturdy strap tab. Fasten off, leaving a long tail for sewing.
Repeat on the opposite side, making sure both tabs are aligned.
To create the long strap, chain until it reaches your preferred length. For a shoulder strap, begin with approximately 30–40 inches, then adjust according to your height and how you intend to wear the holder. Work back across the chain in sc stitches. Add another row if you want a wider strap.
Sew each end firmly to its corresponding tab. Reinforce the attachment points because they will carry the weight of the bottle.
Step 6: Finish and Test Your Holder
Weave in all loose ends using your yarn needle. Check the base, strap, and attachment points for gaps or loose stitches.
Insert your bottle and lift the holder gently over a safe, soft surface to check the fit. Do not test it by swinging the bottle or carrying it over people or valuables. A handmade mesh holder is not a substitute for a secure, purpose-built carrier when transporting a heavy glass bottle.
Your crochet water bottle holder is ready to use!
How to Customize Your Crochet Bottle Holder
Once you understand the basic construction, you can make the design your own.
- For a larger bottle: Increase the base until it matches the bottle’s bottom, then continue with the body.
- For a taller bottle: Add more mesh rounds before making the strap.
- For a shorter handle: Reduce the starting chain and test the length before finishing.
- For a colorful design: Alternate blue and cream yarn or add a contrasting border.
- For a firmer finish: Use a smaller hook if necessary, while ensuring the fabric remains comfortable to crochet.
You can also add a small crocheted flower or decorative bow, provided it does not interfere with inserting or removing the bottle.
Common Problems and Easy Fixes
Why is my base curling? You may need more increases or a slightly larger hook. Check the base against your bottle as you work.
Why is the holder stretching? Cotton can still stretch under weight. Try a firmer gauge and avoid making the mesh excessively loose.
Why does my strap twist? Lay the strap flat before attaching the second end and check that both ends face the same direction.
Can I use acrylic yarn? Yes, although cotton is a practical first choice for a holder that needs some structure. Test the finished fabric with your bottle before relying on it.
Final Thoughts
This easy crochet water bottle holder pattern is a lovely way to turn basic crochet skills into a useful everyday accessory. With a simple circular base, a lightweight mesh body, and a comfortable strap, you can create a handmade carrier that reflects your own style.
Start with a blue cotton yarn, measure your bottle as you work, and adjust the base and strap to achieve a comfortable fit. Once you’ve made one, try a different color combination for a handmade gift or a matching set.
If you make this project, save your finished measurements and yarn details so you can recreate the design later. Happy crocheting!
A quick safety note: Check the seams and strap regularly for wear. Keep the bottle upright where possible, and avoid carrying hot liquids or relying on the holder for fragile glass bottles unless the design and materials are appropriate for that use.