Crochet Granny Stitch Dress Pattern: A Beautiful Handmade Dress with a Boho Touch
A crochet granny stitch dress is a beautiful way to turn simple crochet techniques into something stylish, comfortable, and practical. If you love handmade clothing, textured stitches, and warm earthy colors, this project is a lovely addition to your crochet collection.
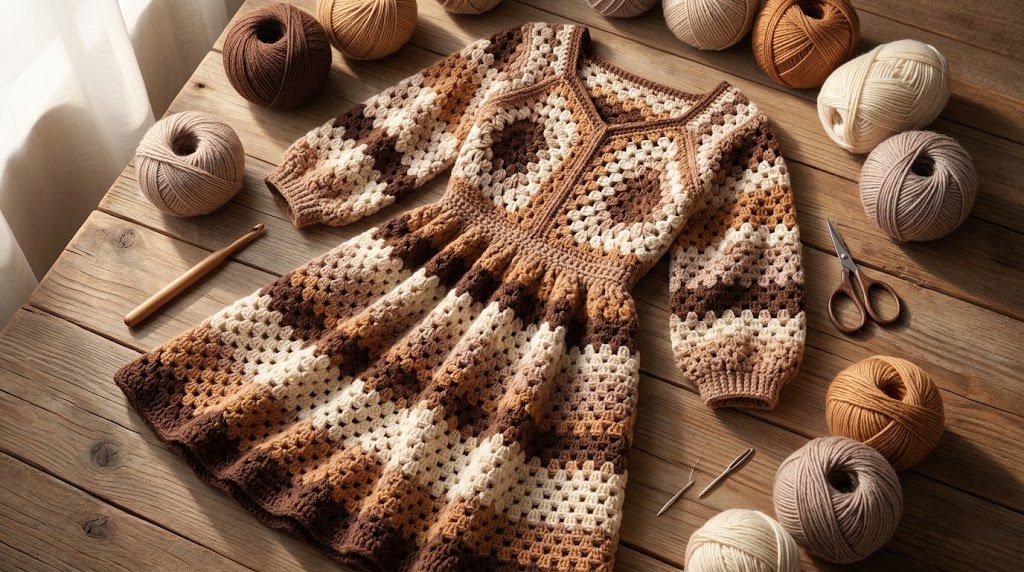
What makes this dress particularly interesting is its unique construction. Instead of making separate front and back panels, the design uses two large crochet hexagons that are folded and joined to create the upper body and sleeves. The skirt is then extended with repeating granny stitch rounds to create a flowing dress.
In this detailed guide, I’ll explain the materials, stitches, construction process, fitting tips, and finishing techniques. I’ll also share two helpful crochet tools that can make the project easier to complete.
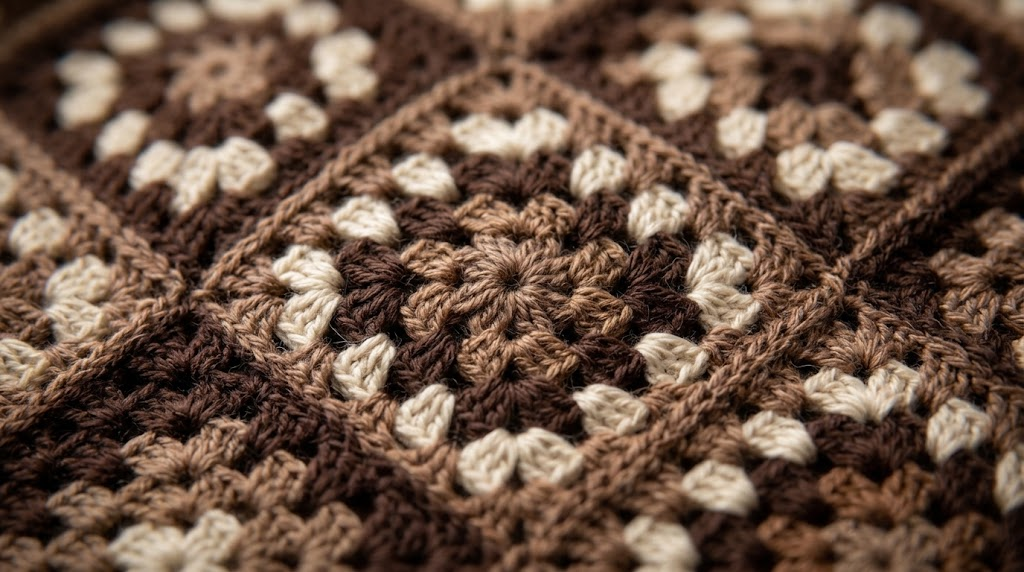
Why You’ll Love This Crochet Granny Stitch Dress
There are plenty of reasons to try a granny stitch dress, especially if you enjoy making wearable crochet projects.
- Beautiful texture: Granny stitch clusters create an attractive open pattern that looks detailed without requiring complicated stitches.
- Creative construction: The hexagon-based design gives the dress an interesting shape using two main crochet pieces.
- Customizable length: You can create a shorter summer dress or extend the skirt for a longer silhouette.
- Comfortable style: The relaxed construction makes this dress suitable for casual outfits and layered looks.
- Color flexibility: You can use one color for a minimalist appearance or combine several shades for a more playful design.
- A rewarding project: Watching two simple crochet shapes transform into a complete garment is especially satisfying.
Another advantage is that you can check the fit during construction. This is helpful because crochet clothing can look different once the pieces are folded, joined, and worn.
Materials Needed for the Crochet Dress
Before starting, collect all your materials. Preparing everything in advance makes a larger crochet project easier to organize.
| Material | Purpose |
|---|---|
| Medium-weight yarn (Category 4) | Main dress fabric |
| 6.5 mm crochet hook | Working the granny stitches |
| Locking stitch markers | Marking construction sections |
| Tapestry needle | Joining seams and weaving ends |
| Measuring tape | Checking garment measurements |
| Scissors | Cutting yarn |
| Blocking mat and T-pins | Optional garment finishing |
Choosing the right yarn
For this type of dress, I recommend a soft medium-weight yarn that has a comfortable feel and enough drape to create a wearable garment.
Acrylic yarn is an affordable option and comes in many colors. Cotton blends can also work well when you want a breathable fabric, although the finished drape and weight may differ.
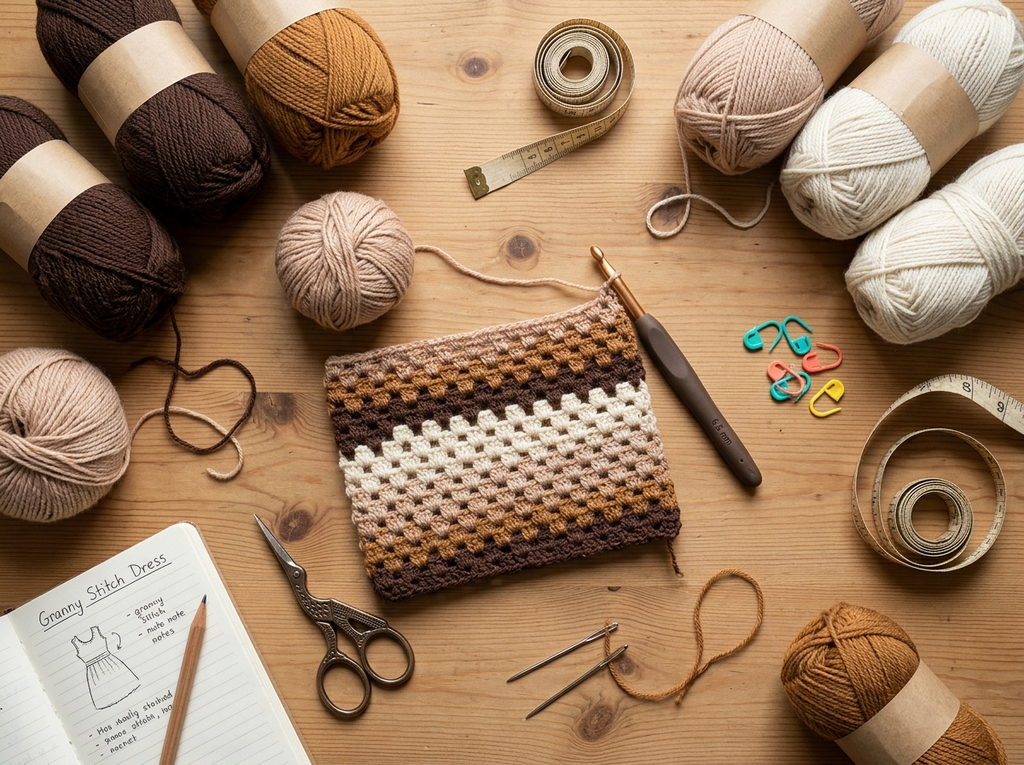
Before purchasing all your yarn, make a small gauge swatch. This helps you determine whether your stitches match the required measurements.
Remember that the amount of yarn depends on your selected size, sleeve length, and skirt length. Buy according to the size-specific yarn requirements rather than estimating from the finished appearance.
Choosing Beautiful Skin-Tone and Brown Colors
Color selection can make a simple granny stitch pattern look especially elegant.
For this project, I would choose a warm neutral palette inspired by natural earthy shades.
Here are some combinations to consider:
- Nude beige and chocolate brown: A sophisticated combination with a cozy bohemian feel.
- Cream and caramel: Soft, warm, and suitable for everyday outfits.
- Taupe and coffee brown: A subtle combination that highlights the stitch texture.
- Ivory and dusty rose: A softer and more feminine color palette.
- Mocha and warm sand: Beautiful for a minimalist handmade dress.
My favorite combination is chocolate brown, nude beige, and creamy ivory. The alternating shades make the granny clusters stand out while keeping the overall design balanced.
One useful tip is to place your yarn balls next to one another before beginning. This helps you see whether the colors complement each other in natural lighting.
Understanding the Granny Stitch
The granny stitch is a classic crochet technique made using groups of three double crochet stitches worked into the same space.
These groups are commonly called granny clusters.
To make a basic granny cluster:
- Yarn over your crochet hook.
- Insert the hook into the required chain space.
- Pull up a loop.
- Complete one double crochet.
- Repeat the process twice more in the same space.
- Follow the pattern’s chain-space instructions before working the next cluster.
The result is a small group of stitches with an open space between the clusters.
This creates the recognizable granny stitch texture that makes the dress so attractive.
Common crochet abbreviations
| Abbreviation | Meaning |
|---|---|
| ch | Chain |
| dc | Double crochet |
| sc | Single crochet |
| sl st | Slip stitch |
| RS | Right side |
| WS | Wrong side |
| rep | Repeat |
| PM | Place marker |
The pattern uses US crochet terminology. If you normally follow UK crochet patterns, remember that US double crochet is called treble crochet in UK terminology.
Step-by-Step Crochet Granny Stitch Dress Construction
The following steps explain the construction process and help you understand how the separate crochet pieces become a complete dress. Use the corresponding stitch counts, measurements, and size instructions from your chosen pattern.
Step 1: Crochet the First Hexagon
Begin by creating the first granny stitch hexagon.
Start with a magic ring or the foundation method specified in your pattern. Work the initial granny clusters into the center, creating six sides with chain spaces at the corners.
As you continue adding rounds, additional clusters are worked along the sides while the corner spaces help maintain the hexagonal shape.
The hexagon will gradually become larger. In this particular style of construction, the piece may develop a wavy appearance rather than lying completely flat.
This is an important part of the garment’s shaping, so don’t stretch it or try to force it into a flat shape.
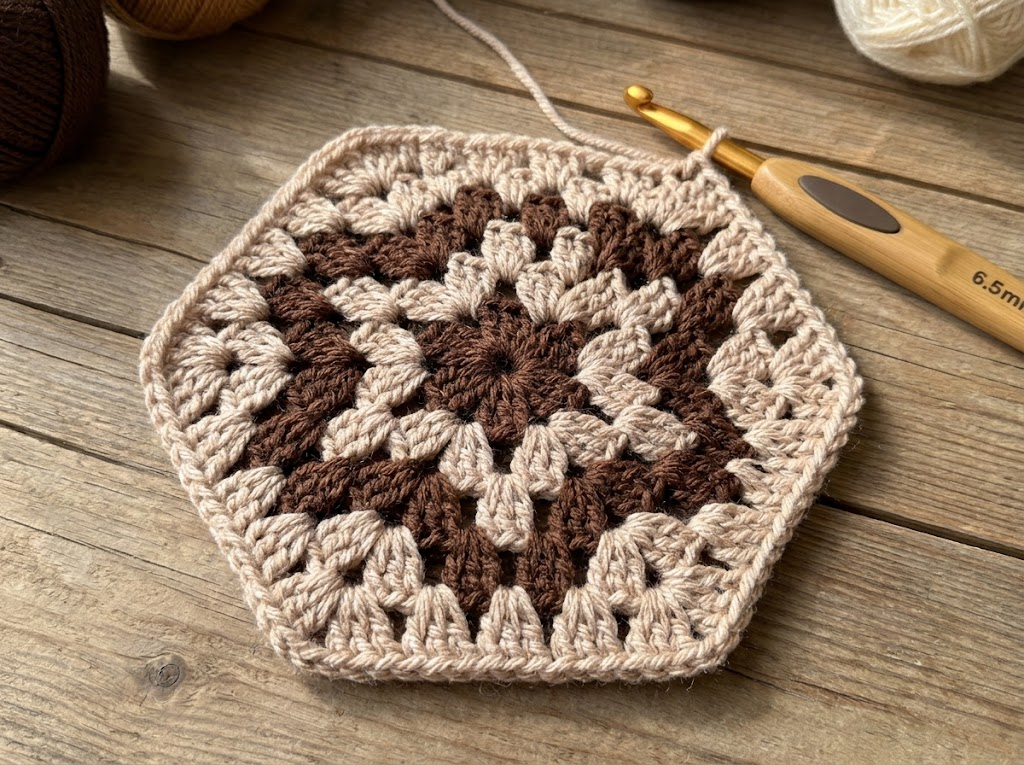
Helpful tip: Count your clusters regularly and keep your tension consistent. This makes it easier to create a matching second hexagon.
Step 2: Make the Second Hexagon
Once the first hexagon is complete, create a second matching piece.
Both hexagons should follow the same stitch pattern and corresponding size instructions.
If you are using three colors, repeat the same color arrangement on both pieces. This creates a coordinated appearance when the dress is assembled.
Before moving forward, place both hexagons on a flat surface and compare their shapes and measurements.
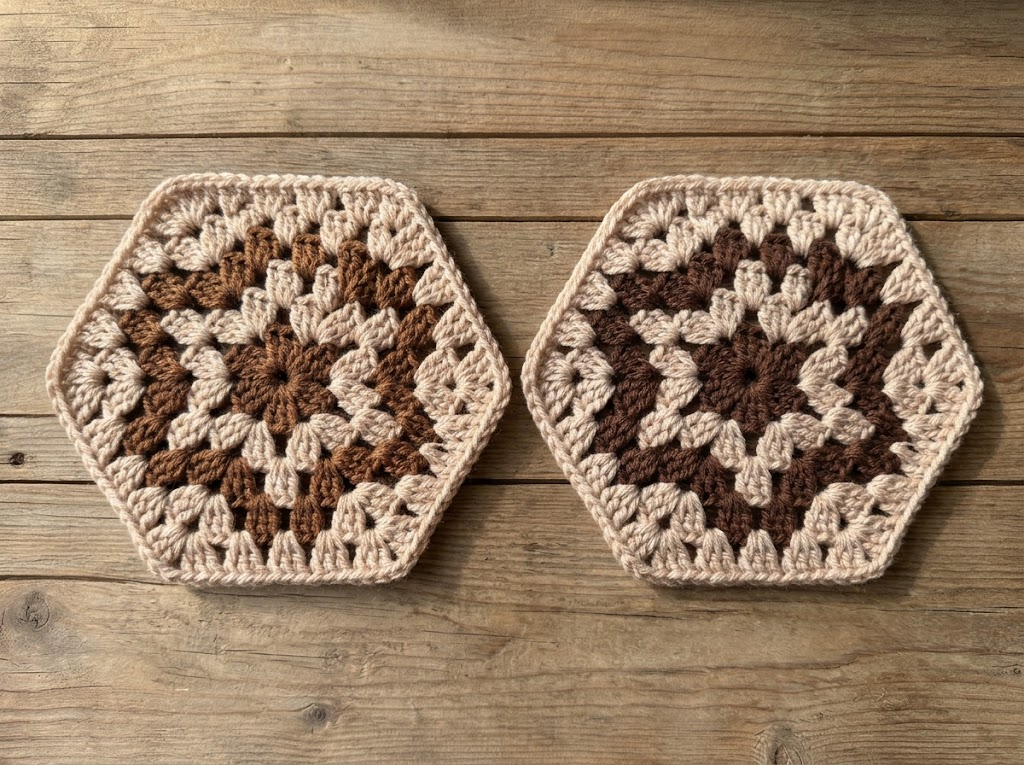
Small differences in tension can affect the final fit, so it’s worth checking them now rather than after joining.
Step 3: Add the Front and Back Extensions
The next stage involves adding additional crochet rows along selected sides of the hexagons.
These extensions help form the front and back sections of the bodice.
Continue working granny clusters along the required chain spaces, following the placement and measurement instructions.
Pay attention to the neckline positioning. The front opening determines how the finished dress sits around your upper body.
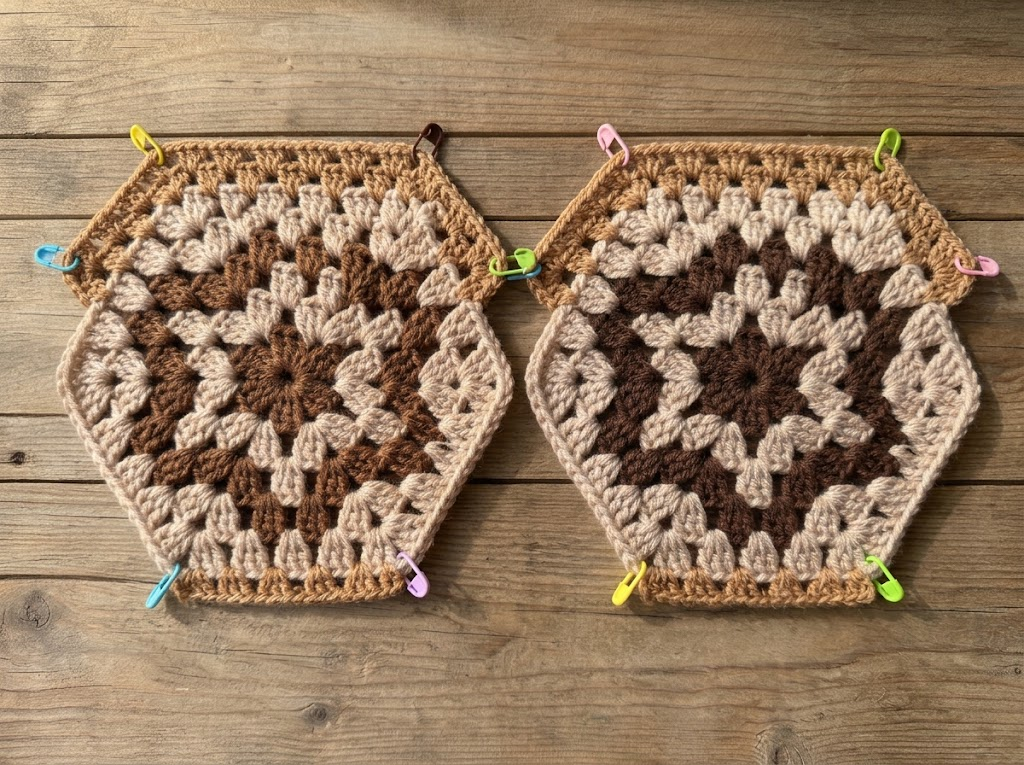
Use stitch markers to identify the correct sections before beginning.
My suggestion: Take a moment to label the front, back, and sleeve sections. This simple habit can prevent confusion when you start folding the pieces.
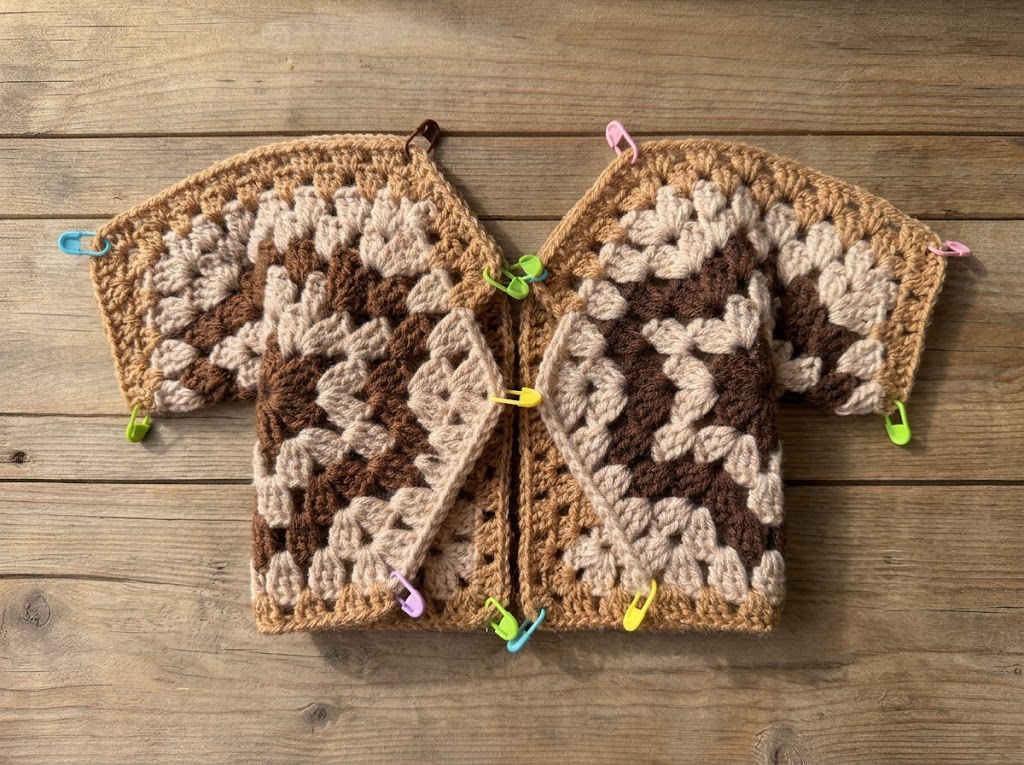
Step 4: Fold the Hexagons to Shape the Bodice
This is one of the most interesting stages of the project.
The two hexagons are folded so that their edges create the upper body and sleeve sections.
Place both pieces on a flat surface and arrange them according to the construction instructions.
You should be able to identify the front, back, shoulder, and sleeve areas.
Use locking stitch markers to temporarily hold matching edges together.
Before joining anything permanently, check that both pieces are positioned correctly. This is also a good opportunity to check the approximate width of the bodice.
Step 5: Join the Bodice and Sleeve Seams
Once the hexagons are correctly positioned, begin joining the required edges.
A tapestry needle is useful for this stage. Mattress stitch is a popular joining technique because it can create a neat seam when worked carefully.
I recommend using yarn that matches the surrounding fabric. This helps the joining stitches blend into the granny stitch texture.
Don’t rush this process.
Join small sections at a time, checking that the edges remain aligned. If you are unsure about the placement, temporarily pin the sections before sewing.
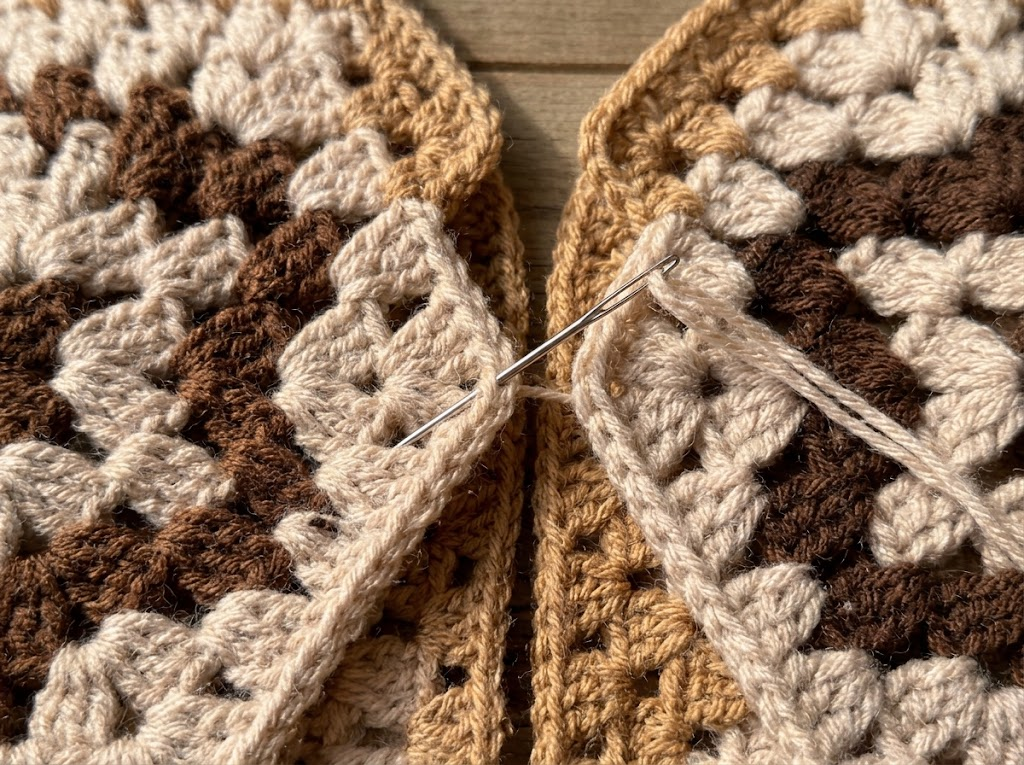
The goal is to create a comfortable upper body without pulling the fabric too tightly.
Step 6: Extend the Granny Stitch Skirt
After the upper section has been assembled, you can begin working on the skirt.
The granny stitch pattern continues along the lower edge of the bodice in repeating rounds.
This creates the flowing lower portion of the dress.
One of the best things about this stage is the opportunity to customize the length.
For a shorter summer dress, you can work fewer rounds. For a longer dress, continue repeating the established stitch pattern while checking the finished length.
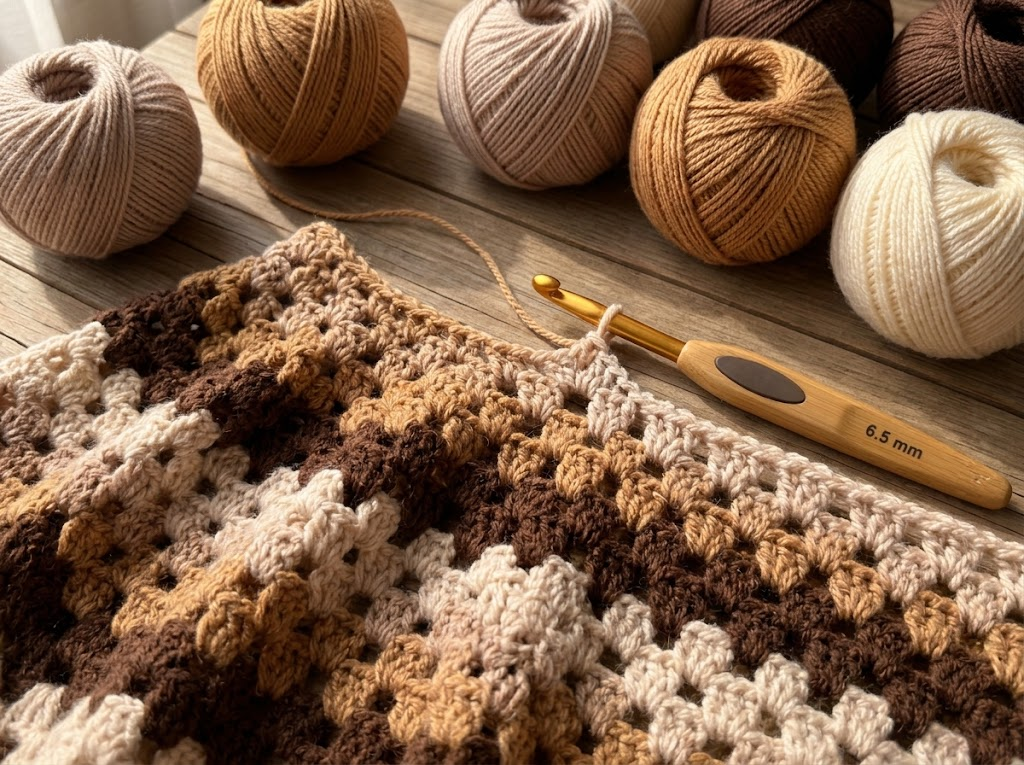
I recommend measuring from the waist or upper body section to your preferred hemline.
Also remember that a longer skirt requires additional yarn, so make sure you have enough before continuing.
Step 7: Crochet the Sleeves
The sleeves are worked around the openings created when the hexagons are folded and joined.
Continue the granny stitch pattern around each sleeve opening according to the pattern instructions.
You can adjust the sleeve length depending on your preferred style.
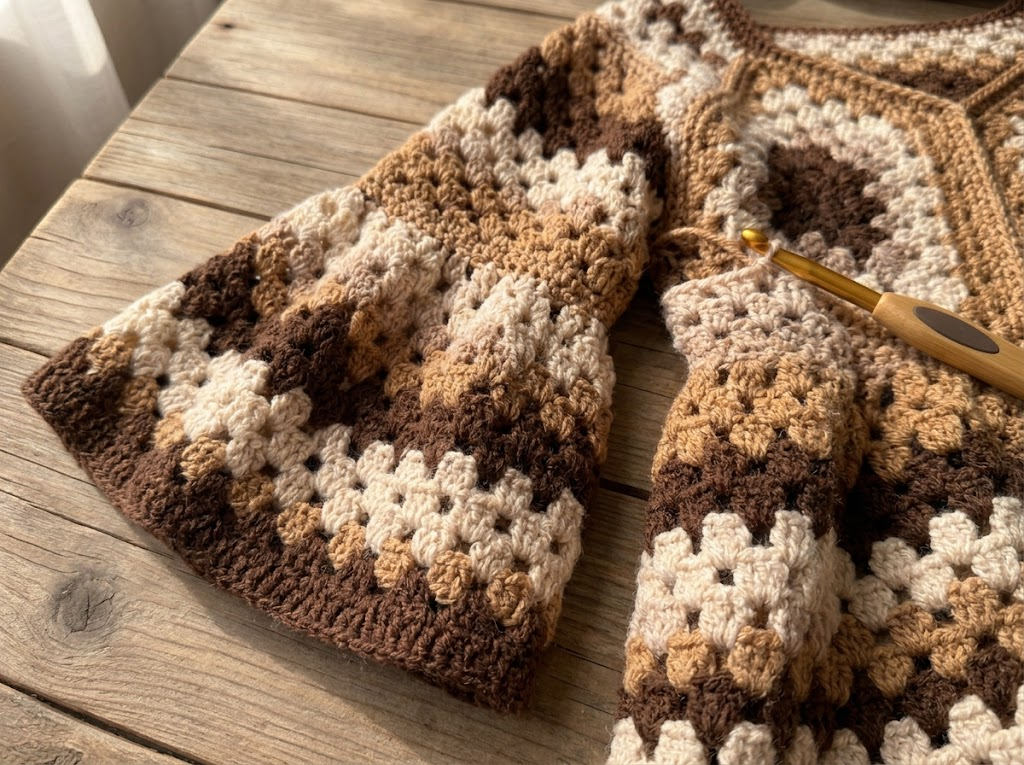
Shorter sleeves create a relaxed summer look, while longer sleeves offer a more dramatic bohemian appearance.
For a balanced finish, keep both sleeves approximately the same length.
Step 8: Finish the Neckline and Sleeve Edges
Once the main body is complete, concentrate on the finishing details.
The neckline and sleeve openings can be finished with single crochet and slip stitches, following the pattern’s edging instructions.
Work evenly around each edge.
Avoid pulling your stitches too tightly because this can cause the neckline or sleeves to become uncomfortable.
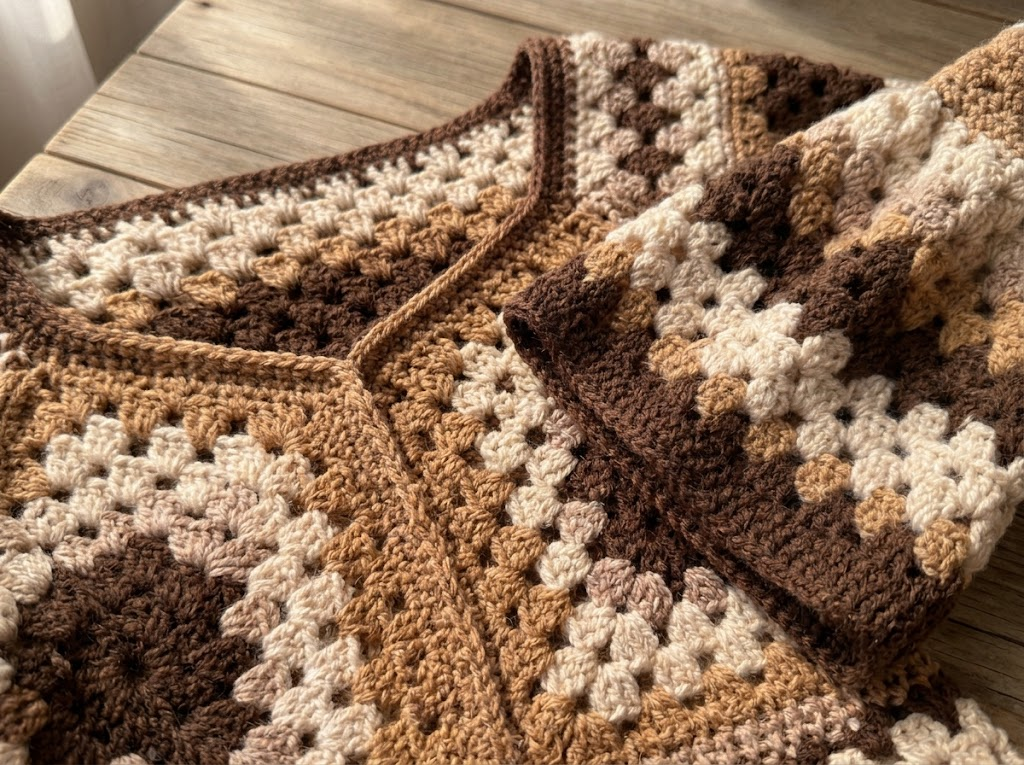
A neat border gives the finished garment a more polished appearance and helps the edges maintain their shape.
Step 9: Weave in Ends and Block the Dress
The final step is finishing your crochet dress.
Use a tapestry needle to weave in all remaining yarn ends securely.
Check the seams, neckline, sleeves, and skirt for loose strands or uneven sections.
Blocking can help the garment settle into its intended shape. However, always check the yarn care instructions before using steam or moisture.
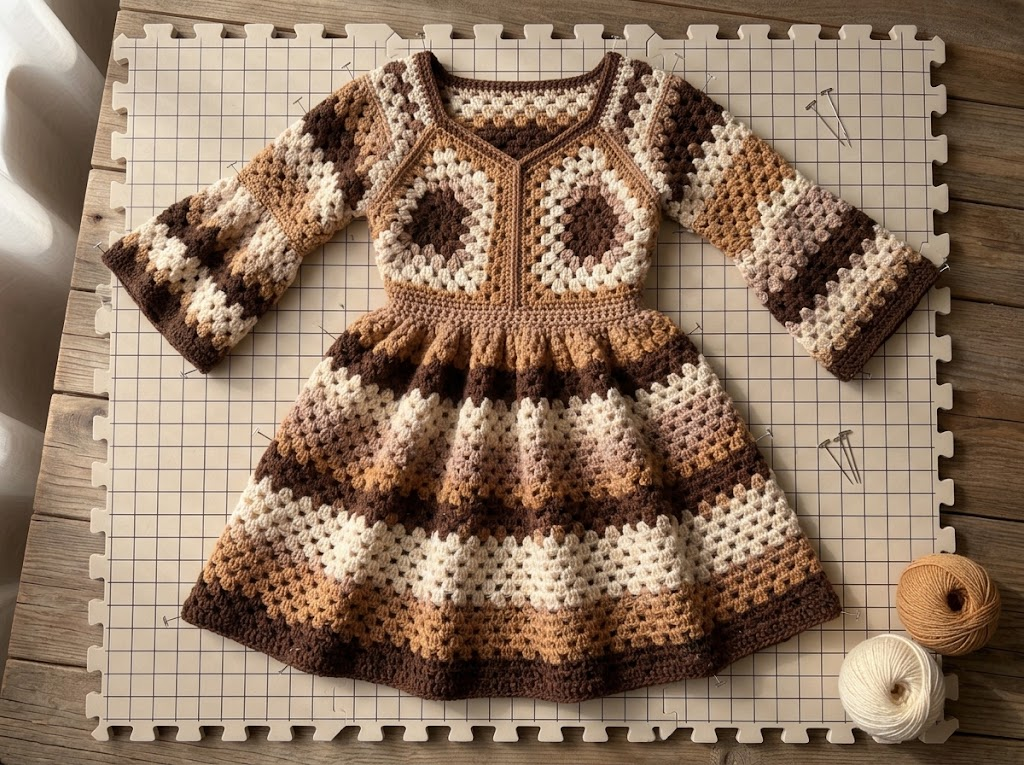
For acrylic yarn, test any steam-blocking method on a small swatch first. Never press a hot iron directly onto the crochet fabric.
Allow the garment to dry completely before wearing or storing it.
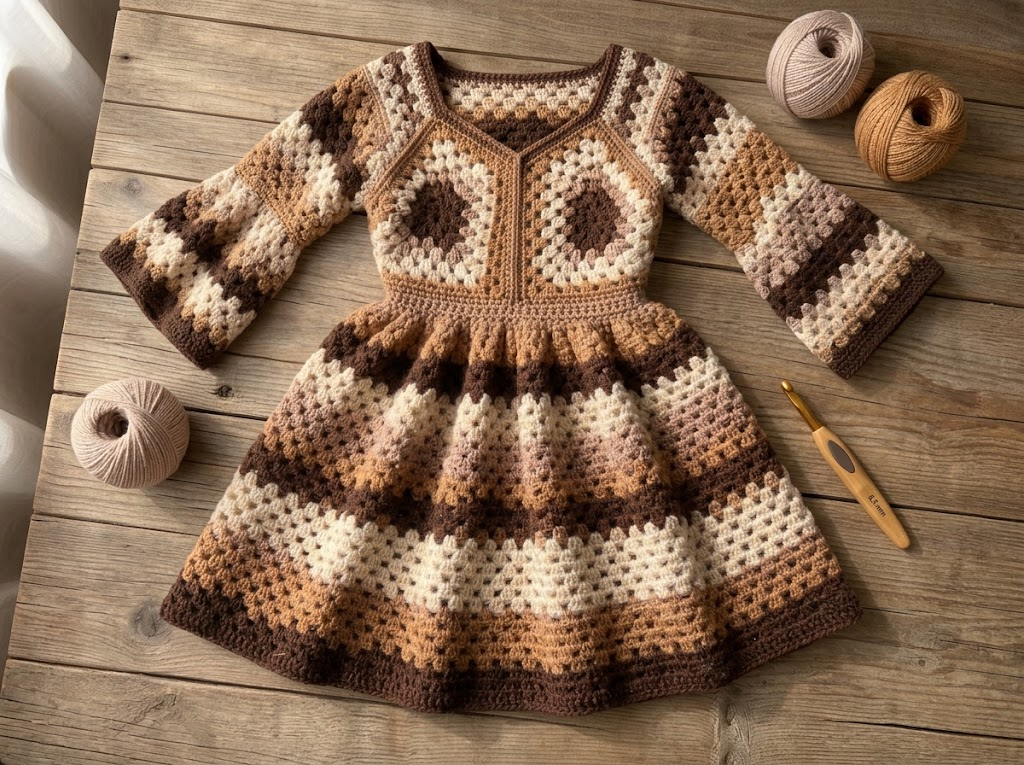
Two Helpful Amazon Products for This Crochet Project
You don’t need dozens of tools to make a beautiful crochet dress. I would focus on two practical supplies that make the process easier.
1. Ergonomic 6.5 mm Crochet Hook
A comfortable crochet hook is important when working on a larger project with repeated stitches. An ergonomic handle can provide a more comfortable grip during longer crochet sessions.
I recommend looking for a hook with a smooth tip, comfortable handle, and a clearly marked 6.5 mm size. This is the hook size specified for the pattern, although you should adjust it if necessary to achieve the correct gauge.
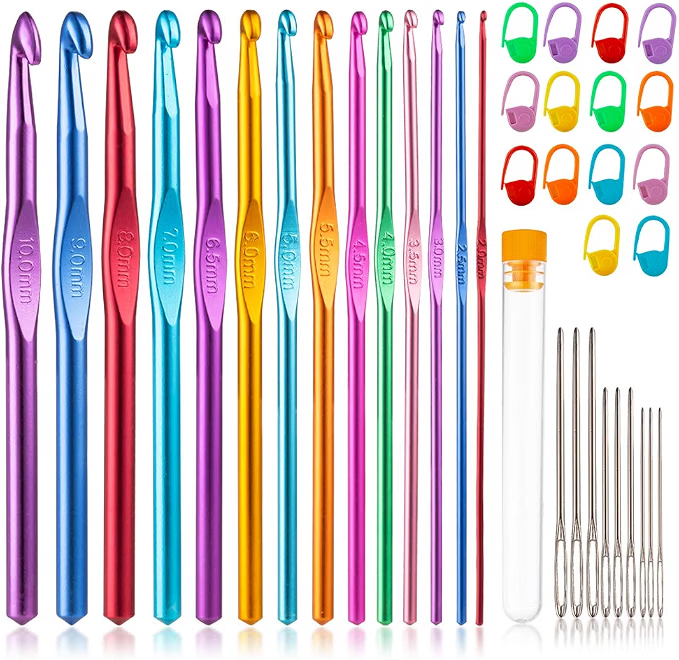
2. Locking Crochet Stitch Markers
Stitch markers are especially useful when making two hexagons and assembling the dress.
You can use them to identify the front and back sections, mark important chain spaces, and temporarily hold the seams together before joining.
I prefer colorful locking markers because different colors make it easier to identify different sections of a project.

Important Tips for Getting the Perfect Fit
Crochet clothing requires a little more attention to measurements than smaller accessories.
Here are some tips I recommend following before completing your dress.
Check your crochet gauge
Gauge is one of the most important parts of garment-making. For this design, the specified gauge is four granny clusters and four spaces across four inches, with eight rounds or rows measuring four inches in the granny pattern.
Make a swatch before starting and adjust your hook if necessary.
Choose the correct size
The pattern provides eight size options, ranging from XS/S to 4X/5X.
Measure your bust before selecting a size. The intended dress has approximately 2–5 inches of positive ease, so consider how relaxed you want the finished garment to feel.
Try on the bodice before sewing
One advantage of this hexagon construction is that you can temporarily pin the pieces together and check the fit before permanently joining them.
This is especially useful because the bust and hip circumference of this shift-style dress are closely related.
Plan the skirt length
Think about your preferred dress length before beginning the skirt extension. A mini dress requires fewer rounds, while a longer version requires additional yarn.
Keep both sides symmetrical
Use the same color sequence and stitch tension for both hexagons. This creates a balanced finished appearance.
Weave in yarn ends as you work
Instead of leaving every loose end until the final day, finish them after completing the main sections. This makes the final finishing process much easier.
Common Mistakes to Avoid
Even a relatively simple granny stitch pattern can become frustrating if you overlook a few details.
Here are some mistakes worth avoiding:
- Skipping the gauge test: Your dress may turn out too large or too small.
- Using inconsistent tension: Different tension between hexagons can affect the final shape.
- Forgetting stitch markers: You may lose track of the correct sides during construction.
- Joining pieces incorrectly: Always check the arrangement before sewing the seams.
- Ignoring measurements: Check the bust and hip circumference before completing the bodice.
- Using too little yarn: Longer sleeves and skirts require additional yarn.
- Pulling edging stitches too tightly: This can make the neckline and sleeve openings uncomfortable.
- Skipping finishing: Loose ends and uneven seams can make an otherwise beautiful dress look unfinished.
My biggest advice is to take your time with the assembly. A few extra minutes checking the placement can save you from having to undo several rows later.
Frequently Asked Questions
Is this crochet granny stitch dress suitable for beginners?
It is suitable for advanced beginners who already understand basic crochet stitches. You should be comfortable with chains, double crochet, slip stitches, and working in rounds. The folding and assembly process may require some extra attention.
How many hexagons do I need?
The construction uses two large crochet hexagons. These are folded and joined to form the upper body and sleeves.
Can I make the dress in one color?
Absolutely! A single-color dress creates a simple, elegant appearance. It is also a convenient choice if you want to avoid frequent color changes and weaving in extra ends.
Can I change the dress length?
Yes. The skirt is extended using repeating granny stitch rounds. You can make it shorter or longer according to your preferred style and available yarn.
Can I make the sleeves longer?
Yes. The sleeve length can be customized by continuing the granny stitch pattern around the sleeve openings.
What yarn weight should I use?
Medium-weight Category 4 yarn is specified for this design. Choose a soft yarn with suitable drape and make a gauge swatch before beginning.
What crochet hook size is needed?
A 6.5 mm crochet hook is specified. However, your personal tension may require a different hook size to achieve the correct gauge.
How do I make the neckline higher or lower?
The neckline can be adjusted through the placement of the stitch markers used for the front extensions. Follow the appropriate neckline adjustment instructions and make matching adjustments on both sides.
Does the dress need blocking?
Blocking is optional but can help even out the fabric and improve the finished appearance. Always follow the care instructions for your chosen yarn.
Final Thoughts
A crochet granny stitch dress is a wonderful project for anyone who enjoys making handmade clothing with beautiful texture and a relaxed, bohemian style.
What I find particularly appealing about this construction is how two simple hexagons can be transformed into a complete garment. The repeating granny stitch pattern keeps the design visually interesting, while the adjustable skirt and sleeves offer plenty of room for customization.
You can experiment with chocolate brown, nude beige, cream, caramel, and other earthy shades to create a dress that feels timeless and elegant.
Take your time with the gauge, check the fit before joining the pieces, and enjoy watching your crochet work come together.
Whether you’re making this dress for your own wardrobe or as a special handmade gift, it is a lovely way to turn basic crochet techniques into something beautiful and wearable.