Crochet Strawberry Purse Pattern: A Cute and Sweet Handmade Bag
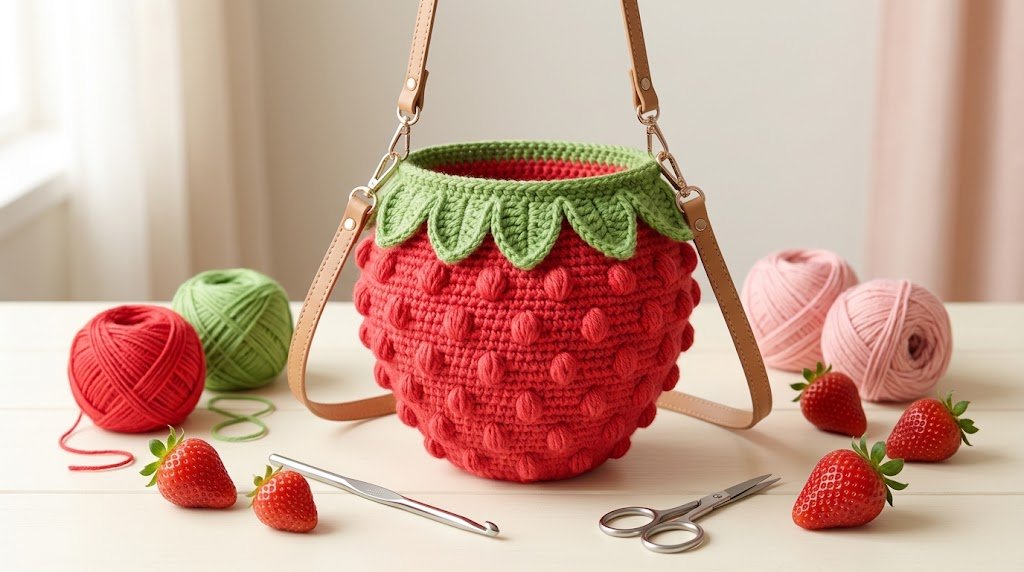
A crochet strawberry purse is one of those handmade accessories that instantly makes you smile. With its bright red strawberry shape, textured puff stitches, and little green leaves, this adorable bag brings a playful touch to any outfit. It is a lovely project for anyone who enjoys making unique crochet accessories, especially if you love fruit-inspired designs.
What makes this purse special is its realistic strawberry texture. Instead of using ordinary flat stitches, the design features raised puff stitches that create the little dimples you see on a real strawberry. The green crochet leaves around the top complete the look and make the bag instantly recognizable.
Whether you’re making a strawberry purse for yourself, creating a handmade gift, or adding another fun accessory to your crochet collection, this project is worth trying.
Why You’ll Love This Crochet Strawberry Purse
There are so many reasons to love a handmade strawberry purse. Its cheerful appearance makes it different from ordinary crochet bags, while the construction gives you an opportunity to practice several useful techniques.
Here are some things that make this project special:
- Adorable strawberry design: The bright red body and green leaves create a recognizable fruit-inspired appearance.
- Beautiful puff stitch texture: Raised stitches give the bag a realistic strawberry surface.
- Two size options: You can make a smaller bag or a larger version depending on how much you want to carry.
- Customizable strap: Choose a handmade crochet strap or use a ready-made purse strap.
Another thing I appreciate about this design is that it combines simple single crochet stitches with more decorative techniques. This makes the project interesting without requiring an enormous collection of crochet skills.
Materials Needed for a Crochet Strawberry Purse
Before starting, prepare your materials so you can work comfortably without constantly searching for supplies.
| Material | Purpose |
|---|---|
| Red medium-weight cotton yarn | Strawberry body |
| Green medium-weight cotton yarn | Strawberry leaves |
| 6.5 mm crochet hook | Main strawberry body |
| 4 mm crochet hook | Smaller details and leaves |
| Tapestry needle | Joining and weaving ends |
| Locking stitch markers | Holding purse panels together |
| Scissors | Cutting yarn |
| Optional leather strap | Alternative bag handle |
| Optional magnetic closure | Securing the purse opening |
Choosing the right yarn
For this style of bag, cotton yarn is a particularly useful choice because it provides good stitch definition and creates a sturdy fabric.
A medium-weight Category 4 cotton yarn is suitable for the original construction. A smooth yarn makes the puff stitches easier to identify and helps the strawberry texture stand out.
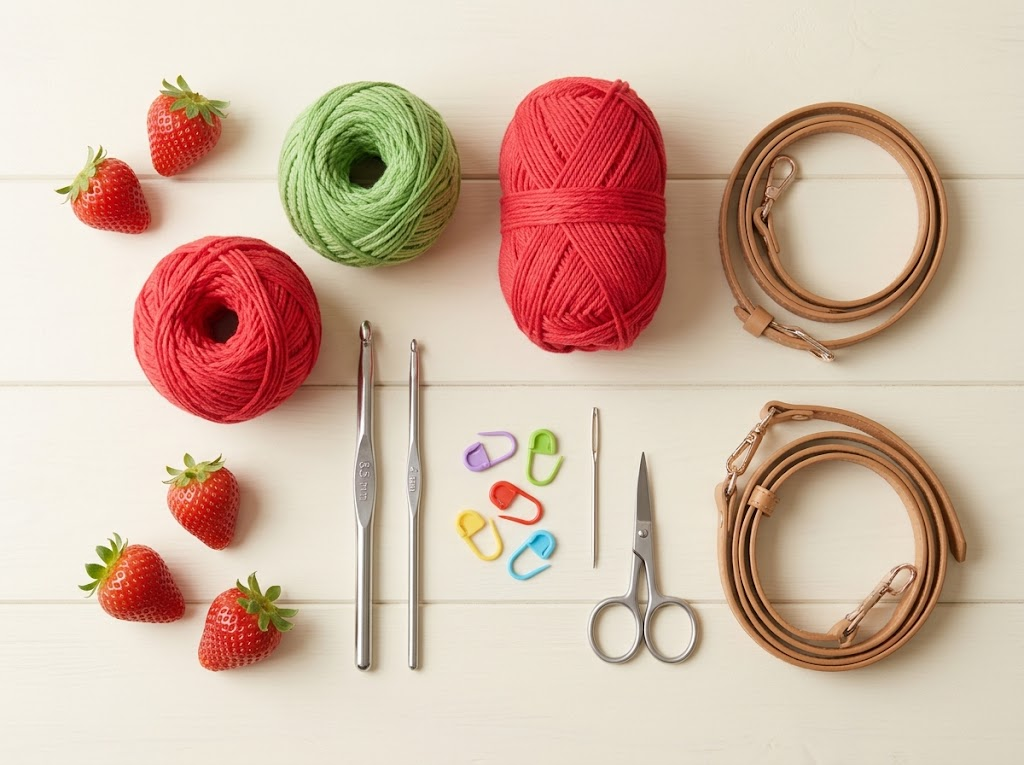
The smaller purse uses approximately 200 grams of red yarn and 20 grams of green yarn, while the larger version requires approximately 350 grams of red yarn and 35 grams of green yarn.
Exact requirements can vary with yarn substitutions and personal tension.
Choosing the Perfect Strawberry Colors
Color selection is one of my favorite parts of fruit-inspired crochet projects.
For a traditional strawberry purse, bright red and fresh green create the classic appearance. However, you can also experiment with softer shades if you want something more unique.
Here are some combinations worth considering:
- Classic strawberry: Bright red, fresh leaf green, and a tiny amount of cream for decorative accents.
- Soft strawberry: Dusty pink, sage green, and ivory.
- Berry-inspired: Deep raspberry, dark green, and pale blush.
- Pastel strawberry: Light pink, mint green, and creamy white.
- Summer strawberry: Coral red, grass green, and warm cream.
My favorite choice is a rich strawberry red paired with fresh grass green. The contrast makes the puff stitches and leafy top stand out beautifully.7
Understanding the Puff Stitch
The puff stitch is the most important decorative feature of this purse.
It creates a raised, rounded texture that resembles the little dimples on a strawberry.
Unlike a regular single crochet, a puff stitch uses several yarn-over and pull-up-loop movements in the same stitch.
How to make a basic puff stitch:
- Yarn over your hook.
- Insert the hook into the designated stitch.
- Yarn over again and pull up a loop.
- Repeat the yarn-over and pull-up process as instructed by the pattern.
- Once the required loops are on your hook, yarn over and pull through all the loops.
- Finish with the closing chain specified by the pattern.
The result is a soft, raised cluster.
One important tip is to keep the loops reasonably even. If you pull them too tightly, the puff stitch can become difficult to complete. If you make them too loose, the strawberry body may look uneven.
Common crochet abbreviations
| Abbreviation | Meaning |
|---|---|
| ch | Chain |
| sc | Single crochet |
| sl st | Slip stitch |
| sc2tog | Single crochet two stitches together |
| inc | Increase |
| dec | Decrease |
| st | Stitch |
| rep | Repeat |
| RS | Right side |
| WS | Wrong side |
| yo | Yarn over |
The pattern uses US crochet terminology, so remember that single crochet in US terms is called double crochet in UK terminology.
Step-by-Step Crochet Strawberry Purse Construction
The purse is made by creating two matching strawberry-shaped panels, joining them together, adding green leaves, and finishing the top with a strap.
The following steps explain the construction process. For exact row counts and stitch placement, use the complete size-specific pattern instructions.
Step 1: Start the First Strawberry Panel
Begin with your red yarn and larger crochet hook.
The strawberry body is worked flat in rows, starting with a short foundation chain. The first row is made using single crochet stitches.
In the following rows, alternate single crochet stitches with puff stitches to create the strawberry’s characteristic texture.
As you work, the number of puff stitches gradually increases through the shaping rows. This helps the panel become wider toward its middle.
I recommend taking your time with the first few rows because they establish the stitch pattern for the rest of the purse.
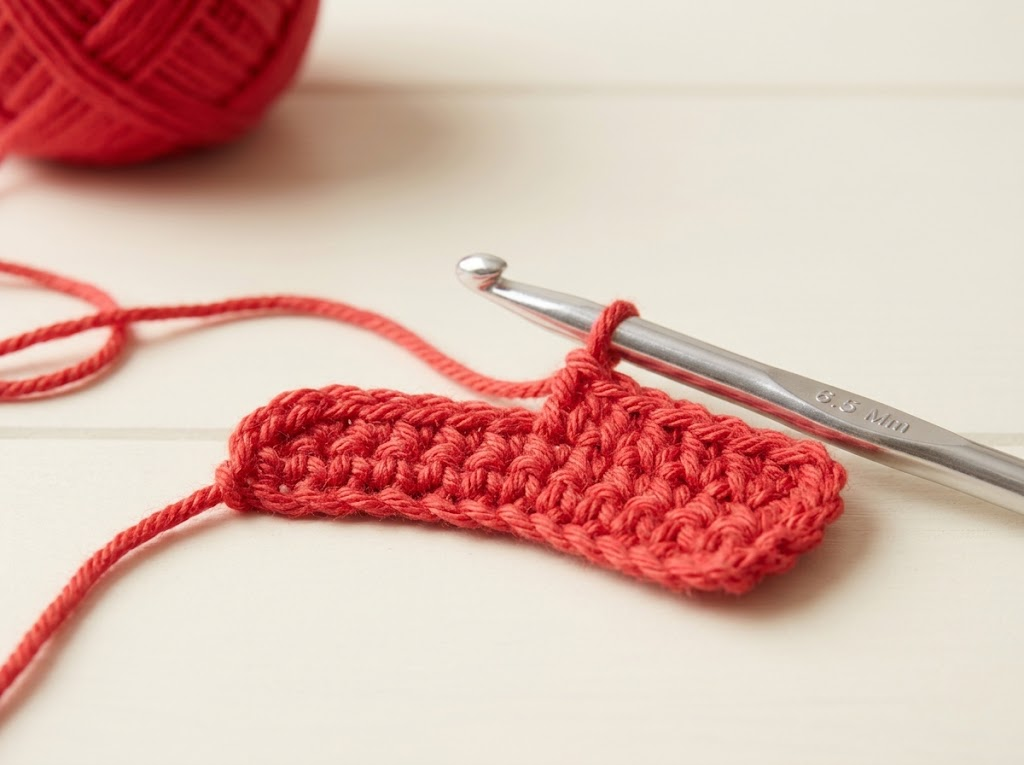
Helpful tip: Keep your puff stitches consistent in height. This creates a more attractive surface and helps the finished strawberry look evenly textured.
Step 2: Continue Building the Strawberry Shape
Image prompt to generate separately: Strawberry panel in progress.
Continue alternating the single crochet and puff stitch rows according to your chosen purse size.
The smaller version has 18 rows in the main strawberry section, while the larger version has 22 rows before the top shaping begins.
As the panel grows, the puff stitches create a beautiful raised texture.
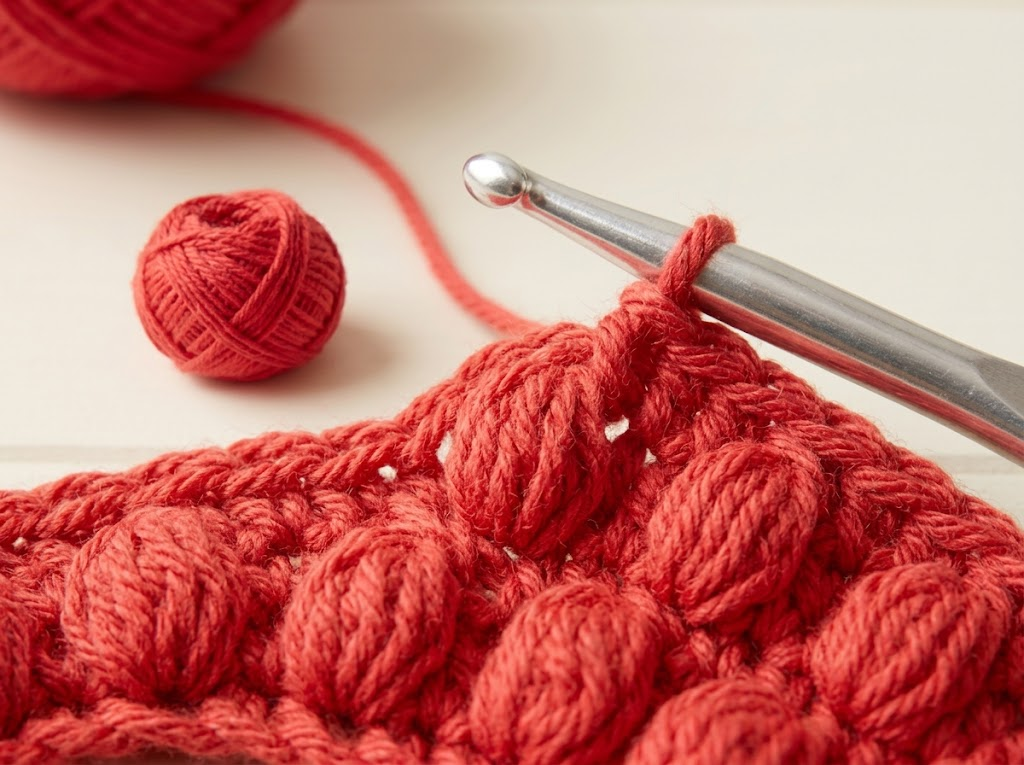
Make sure you count your stitches at the end of each row. Because puff stitches include a closing chain, it is important to follow the pattern carefully when working into the next row.
If the fabric feels too loose, check your tension and hook size. The strawberry body should be firm enough to hold small belongings without large gaps.
Step 3: Shape the Top of the Strawberry
Once the main body reaches the required length, begin shaping the upper section.
This stage uses single crochet stitches and decreases to create the narrower top of the strawberry.
The smaller and larger purse versions have different shaping instructions, so make sure you are following the correct size.
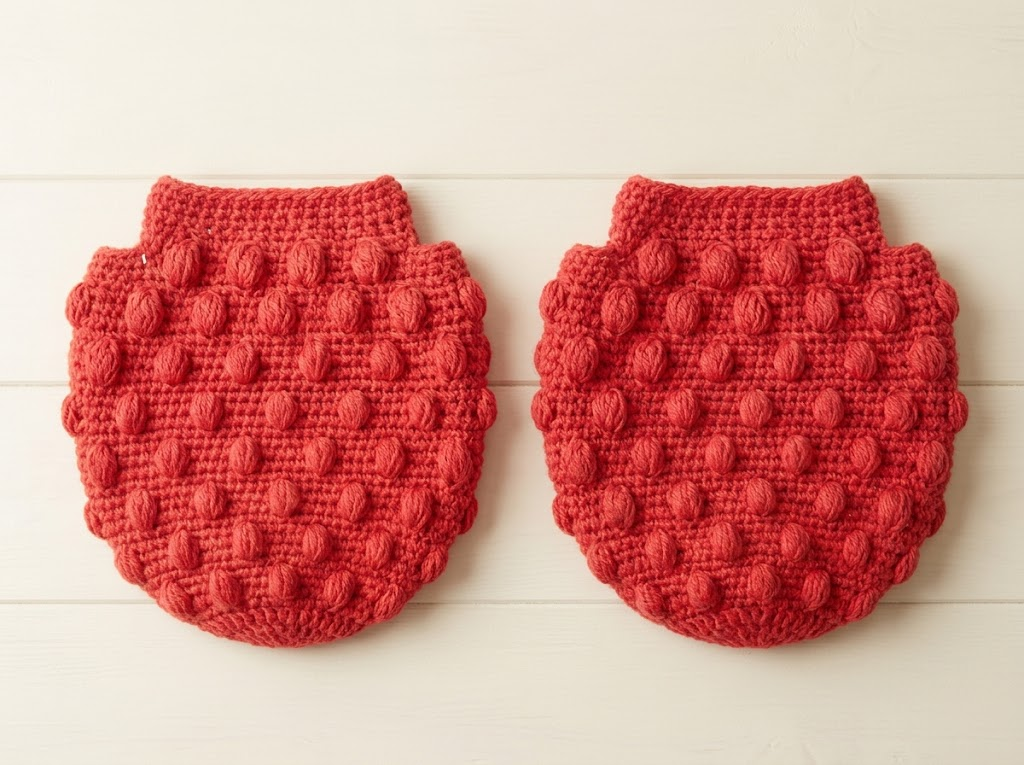
Work slowly through the decrease rows. It is important to maintain the correct stitch placement so the top looks balanced.
At the end of the shaping section, fasten off the first panel.
Repeat the process to create a second matching strawberry panel.
Step 4: Make the Second Strawberry Panel
Creating two matching panels is essential for a neat finished purse.
Use the same red yarn, hook sizes, stitch pattern, and row counts for the second panel.
When both pieces are complete, place them side by side and compare their measurements.
Check that the puff stitches line up and that the top shaping is consistent.
If you notice a difference, it is easier to correct it now than after joining the panels.
My suggestion: Use stitch markers to identify the top, bottom, and sides of both panels. This makes assembly much easier.
Step 5: Join the Front and Back Panels
Once both strawberry pieces are ready, position them with their right sides facing each other.
Use locking stitch markers to hold the corresponding puff stitch rows together.
The panels are joined around the sides and bottom using slip stitches, following the pattern’s joining instructions.
Work carefully through both panels so the seam remains even.
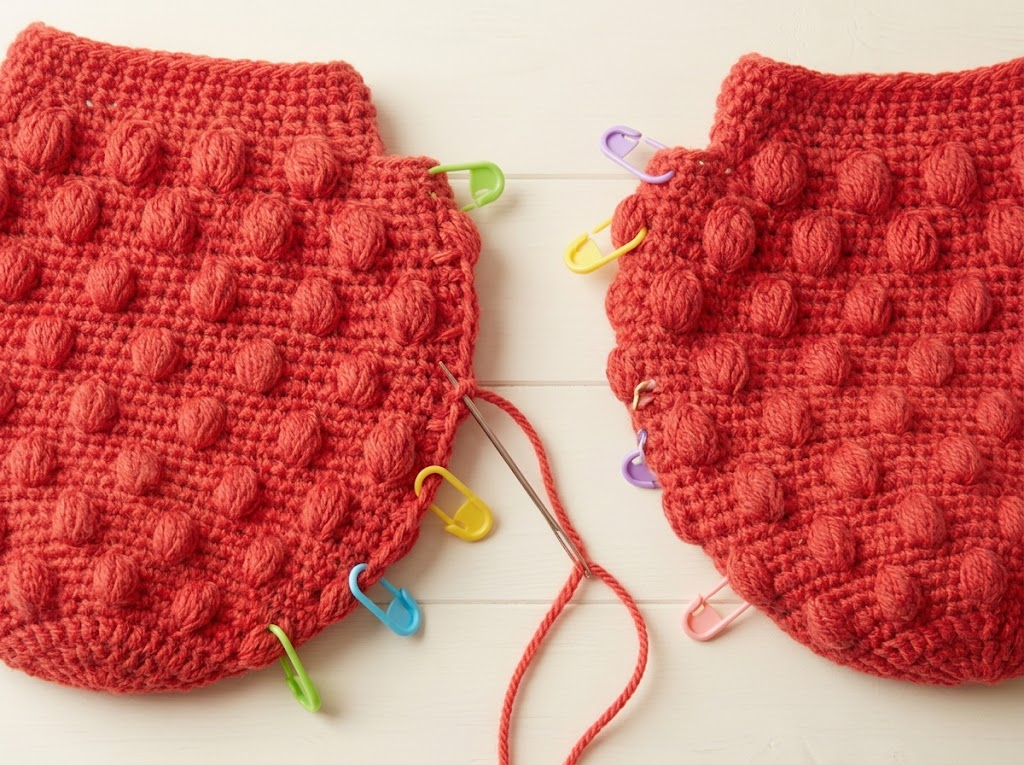
Avoid pulling the joining yarn too tightly. A tight seam can make the purse opening and body look distorted.
When you finish joining, turn the purse right side out.
You should now have a recognizable strawberry-shaped bag with a textured red body.
Step 6: Crochet the Green Strawberry Leaves
The green leaves are what make this purse look like a real strawberry.
Use your green yarn and the smaller hook for the leaf details.
The leaves are worked using Tunisian full stitch, which creates a slightly different texture from the main strawberry body.
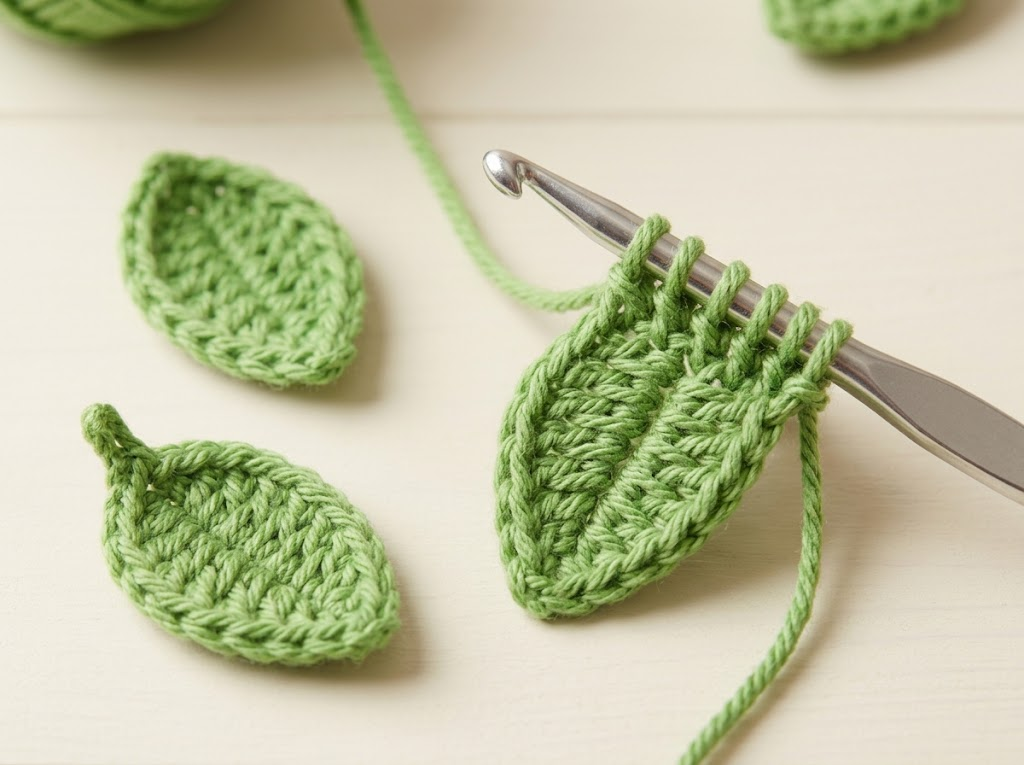
Each row has two stages:
- Forward pass: Insert the hook into the required spaces and pull up loops, leaving them on the hook.
- Return pass: Yarn over and work through the loops until only one loop remains.
As the leaf grows, decrease the number of loops to create a pointed shape.
Repeat the process until you have the number of leaves required for your selected purse size.
The smaller version uses ten leaves, while the larger version uses eight leaves.
Helpful tip: Leave a long yarn tail on every leaf. You can use these tails to attach the leaves securely to the top of the purse.
Step 7: Attach the Green Leaves Around the Top
Now comes one of the most satisfying parts of the project.
Arrange the green leaves around the opening of the strawberry purse.
The leaves should sit around the top edge, creating the appearance of a strawberry crown.
Use the smaller hook and the green yarn to work the top border.
Attach each leaf as you reach its designated position, securing it through the leaf’s center and the purse stitches.
Continue working around the opening until all leaves are attached.
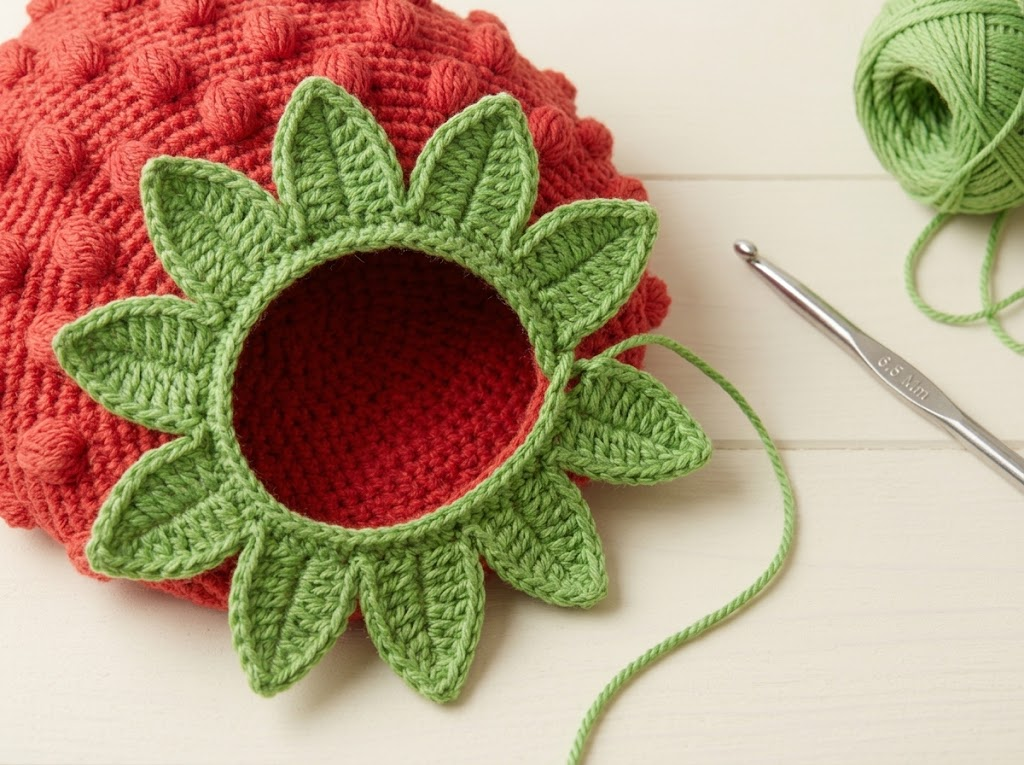
Finish with the final slip stitch round and weave in the loose ends.
Take a moment to adjust the leaves so they spread naturally rather than bunching together.
Step 8: Make the Crochet Purse Strap
A strap makes your strawberry purse more practical and comfortable to carry.
You have two options:
Option A: Crochet your own strap
The original construction uses a Romanian cord technique.
This produces a sturdy, rounded cord that can be made using two strands of yarn held together.
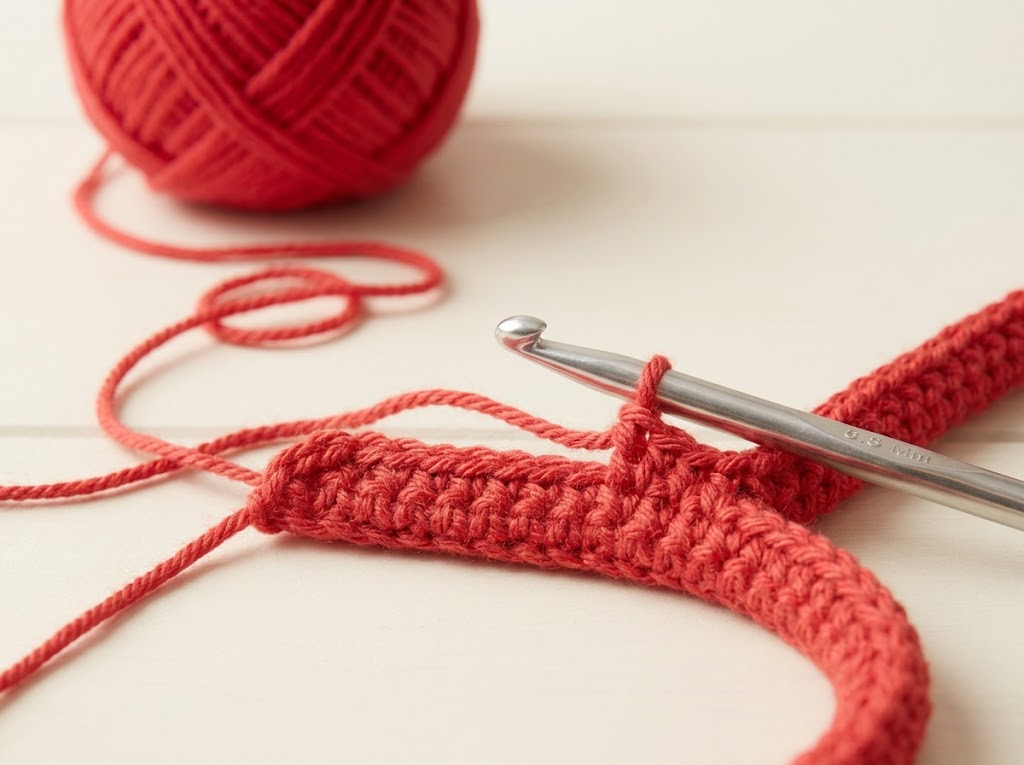
Begin with a short foundation chain and work single crochet stitches into the back loops or designated loops, rotating the cord as instructed.
Continue until you reach your desired strap length.
For this purse, the suggested cord length is approximately 50 inches, although you can adjust it to your preference.
Option B: Use a ready-made strap
If you prefer a more polished appearance, you can attach a premade leather or adjustable bag strap.
This is a useful alternative when you want to save time or give the purse a different style.
Whichever option you choose, make sure the strap is securely attached before carrying the bag.
Step 9: Add the Strap Loops
Before attaching the strap, create two small loops near the upper sides of the purse.
These loops hold the strap in position.
Use green yarn and the appropriate hook to make each loop, following the pattern’s instructions.
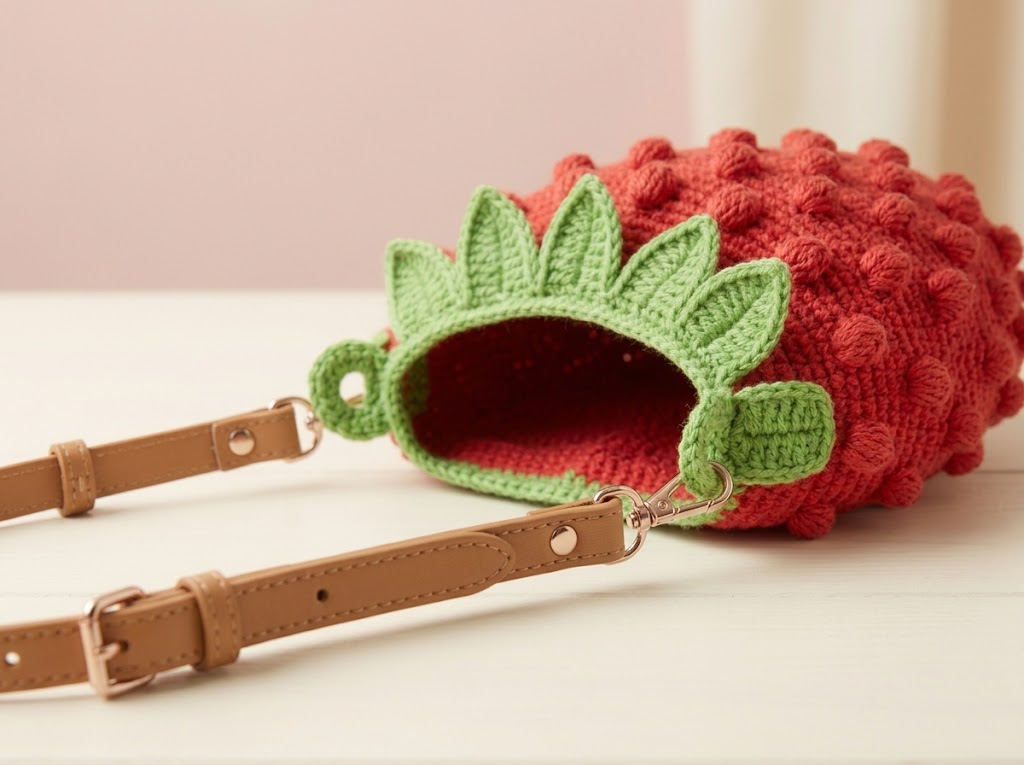
Attach one loop on each side of the purse, ensuring they are positioned evenly.
If the loops are too loose, the strap may move around while carrying the bag. If they are too tight, inserting the strap can become difficult.
Check the fit before fastening off.
Step 10: Finish and Add an Optional Magnetic Closure
The final stage is all about making the purse look neat and functional.
Weave in all remaining yarn ends using a tapestry needle.
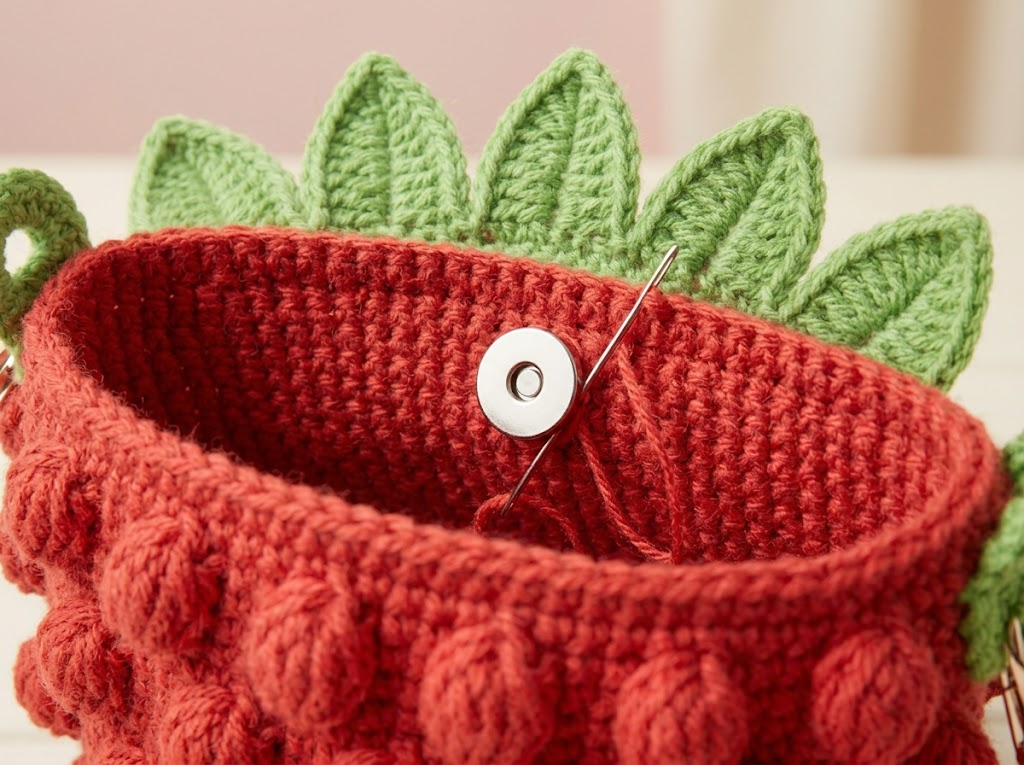
Check the green leaves and secure any loose sections with the remaining yarn tails.
If you want the purse opening to stay closed, you can add an optional magnetic closure.
Attach the closure carefully using a needle and thread. Make sure both sides are positioned correctly so they meet when the purse is closed.
Finally, gently shape the strawberry body and adjust the leaves.
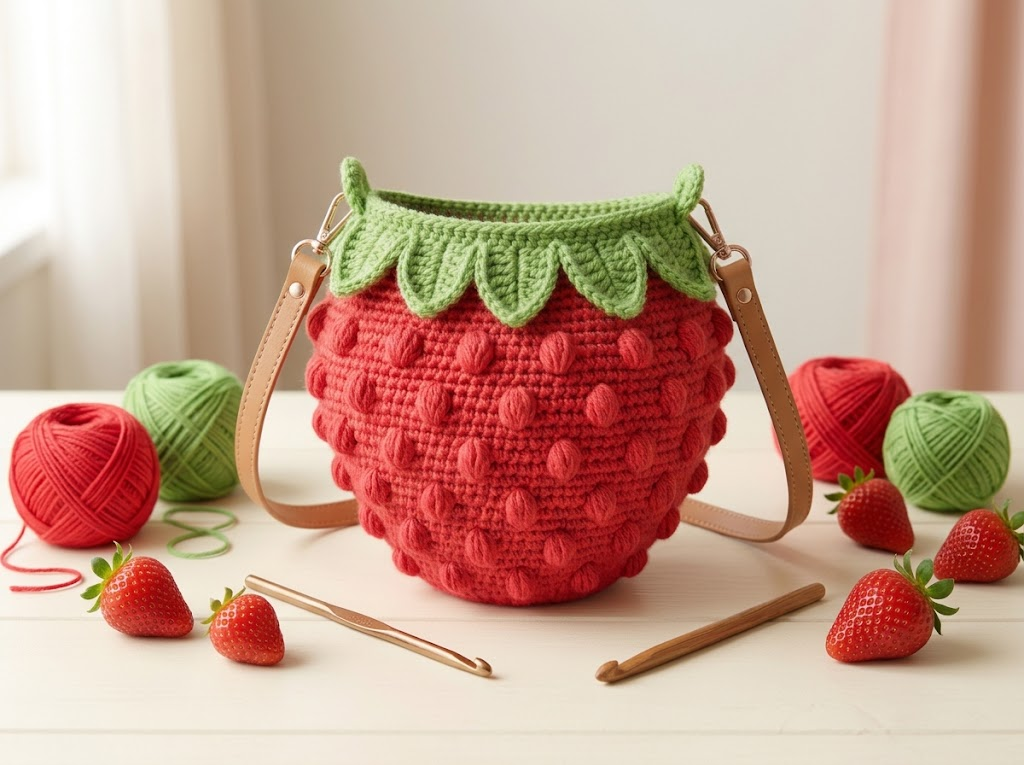
Your handmade strawberry purse is ready!
Two Helpful Amazon Products for This Project
For this project, I would choose products that improve the construction and make the finished purse more practical.
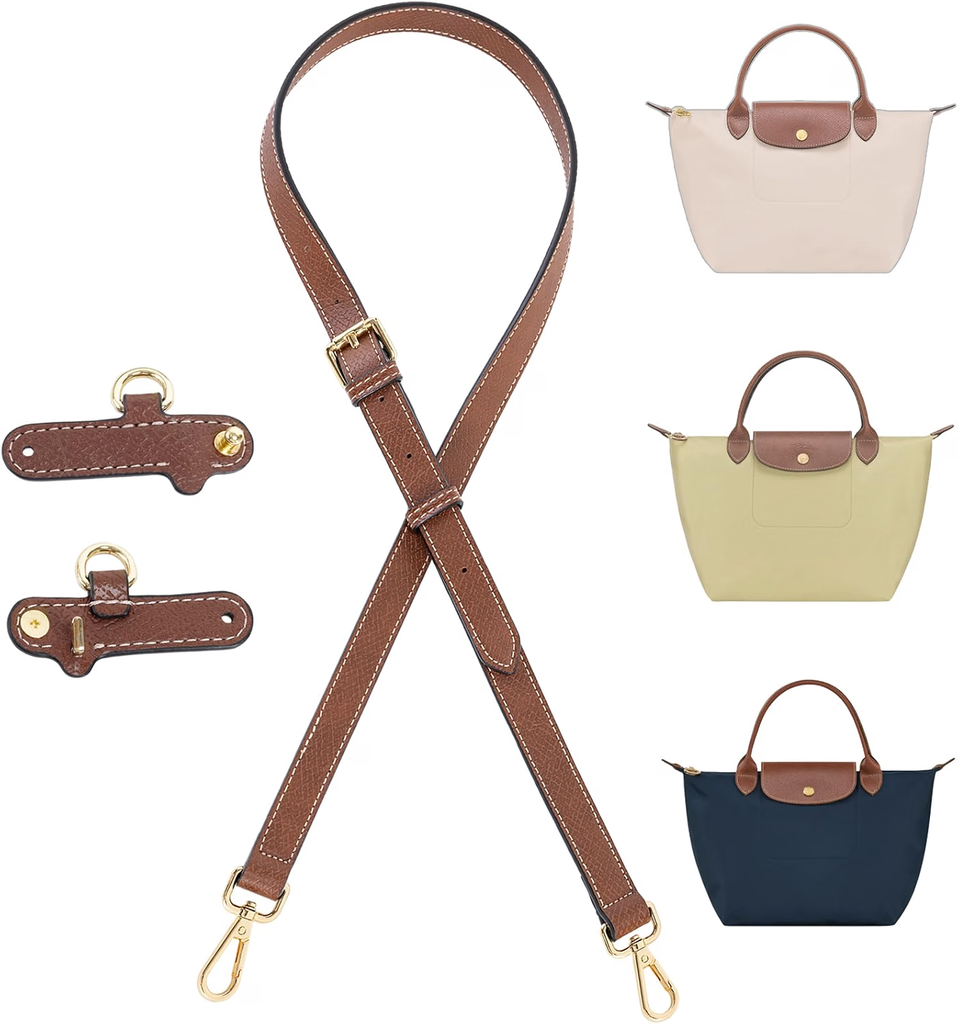
1. Adjustable Leather Purse Strap
Product recommendation · Optional alternative to a crochet strap
An adjustable leather purse strap is a useful option if you want your handmade strawberry bag to have a more finished, boutique-style appearance.
I particularly like the idea of using a neutral tan or brown strap because it creates a lovely contrast against the red strawberry body and green leaves.
When shopping, look for an adjustable strap with secure metal clips and a width suitable for your purse loops.
2. Ergonomic Crochet Hook Set
A comfortable crochet hook set is useful when working with different sections of this purse.
You need a larger hook for the strawberry body and a smaller hook for the decorative details. A set containing both 6.5 mm and 4 mm hooks can save you from purchasing separate hooks.
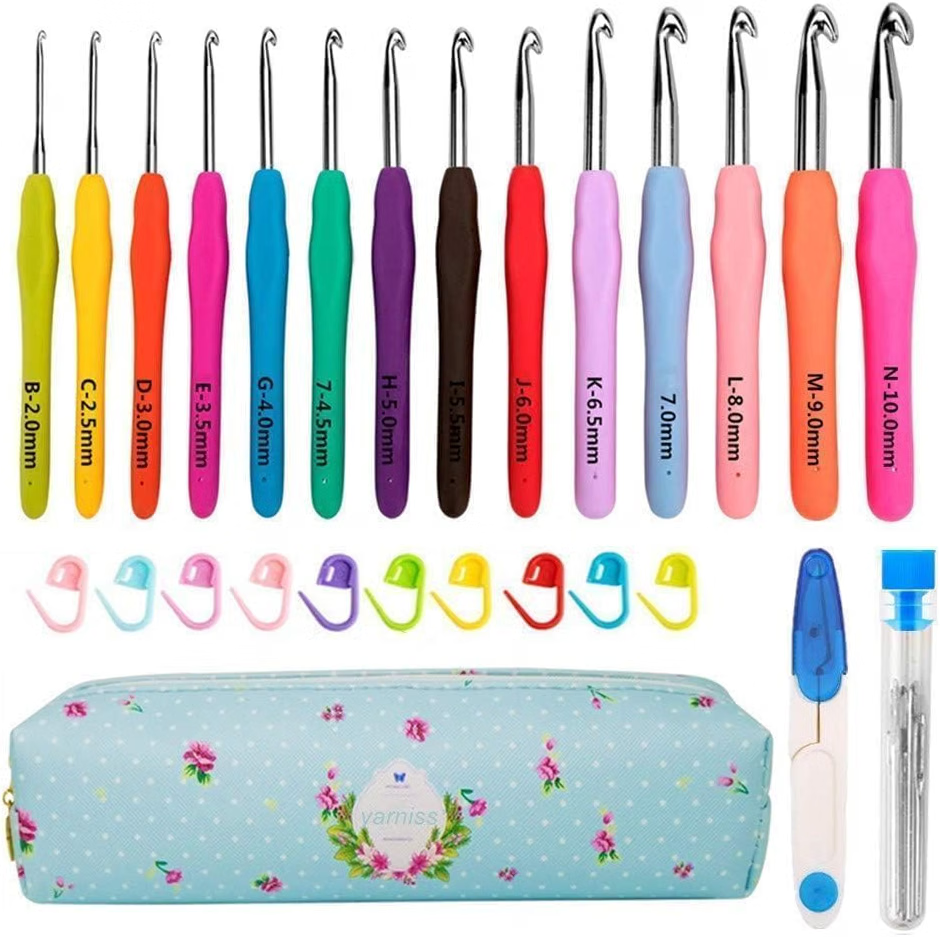
Look for smooth hook tips and comfortable handles, especially if you enjoy working on larger crochet projects.
Tips for Making a Beautiful Strawberry Purse
Here are a few things I recommend keeping in mind while working on this project.
Keep your puff stitches consistent. The puff stitches create the strawberry texture, so consistent height makes a noticeable difference.
Choose sturdy yarn. Cotton yarn is a good option because it provides clear stitch definition and helps create a structured bag.
Check the measurements. The smaller purse measures approximately 9 x 8.5 inches, while the larger version measures approximately 11.5 x 9.5 inches.
Secure the leaves properly. The green leaves are decorative, but they should also be attached firmly so they do not become loose with regular use.
Don’t overload the purse. This is a small handmade accessory rather than a heavy everyday shopping bag.
Check your strap attachments. Give the strap loops and seams a gentle pull before using the finished purse.
Keep the opening neat. A tidy top border makes the purse look more professional and helps the leaves sit beautifully.
Common Mistakes to Avoid
Even a cute little purse can become challenging if a few important details are overlooked.
- Uneven puff stitches: Inconsistent puff height can make the strawberry texture look irregular.
- Incorrect stitch counting: Missing increases or decreases can affect the panel shape.
- Different panel sizes: The front and back should match for easier assembly.
- Loose joining seams: Weak seams may separate with regular use.
- Uneven leaf placement: Arrange the leaves before attaching them permanently.
- Incorrect strap length: Check the desired carrying position before finishing the strap.
- Skipping the final inspection: Check all yarn ends, seams, and attachments before using the purse.
My advice is to pay particular attention to the puff stitches and panel joining. These two details have the biggest influence on the final appearance.
Frequently Asked Questions
Is a crochet strawberry purse suitable for beginners?
This project is best suited to intermediate crocheters. You should be comfortable with single crochet, increases, decreases, puff stitches, and basic seaming. The Tunisian-style leaves may require a little extra practice.
What size crochet hooks do I need?
The construction uses a 6.5 mm hook for the main strawberry body and a 4 mm hook for smaller sections. Always check your gauge when substituting yarn.
Can I make a smaller strawberry purse?
Yes! There are two size options. The smaller purse measures approximately 9 x 8.5 inches, while the larger purse measures approximately 11.5 x 9.5 inches.
What yarn is best for a strawberry purse?
Medium-weight cotton yarn is a good choice. It creates defined stitches and a relatively sturdy fabric.
Can I use acrylic yarn?
You can experiment with acrylic yarn, but the finished fabric may have a different amount of stretch and structure. Always make a small test section before starting the complete purse.
Can I use a leather strap instead of crocheting one?
Absolutely! A premade adjustable leather strap is a convenient alternative. Make sure the attachment loops are strong enough to support the finished bag.
How do I make the strawberry leaves look realistic?
Use green yarn and create pointed leaves with the Tunisian full stitch technique. Arrange them evenly around the top opening for a natural strawberry appearance.
Can I add a zipper or magnetic closure?
A magnetic closure is an optional finishing detail. A zipper is another possible customization, although it requires additional sewing and careful placement.
Final Thoughts
This crochet strawberry purse is a delightful project for anyone who loves colorful, creative handmade accessories.
I especially love the combination of raised puff stitches and little green leaves. Together, they transform an ordinary crochet bag into something playful and eye-catching.
You can make it in classic strawberry red, experiment with pink berry shades, or try pastel colors for a softer appearance. The two available sizes also make it easier to choose a version that suits your needs.
Take your time with the puff stitches, make sure both panels match, and attach the leaves and strap securely.