5 Easy Crochet Bag Ideas for Beginners
If you are looking for a crochet project that is useful, stylish, and not too overwhelming, an easy crochet bag is one of the first projects I would recommend.
I love crochet bags because they give me the chance to practice basic stitches while creating something I can actually use. Unlike a large blanket, a bag can often be completed in a much shorter amount of time. Even better, I can customize almost everything—from the color and size to the strap and closure.
A simple crochet bag does not need an elaborate stitch pattern to look beautiful. In many cases, a clean stitch, attractive yarn, and carefully finished edges are enough.
The key is choosing a construction that matches your skill level.
In this guide, I’m sharing five easy crochet bag ideas that beginners can use as inspiration. Each point focuses on a different style while keeping the construction approachable.
Whether you want a small everyday bag, a market tote, a shoulder bag, or a cute gift, there is plenty of room to make the design your own.
1. Start With a Simple Rectangle Crochet Bag
The easiest place to start is with a rectangular bag.
This construction is beginner-friendly because you don’t have to worry about complicated shaping. You simply create a crochet rectangle, fold it, join the sides, and add handles.
I particularly like this approach when I want to concentrate on improving my tension rather than learning a complicated stitch pattern.

What you need
For a basic bag, gather:
- Medium-weight yarn
- Appropriate crochet hook
- Tapestry needle
- Scissors
- Measuring tape
- Optional button or magnetic closure
Cotton yarn is a particularly useful choice for a bag because it generally creates a firm fabric with clear stitch definition.
Basic construction
Begin by making a foundation chain that determines the width of your bag.
Work rows of your chosen stitch until the piece reaches approximately twice the height you want for the finished bag.
Fold the rectangle in half.
Join the two side edges and bottom edge.
Leave the top open.
Finally, add your handles.
That’s the basic structure.
You can use single crochet for a firm fabric, half double crochet for a slightly taller stitch, or another simple stitch that you already know.
Why I like this method
There is very little shaping.
That means I can spend more time concentrating on keeping my rows straight and my tension even.
If you are making your first crochet bag, I would rather see you complete a simple project successfully than struggle through a complicated pattern.
2. Try a Classic Crochet Market Bag
A crochet market bag is another excellent beginner project.
Unlike a small purse, a market bag can be designed with more open stitches. This gives it a lightweight, flexible appearance and can reduce the amount of yarn required.
It is also a great project for experimenting with mesh-like patterns.

Choosing the stitch
You can create an open fabric using combinations of:
- Chain stitches
- Double crochet
- Single crochet
- Slip stitches
For example, you can create repeated chain spaces between stitches to form an airy mesh.
The exact stitch repeat can be adjusted according to the size you want.
Basic construction
Start at the bottom.
You can make a small oval base and gradually work upward, or create a flat rectangular base and build the sides from it.
Once the body reaches your preferred height, add a reinforced top edge.
Then attach two handles.
For a beginner, I recommend keeping the handles relatively simple.
A tightly crocheted strap made from single crochet is often easier to control than an elaborate braided handle.
Important consideration
Open crochet bags can stretch.
If you plan to carry heavy groceries or books, don’t assume that a loose mesh bag will behave like a structured handbag.
The more weight you put inside, the more the fabric and handles can stretch.
For heavier use, choose a denser stitch or reinforce the base and handles.
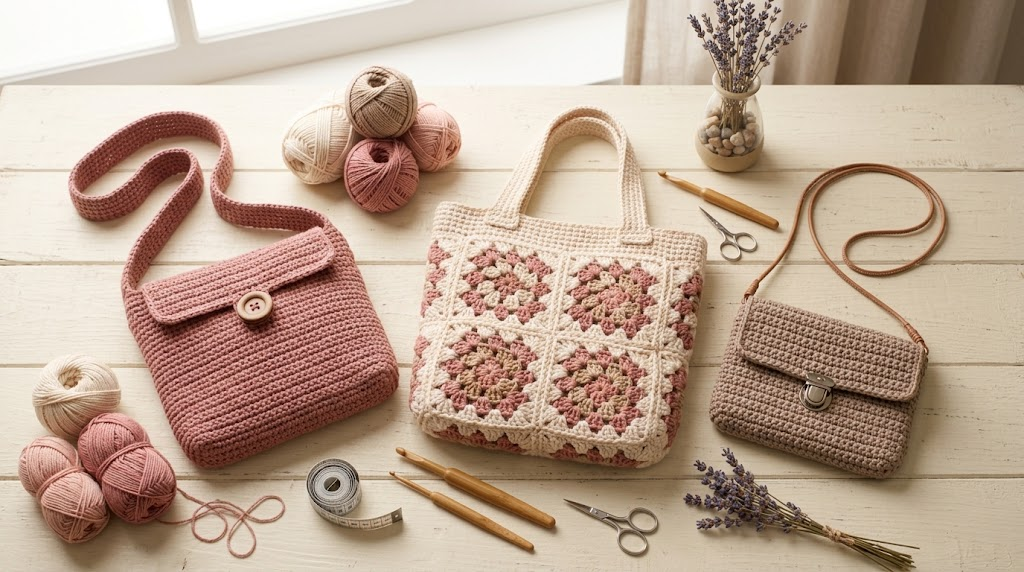
3. Make a Simple Crochet Shoulder Bag
If you want something more like an everyday handbag, a simple shoulder bag is a great next step.
This design can still use basic stitches, but you can add a flap, button, or decorative border to give it a more finished appearance.
Simple pattern structure
Create two matching rectangular panels.
The size of these panels determines the overall size of the purse.
For example, a smaller panel creates a compact bag for essentials, while a larger panel gives you more room for everyday items.
Once both panels are finished, join the bottom and side edges.
Leave the top open.
Then crochet a flap from the back panel.
You can make the flap:
- Straight
- Rounded
- Pointed
- Scalloped
For a first project, I would keep it simple.
A straight flap with a decorative border can look surprisingly polished.

Add a closure
A button is one of the easiest closures to add.
Create a small chain opening in the flap that fits over the button.
You can also use a magnetic snap if you want a cleaner-looking closure.
Make sure the closure is securely attached because it will experience repeated pulling every time the bag is opened.
4. Create a Granny Square Crochet Bag
Granny squares are one of my favorite ways to turn leftover yarn into something useful.
They are also ideal for beginners because each square is relatively small.
Instead of carrying a large project everywhere, I can make individual squares and assemble them later.

Choosing a color palette
For a soft modern look, try:
- Light blush red
- Dusty rose
- Cream
- Warm ivory
- Beige
For something brighter, choose three or four contrasting colors.
The important thing is to create some consistency.
If every square has completely different colors, the finished bag may look visually busy.
A repeating color order can make the bag feel much more intentional.
Assembly
Make your desired number of granny squares.
Lay them out on a flat surface before joining.
This is one of my favorite parts because you can rearrange the squares until you find an arrangement you like.
Join the squares using:
- Slip stitch
- Single crochet
- Whip stitch
- Mattress-style joining
Once the panels are assembled, add the sides and bottom.
Finish with a simple top edge and handles.
My beginner tip
Don’t worry if your individual squares are not perfectly identical.
Blocking or careful joining can help improve their appearance.
More importantly, practice your tension as you go so that your squares become increasingly consistent.
5. Make a Small Crochet Crossbody Bag
If you want a quick project that uses relatively little yarn, a mini crossbody bag is a great option.
I especially like this design for beginners because it does not require a large amount of fabric.

The basic concept is simple:
crochet the body → join the sides → add a flap → attach a strap
Body
Start with a rectangle.
The width determines how much you can carry, while the height determines the overall size.
For a phone-sized bag, keep both measurements relatively small.
For an everyday crossbody, make the body wider and taller.

Flap
Continue working from the back panel to create the flap.
You can use the same stitch as the body or introduce a small decorative detail.
For example, a few rows of a contrasting color can create a subtle border.
Strap
This is one area where I recommend paying attention to strength.
A long strap needs to support the weight of the bag.
I prefer a fairly dense crochet strap instead of an extremely loose one.
You can also make the strap wider for greater comfort.
Before attaching it permanently, place the bag against your body and check the length.
It is much easier to adjust the strap before finishing the attachment.

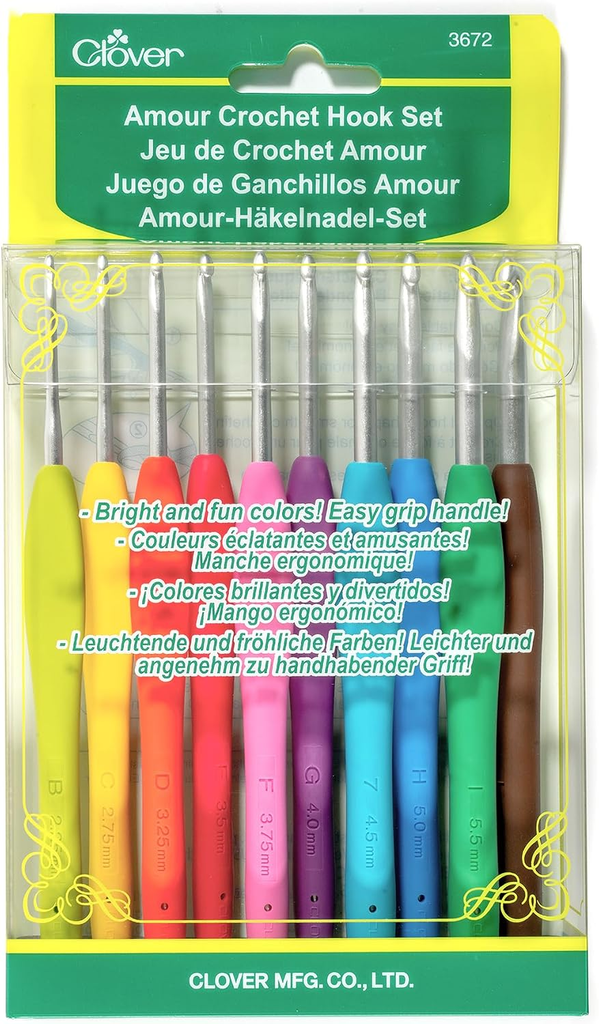
Choosing the Right Crochet Hook
The hook size you use affects the final texture and structure of the bag.
A very large hook can create an open, flexible fabric.
A smaller hook can produce tighter stitches.
For most everyday crochet bags, I prefer a fabric that has enough structure to hold its shape.
The correct size will depend on your yarn and your natural tension, so always check the yarn manufacturer’s recommendation as a starting point.
Choosing Yarn for an Easy Crochet Bag
Yarn selection can make or break a crochet bag.
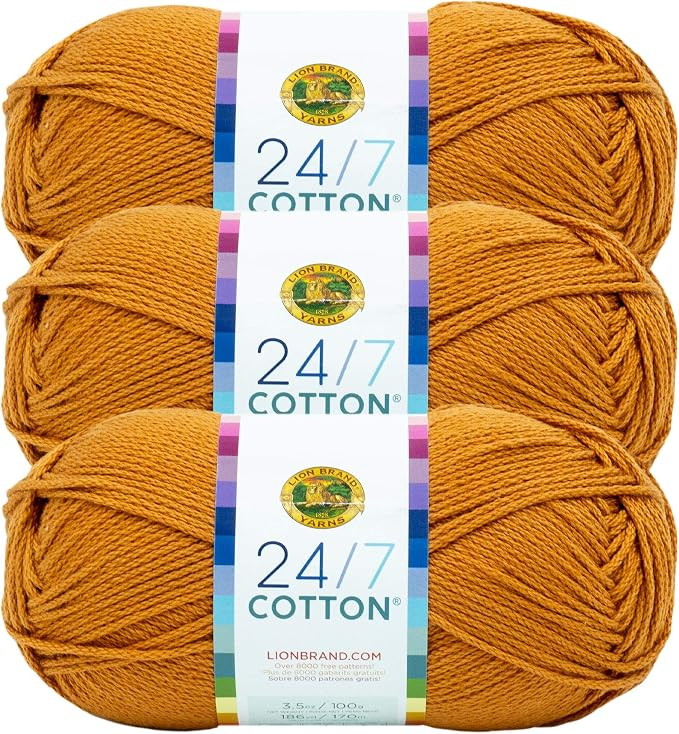
For many beginner bags, I would start with cotton or a cotton blend.
Cotton tends to create clear stitch definition and can give the bag a relatively firm structure.
One option worth considering is Lion Brand 24/7 Cotton.
What I look for in bag yarn
I generally consider:
Durability: The bag needs to tolerate regular handling.
Structure: Extremely soft yarn may create a bag that collapses easily.
Stitch definition: Clear stitches help decorative patterns stand out.
Care: A practical bag should ideally be easy to maintain.
Color: Since a bag is something you may use frequently, choose a shade you will enjoy seeing.
How to Keep Your Crochet Bag From Stretching
Stretching is one of the biggest concerns with handmade crochet bags.
The good news is that you can reduce it with a few simple decisions.
Use a tighter stitch
A dense stitch creates a firmer fabric.
Single crochet is one of the easiest choices.
Reinforce the bottom
The bottom carries much of the weight.
You can make the base slightly denser or add a fabric lining.
Make the handles strong
The handles experience constant pulling.
Attach them across multiple stitches instead of connecting them to only one or two points.
Avoid overloading
Even a strong handmade bag should not be treated like a heavy-duty shopping container unless it was specifically designed for that purpose.
Why a Crochet Bag Is a Great Beginner Project
I think crochet bags are underrated as learning projects.
A small bag lets you practice several important crochet skills at once.
You learn how to:
- Maintain stitch counts
- Keep edges straight
- Work flat pieces
- Join crochet pieces
- Change colors
- Make straps
- Add closures
- Finish yarn ends
- Think about structure
And unlike a practice swatch, you finish with something useful.
That can make learning much more motivating.

Five Easy Ways to Customize Your Bag
Once you understand the basic construction, you can make the design your own.
Add stripes
Change colors every few rows.
Add texture
Try simple puff stitches, ridges, shells, or bobbles.
Change the size
Adjust the foundation chain and number of rows.
Add a lining
A fabric lining can make an open crochet bag more practical.
Change the handles
Try short handles for a handbag or a longer strap for a crossbody design.
You can even make detachable straps if you want to change the look later.
Common Beginner Mistakes to Avoid
Making the fabric too loose
A very loose stitch can make a bag stretch more than expected.
Forgetting to count
A small mistake early in the project can change the shape later.
Making the strap too thin
A thin strap may dig into your shoulder and can stretch under weight.
Joining uneven panels
Before sewing or crocheting pieces together, line up the edges carefully.
Leaving yarn ends unsecured
Take the extra few minutes to weave them in properly.
Those little finishing details make a big difference.
Final Thoughts
An easy crochet bag is one of those projects where simplicity really works.
You don’t need an advanced stitch dictionary or dozens of decorative elements to create something beautiful. A rectangular body, a sturdy strap, and a thoughtful color combination can be enough.
If I were teaching someone to crochet their first bag, I would start with the simple rectangle design. Once that feels comfortable, I would move on to a market bag, shoulder bag, granny-square design, or mini crossbody.
The most important thing is to pay attention to structure.
A crochet bag needs to look good, but it also needs to hold its shape and survive normal use. That means choosing appropriate yarn, keeping your stitches reasonably firm, reinforcing the handles, and finishing your yarn ends carefully.
And don’t be afraid to experiment.
Try a blush-and-cream bag for a soft feminine look. Choose beige and taupe for something neutral. Add dusty rose stripes for a subtle color accent. Or use bright colors and let the crochet become the main statement.
The best part of making your own bag is that you are not limited to what you find in a store.
You decide the size.
You choose the yarn.
You control the colors.
And stitch by stitch, you create an accessory that is completely your own.