
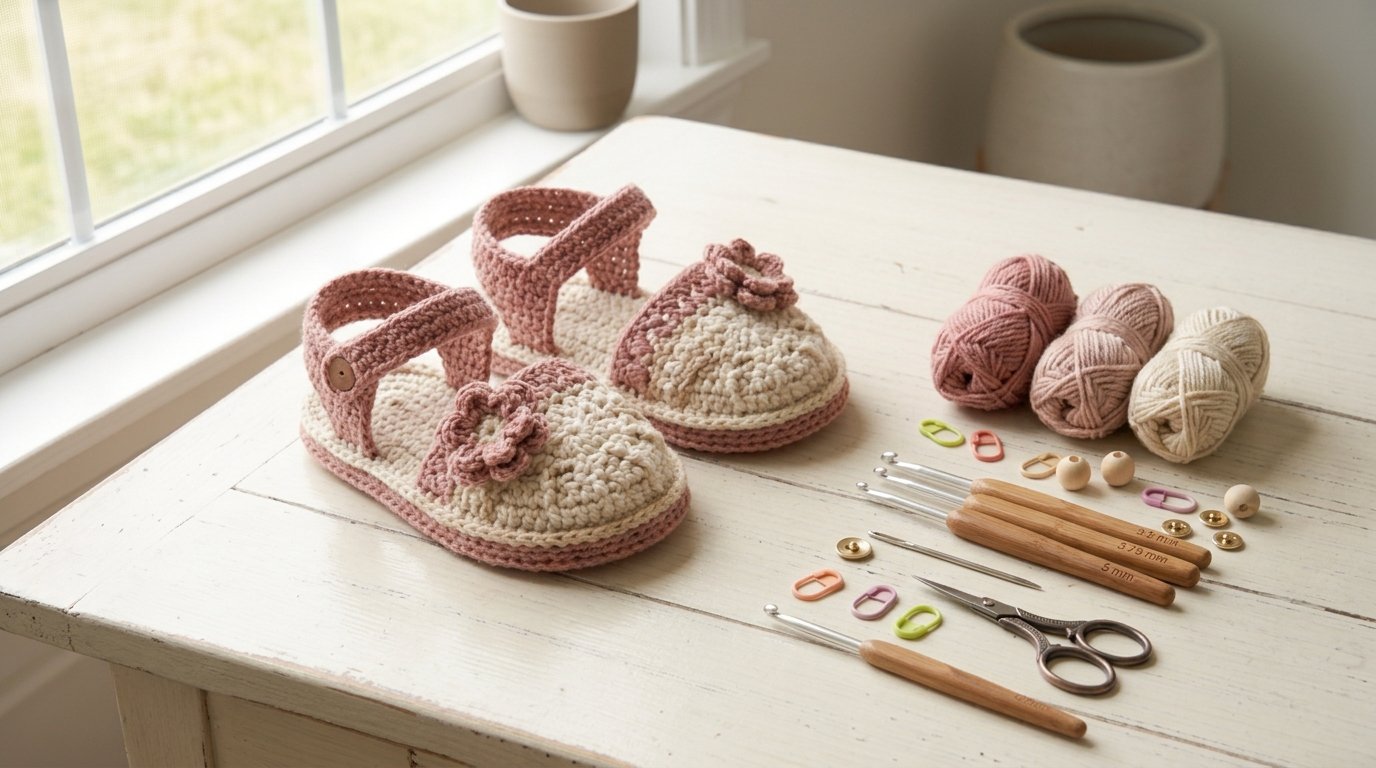
Orchid Sandals Crochet Baby Booties: A Beautiful Handmade Pattern for Little Feet
There is something especially satisfying about crocheting tiny baby shoes. They are small enough to finish without spending weeks on them, but they can still have beautiful details that make them look like something from a boutique baby shop.
The Orchid Sandals Crochet Baby Booties pattern is a lovely example.
What caught my attention about this design is the combination of a simple overall shape with a decorative toe and flower detail. Instead of making the entire sandal complicated, the design keeps most of the sandal understated and lets the toe area become the focal point. The original designer describes the toe top as the highlight, while the flower is intentionally simple and worked without crocheting in the round.
That makes this a particularly charming project for a baby shower gift, a handmade photo prop, or a special little accessory for a baby’s summer wardrobe.
The pattern includes four sizes: 0–3, 3–6, 6–9, and 9–12 months, making it useful for several stages of a baby’s first year.
What I Like About the Orchid Sandals Style
When I make baby crochet projects, I always think about the balance between decoration and practicality.
Baby accessories can easily become overloaded with flowers, buttons, bows, and other embellishments. Sometimes a simpler design actually looks more elegant.
That’s what I like about the Orchid Sandals concept.
The decorative portion is concentrated around the toe, while the rest of the sandal remains relatively clean. This gives the finished pair a delicate appearance without making the entire project visually busy.
The original design also uses a double-layered sole, which gives the sandals more structure than a single thin crochet sole. The ankle strap uses two pairs of snap buttons, allowing the fit to be adjusted.
For a handmade baby accessory, those details make a meaningful difference.
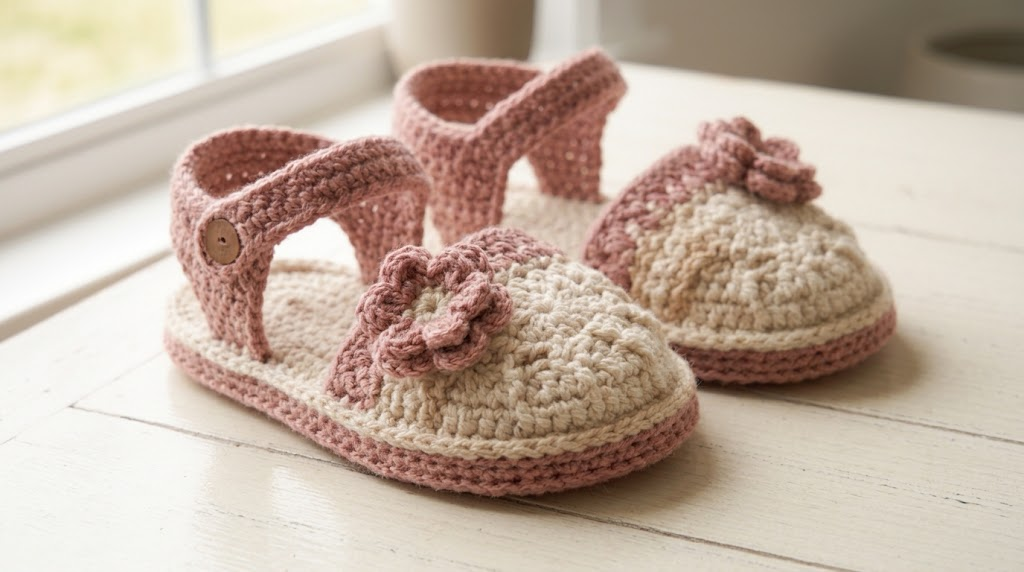
Orchid Sandals Pattern Details
Before starting a small crochet project, I like to check all of the materials and sizing information first.
According to the original pattern, the Orchid Sandals use:
- Worsted-weight/Aran yarn
- Fine/Sport/Baby-weight yarn for the smallest size
- DK/Light Worsted yarn for the larger sizes
- H/5 mm crochet hook
- F/3.75 mm crochet hook
- E/3.5 mm crochet hook
- Single crochet
- Slip stitch
- Half double crochet
- Standard American crochet terminology
The pattern covers 0–3, 3–6, 6–9, and 9–12 months.
Because several yarn weights and hook sizes are involved, I recommend reading through the pattern completely before beginning. Small baby projects can actually require more attention to detail than larger projects because a difference of just a few stitches can noticeably affect the finished size.

Why the Double-Layered Sole Matters
The sole is one of the most important parts of any crochet baby sandal.
If the sole is too thin, the finished sandal can feel floppy. If it is too stiff, it may not have the soft handmade quality you want.
The Orchid Sandals pattern addresses this by using a double-layered sole.
I particularly like this approach for decorative baby sandals because the additional layer gives the sole a little more body while keeping the project crocheted rather than relying on a manufactured sole.
When making the two layers, pay close attention to your tension.
If one sole is noticeably larger than the other, joining them can become frustrating.
My advice is to make the first sole carefully and then use it as your visual reference for the second one.
Don’t simply assume that crocheting the same number of stitches automatically means both pieces will be identical.
Your tension can change.

Choosing Yarn for Baby Sandals
Yarn selection becomes especially important when you’re making something intended for a baby’s feet.
I prefer yarn that feels soft, has consistent thickness, and produces clear stitch definition.
For the Orchid Sandals, the original pattern uses different yarn weights depending on the size. The smallest size combines worsted/Aran yarn with fine, sport, or baby-weight yarn, while the larger sizes use worsted and DK/light-worsted yarn.
That means I wouldn’t substitute yarn casually.
If you change the yarn weight, you can change the size of the sole and the proportions of the upper.
For your first pair, following the recommended yarn category is the safest approach.
My Favorite Color Approach
Baby sandals give you a wonderful opportunity to play with color.
For a classic look, try:
- Ivory and blush pink
- Cream and dusty rose
- White and soft blue
- Beige and pale peach
For something brighter:
- Coral and cream
- Yellow and white
- Lavender and pink
- Mint and ivory
I especially like using a neutral shade for the sole and a slightly stronger color for the decorative upper.
That allows the details to stand out without making the sandals look too busy.
Understanding the Hook Sizes
One detail that beginners should pay attention to is the fact that this project doesn’t rely on just one crochet hook.
The original pattern lists 5 mm, 3.75 mm, and 3.5 mm hooks.
That may seem unusual if you’re accustomed to completing an entire project with one hook, but different portions of a crochet design can benefit from different hook sizes.
A smaller hook generally produces a tighter fabric.
A larger hook generally creates larger, more flexible stitches.
For baby sandals, this can be useful because the sole and decorative upper don’t necessarily need exactly the same stitch characteristics.
A Useful Tip
Keep your hooks together from the beginning.
When I work on projects requiring multiple hook sizes, I like to place them beside the pattern rather than putting them away after each section.
That simple habit can prevent the classic crochet mistake of reaching for the wrong hook and realizing several stitches later that something doesn’t look right.
The Decorative Toe Is the Star
The toe section is what gives the Orchid Sandals their personality.
The original design intentionally keeps the other elements understated so that the toe top becomes the highlight.
This is an important design lesson that applies to crochet beyond this particular project.
You don’t always need complicated stitches everywhere.
Sometimes a simple sole, simple straps, and one beautiful decorative section create a much more polished result.
When you’re working the toe, pay attention to your stitch tension.
If the stitches become too loose, the decorative shape may lose its definition.
If they’re too tight, the piece can become stiff and difficult to attach neatly.

The Flower Detail
The flower is another charming part of this design.
The original pattern describes the flower as very simple and notes that it is not worked in the round.
This makes it approachable even if you’re not an experienced crochet flower maker.
A small flower can also be a great place to introduce a contrasting color.
For example, imagine:
Cream sandal + blush toe + white flower
or
White sandal + dusty rose toe + cream flower
The contrast doesn’t need to be dramatic.
For baby accessories, soft color differences often look more elegant than extremely strong contrasts.
Getting the Baby Size Right
Baby sizes can be tricky because age isn’t always a perfect measurement.
The Orchid Sandals pattern provides four age-based size categories:
- 0–3 months
- 3–6 months
- 6–9 months
- 9–12 months
If you’re making these as a gift, I’d be especially careful about choosing the size.
Babies grow quickly, and a pair that fits perfectly today may become too small surprisingly soon.
For a gift, I would consider making the size appropriate for the baby’s expected age when the gift will actually be used rather than automatically choosing the baby’s current age.
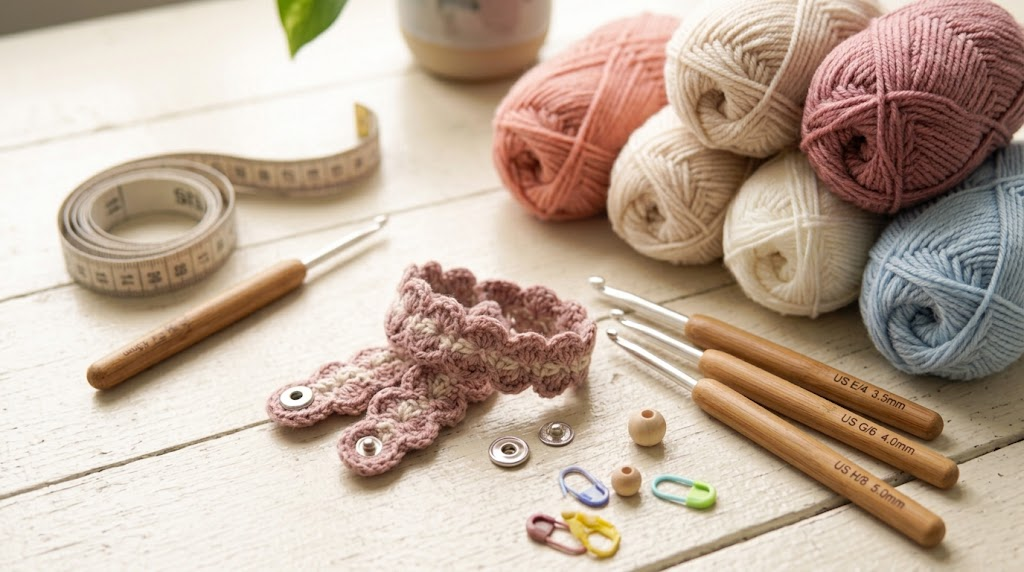
Why Gauge Is Important for Baby Crochet
Gauge is easy to ignore when you’re excited about a new project.
I understand that feeling.
You want to get straight to the fun part.
But baby sandals are one of those projects where gauge matters.
If your stitches are consistently tighter than the pattern’s intended gauge, your sole can become smaller.
If your stitches are looser, it can become larger.
Even if you use the exact same yarn and hook size listed in the pattern, your personal tension can still be different.
That’s why I recommend checking your finished measurements as you work.
Don’t wait until both sandals are completely finished to discover that one is larger than the other.

Make Both Soles Before Moving On
This is one of the habits I find most useful when crocheting footwear.
Make the matching sole pieces together before moving too far into the upper.
Why?
Because you can compare them side by side.
Lay them flat.
Look at the length.
Check the width.
Compare the curve at the toe.
If one looks different, it’s much easier to correct it now than after you’ve attached the upper and straps.
This is especially useful for handmade baby footwear because even a small difference can be noticeable.
Keeping Left and Right Sandals Matching
Crochet footwear has another challenge: symmetry.
The left sandal and right sandal need to look like a pair.
When you reach the strap placement stage, pay close attention to where each strap attaches.
The original pattern provides specific guidance for the left sandal and strap placement rather than simply making two identical pieces and hoping they work.
My advice is to keep the completed sandal beside you as a reference when beginning the second one.
This is much easier than trying to remember what you did several hours earlier.

Working With Snap Buttons
The Orchid Sandals design uses two pairs of snap buttons on the ankle strap, allowing the fit to be adjusted.
This is a practical design choice because babies’ feet and ankles don’t all have exactly the same proportions.
However, because this is baby footwear, I would take extra care with the finishing.
Make sure any attachment is secure and inspect the finished sandal before giving it to a baby.
Avoid loose decorative pieces, unsecured hardware, or anything that could become detached.
The sandals should be treated as a supervised handmade accessory rather than a toy.

Two Amazon Tools I Would Consider
You don’t need a giant collection of crochet equipment for this project.
There are two practical tools I’d prioritize.
1. Clover Amour Crochet Hook Set
Because the Orchid Sandals pattern uses several hook sizes, an ergonomic multi-size hook set can be convenient.
The Clover Amour range includes multiple hook sizes, with the commonly sold 10-piece set covering sizes from B through J. Current marketplace tracking shows the set continues to be sold through Amazon, although pricing and availability vary.
What makes this useful for the Orchid Sandals project is simple: instead of buying each required size separately, you can have several common sizes together.
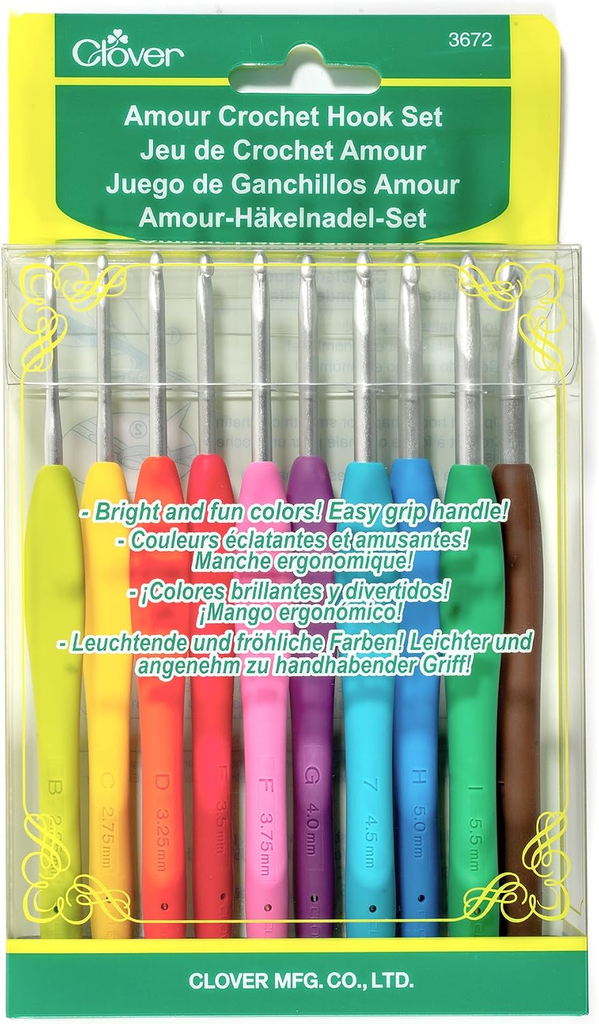
I would look for:
- Comfortable handles
- Clearly marked sizes
- Smooth hook tips
- Several sizes in one set
- A storage solution that keeps the hooks together
One thing to remember: you don’t need an expensive hook set simply because you’re making one pair of sandals. If you already own the required sizes, use them.
For someone building a crochet tool collection, however, a multi-size set can make sense.
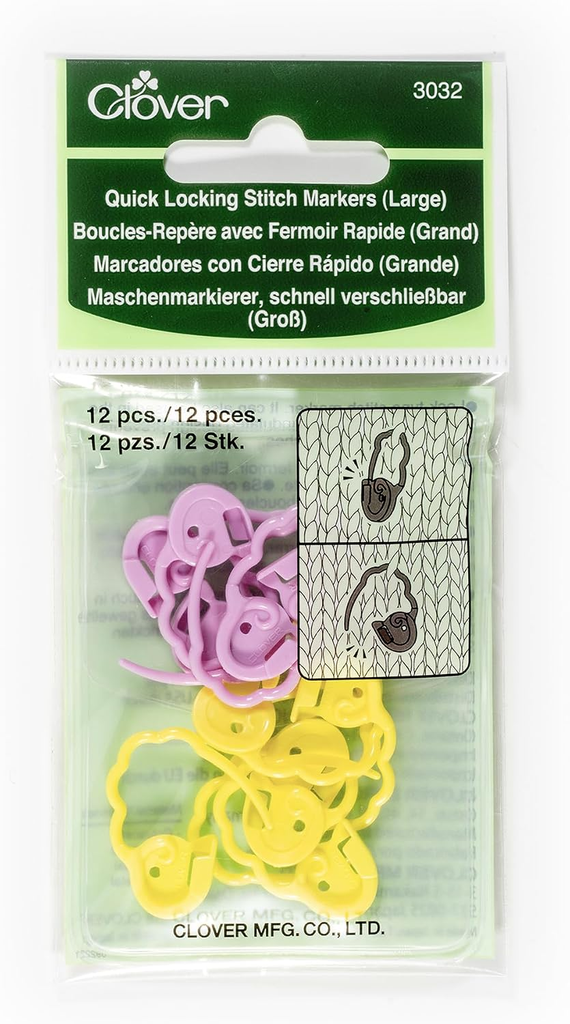
2. Clover Locking Stitch Markers
The second item I’d keep nearby is a set of locking stitch markers.
These are particularly useful when working in rounds or when you need to identify a specific location in a crochet piece.
Locking markers close around the stitch, making them less likely to slip away compared with simple open markers. Current listings and crochet-tool references show Clover locking markers available through Amazon and other craft retailers.
I like this type of marker for baby footwear because you can use it to identify important stitch locations while shaping the sole or working on the straps.
They’re also reusable, so one small set can serve you across dozens of projects.
How I Would Organize the Project
If I were sitting down to make these sandals, I’d organize everything before crocheting.
I’d place:
- The pattern
- Main yarn
- Contrasting yarn
- Required hooks
- Stitch markers
- Yarn needle
- Snap buttons
- Small scissors
on the same workspace.
Then I’d decide on the color combination before starting.
This might sound unnecessary, but it makes a small project feel much more organized.
Baby sandals have several little components, and losing track of one can interrupt your rhythm.
A Simple Workflow for Beginners
Here’s the order I’d recommend following.
Step 1: Choose the Size
Decide which of the four pattern sizes you’re making.
Step 2: Prepare Your Yarn
Separate the main yarn from the contrasting yarn so you don’t accidentally grab the wrong weight.
Step 3: Check Your Hook Sizes
Put the 5 mm, 3.75 mm, and 3.5 mm hooks you’ll need together.
Step 4: Make the Sole Pieces
Work carefully and compare your pieces as you go.
Step 5: Join the Sole Layers
Make sure both layers sit evenly before joining them.
Step 6: Crochet the Decorative Upper
Take your time with the toe section because it is the visual focal point.
Step 7: Add the Straps
Check the placement carefully and compare the left and right sandals.
Step 8: Add the Flower
Use your chosen accent color to finish the decorative detail.
Step 9: Attach the Snaps
Make sure they are firmly secured and inspect the finished sandal carefully.
Step 10: Compare the Pair
Place both sandals side by side.
Check their length, width, strap position, and overall appearance.
Common Problems to Watch For
One sandal is larger
This is usually related to tension.
Try to maintain the same grip and yarn tension on both pieces.
The sole curls
Your tension may be too tight, or the stitch count may not be matching the pattern.
Check your stitches before continuing.
The toe looks floppy
The yarn or hook combination may be producing a fabric that’s too loose.
Check your gauge and make sure you’re using the recommended yarn category.
The straps don’t match
Use the finished first sandal as a reference when positioning the second.
The flower looks too large
Remember that baby footwear is tiny.
A small flower can have a surprisingly big visual impact.
Why These Make a Sweet Handmade Gift
One reason I enjoy baby crochet projects is that they feel personal.
A store-bought pair of baby sandals can be cute, but a handmade pair carries a different kind of meaning.
You chose the yarn.
You selected the colors.
You spent time making every stitch.
And because the Orchid Sandals come in four baby sizes, they can work for different stages of the first year.
They would make a lovely addition to a baby shower gift basket alongside a handmade blanket, baby dress, or matching crochet accessory.
In fact, Crochet Dreamz has also featured the Orchid Sandals as a possible matching accessory for its Little Bow Peep baby dress, showing how nicely the two styles can be coordinated.
Final Thoughts
The Orchid Sandals Crochet Baby Booties pattern is a beautiful example of how a relatively small crochet project can have plenty of personality.
The double-layered sole gives the design structure, the adjustable ankle straps add practicality, and the decorative toe creates the delicate detail that makes the sandals special. The pattern also covers four baby sizes, from 0–3 months through 9–12 months.
My biggest advice is not to rush this project simply because the sandals are small.
Small doesn’t always mean simple.
Take your time with the sole, pay attention to gauge, keep your left and right sandals consistent, and check every finishing detail carefully.
Most importantly, enjoy the creative part.
Choose a beautiful color combination, add your favorite flower color, and make the finished pair feel like something truly handmade.
That’s what I love most about crochet: even a tiny pair of sandals can become a meaningful little keepsake.


pattern can I get?