Toddler Classic Snow Boots Crochet Pattern: A Cozy 5-Step Handmade Winter Boot Guide
When I think about handmade winter projects for toddlers, I always look for something that combines warmth, comfort, and a little bit of personality. A pair of crochet snow boots checks all three boxes.
The original pattern in standard American crochet terminology and is available in four toddler sizes: US 5, 6, 7, and 8. One of the clever things about the construction is that it uses two strands of worsted-weight yarn held together, which creates a thicker and more structured fabric while also allowing the project to work up relatively quickly.
I especially like the idea of these boots as a handmade gift. A little pair of crochet boots can look adorable in a baby’s or toddler’s wardrobe, and changing the yarn color can make the same basic design look completely different.
In this tutorial, I’m breaking the project into five practical stages. Rather than simply following stitches mechanically, I’ll focus on the things I would pay attention to while making the boots: sizing, sole construction, shaping, straps, and finishing.
Why I Like This Crochet Boot Style
A crochet boot is a little more interesting than a basic crochet slipper.
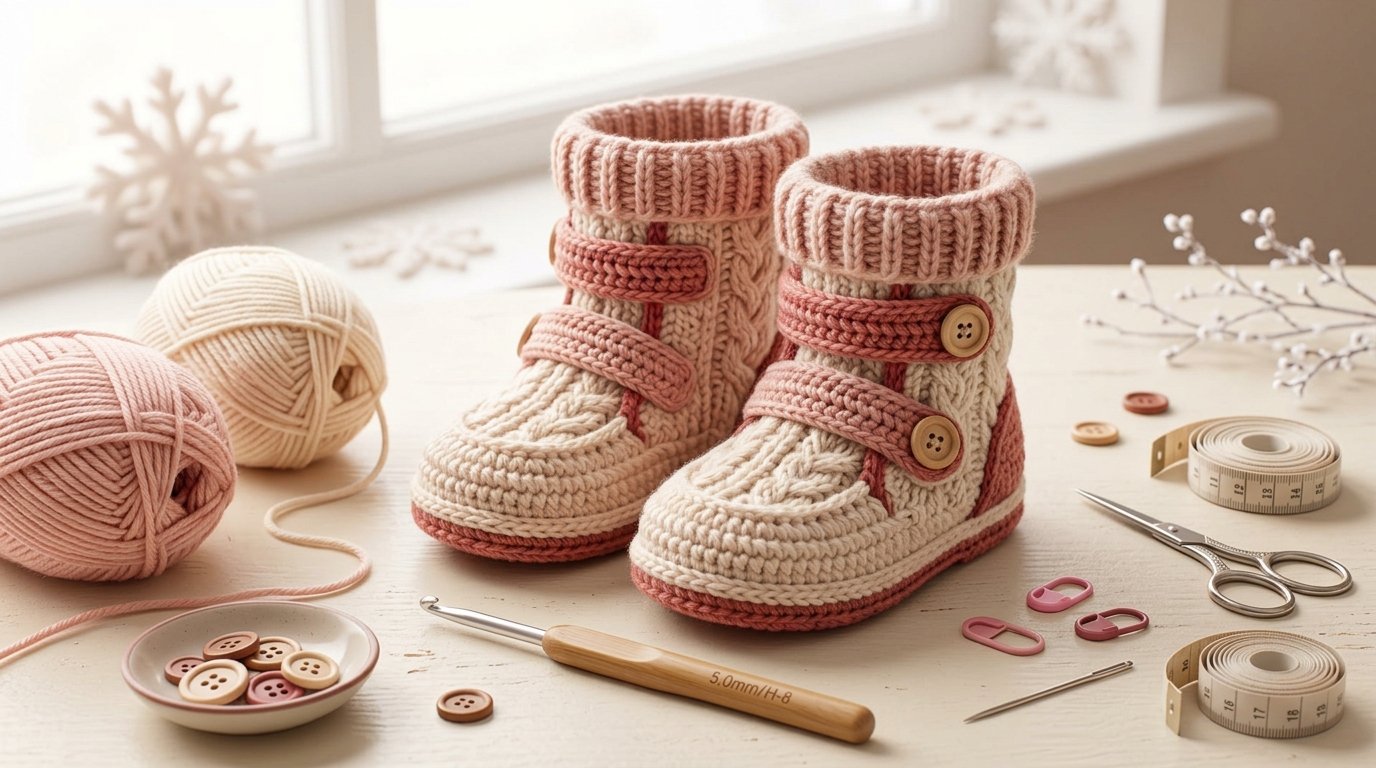
The taller shape gives it a true boot-like appearance, while the straps and buttons add a classic decorative detail. The original sample is shown with wooden buttons, and the design can also be made in different colors, including soft pastels and brighter shades.
The biggest construction feature is the use of two strands of medium/worsted yarn together.
That is worth understanding before you begin.
Holding two strands together produces a thicker working yarn than using one strand alone. For a toddler boot, that extra thickness can help create a firmer fabric and give the finished piece more structure.
It also means that your yarn feeding needs to stay consistent.
If one strand becomes noticeably looser than the other, the stitches can become uneven.
So, before starting, I would place the two yarn balls or skeins where they can unwind smoothly and keep both strands under reasonably similar tension.
Materials You’ll Need
For an original version of this style, gather:
- Medium/worsted-weight yarn
- Two strands held together while crocheting
- Crochet hook appropriate for your gauge
- Tapestry needle
- Scissors
- Measuring tape
- Stitch marker
- Two buttons for each boot, if using the classic buttoned look
- Optional stitch markers for shaping

Choosing Your Yarn
I would choose a smooth, durable worsted-weight yarn rather than a very fuzzy yarn.
You want to be able to clearly see your stitches, especially when constructing the sole.
Good color choices include:
- Cream and ivory
- Blush pink
- Dusty rose
- Light red
- Soft gray
- Oatmeal
- Baby blue
- Sage green
- Burgundy
- Warm brown
For a handmade look, I particularly like cream, blush red, dusty rose, and warm ivory together.

1. Build the Sole Carefully
The sole is the foundation of the entire boot.
This is the part I would take the most seriously because a small mistake in the sole can affect everything that comes afterward.
The original design is available in four toddler shoe sizes, from US 5 through US 8. That means you should select the size according to the child’s actual foot measurement rather than simply choosing a size based on age.
Start by creating the foundation chain for your selected size and work around it to form the elongated oval shape of the sole.
The construction typically develops around both sides of the foundation chain, with increases placed toward the rounded ends.
Think of the sole as having three zones:
Toe → middle → heel
The toe and heel need the shaping increases because they are rounded. The middle section remains comparatively straight.

My Biggest Sole Tip
Don’t rush past the sole.
After completing the first sole, place it against the child’s foot or compare it with the intended foot measurement.
You don’t need to crochet the entire boot before discovering that the size is wrong.
This is one of the most useful things about crochet footwear: the sole gives you an early opportunity to check the overall length and width.
If the first sole isn’t right, fix it before making the second one.
And once you have the first sole correct, make the second sole to exactly the same measurements.
Check Both Measurements
Don’t only check length.
A sole can have the correct length but still be too narrow or too wide.
Measure:
- Overall length
- Widest point
- Heel width
A toddler’s comfort matters more than forcing the project to match a particular number of stitches.
2. Create the Boot Base
Once both soles are complete, the next stage is building upward.
This is where the flat sole starts becoming a three-dimensional boot.
The stitches are worked around the edge of the sole rather than continuing outward.
As the fabric rises, the sole begins to form the lower walls of the boot.
This transition is important because it establishes the shape of the footwear.

Keep Your Tension Consistent
Because you’re working with two strands at once, tension can become a little tricky.
Try to make both strands behave as though they are one strand.
You don’t want one strand pulled extremely tightly while the other sits loosely across the stitch.
If that happens, the fabric can look uneven.
I also recommend keeping the two strands untangled before beginning each round.
If you’re working from two separate yarn balls, put them in a position where both can feed smoothly.
Watch the Toe
The toe area should begin developing a rounded shape rather than remaining completely flat.
Don’t pull the stitches tightly around the toe.
A toddler boot needs enough room for natural movement.
At this stage, I would repeatedly compare the developing boot with the sole you made in Step 1.
If the side walls are rising evenly, you’re on the right track.
3. Shape the Upper Boot
Now the project starts looking much more like an actual winter boot.
The upper portion is worked upward from the base, creating the boot shaft.
This is where your stitch consistency becomes especially visible.
A small difference in tension can make one side taller than the other, so keep an eye on your rounds as you progress.

Think About the Boot Height
For toddler footwear, you don’t want the upper portion to become unnecessarily tall.
The goal is a comfortable boot-like shape that surrounds the foot and ankle.
As you work upward, occasionally flatten the boot and compare both sides.
Are they the same height?
Does the toe remain rounded?
Is the heel centered?
These simple visual checks can catch mistakes early.
Keep the Shape Structured
Because two strands of worsted yarn are being used together, the fabric should have more body than a lightweight single-strand fabric.
That can be helpful for a boot design because you don’t want the upper collapsing completely.
At the same time, avoid crocheting so tightly that the fabric becomes stiff.
The finished piece still needs to feel soft against a toddler’s foot and ankle.
4. Add the Straps and Decorative Details
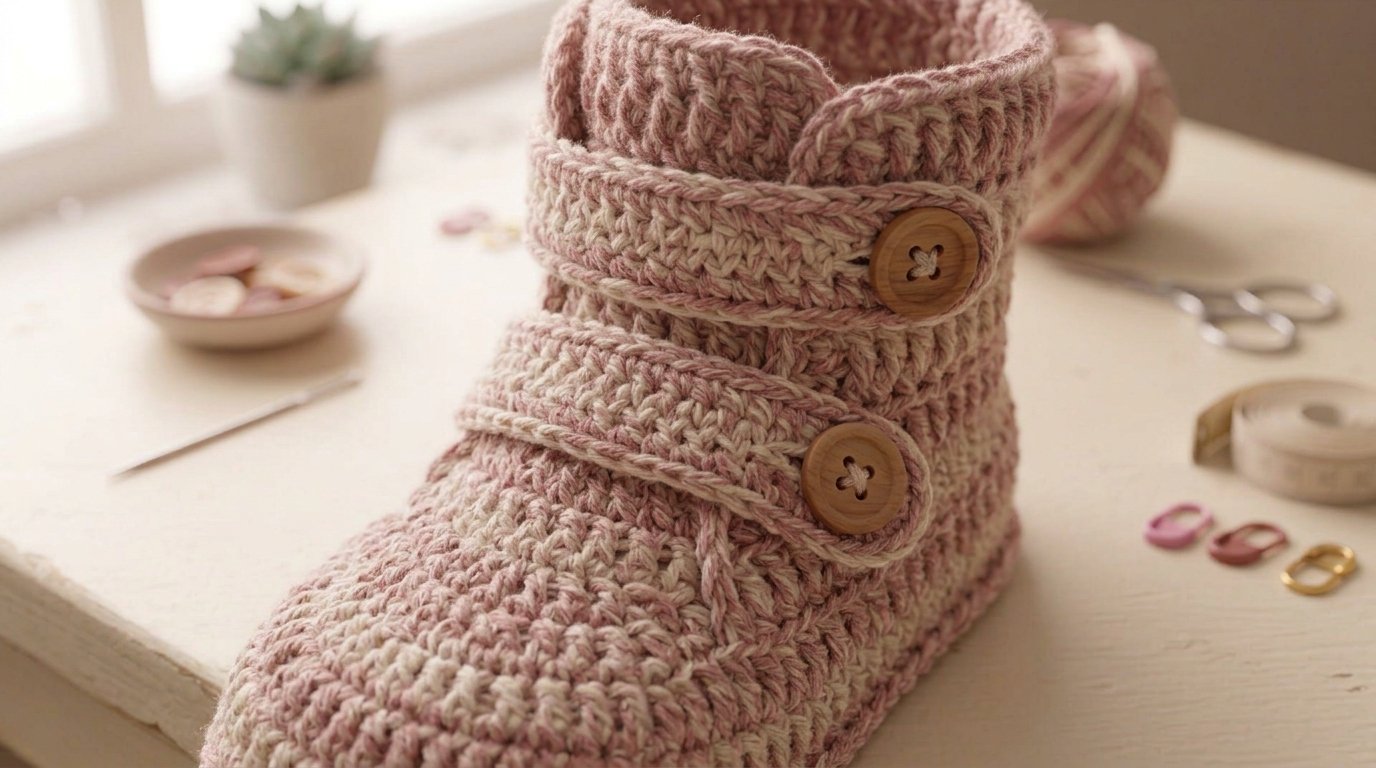
This is one of my favorite parts of the design because the straps make the finished boot instantly recognizable.
The original sample features two straps and wooden buttons.
For an original variation, you can use the same general idea while choosing your own strap width, button style, and color combination.
Strap Ideas
Try:
- Matching straps
- Contrasting straps
- Cream straps on a pink boot
- Pink straps on an ivory boot
- Brown straps on a cream boot
- Two-tone straps
If you’re making a gift, a contrasting strap can make the boots look especially polished.
Button Choice
Wooden buttons create a warm handmade appearance.
You could also use:
- Natural wood
- Cream buttons
- Decorative floral buttons
- Neutral plastic buttons
- Simple round buttons
For toddler footwear, however, attachment security matters more than decoration.
Any button or embellishment needs to be firmly attached and regularly checked.
For babies and young toddlers, avoid loose decorative pieces that could become choking hazards.
Attaching the Straps
The straps should be positioned so they sit comfortably across the boot.
Don’t make them so tight that they pull the upper fabric inward.
The boot should still open enough to get the toddler’s foot inside comfortably.
Before permanently finishing the straps, check the opening.
This is a very practical step that can save you from having to undo your work later.
5. Finish, Shape, and Check the Finished Boots
Once the boot construction is complete, the final stage is all about finishing.
Weave in your yarn ends securely.
Because you’re working with two strands, you may have more yarn tails than you expect. Take the time to finish each one properly.
Use a tapestry needle to weave each end through several stitches on the inside of the boot.
Then change direction before trimming.
This creates a more secure finish than simply cutting the yarn close to the stitch.
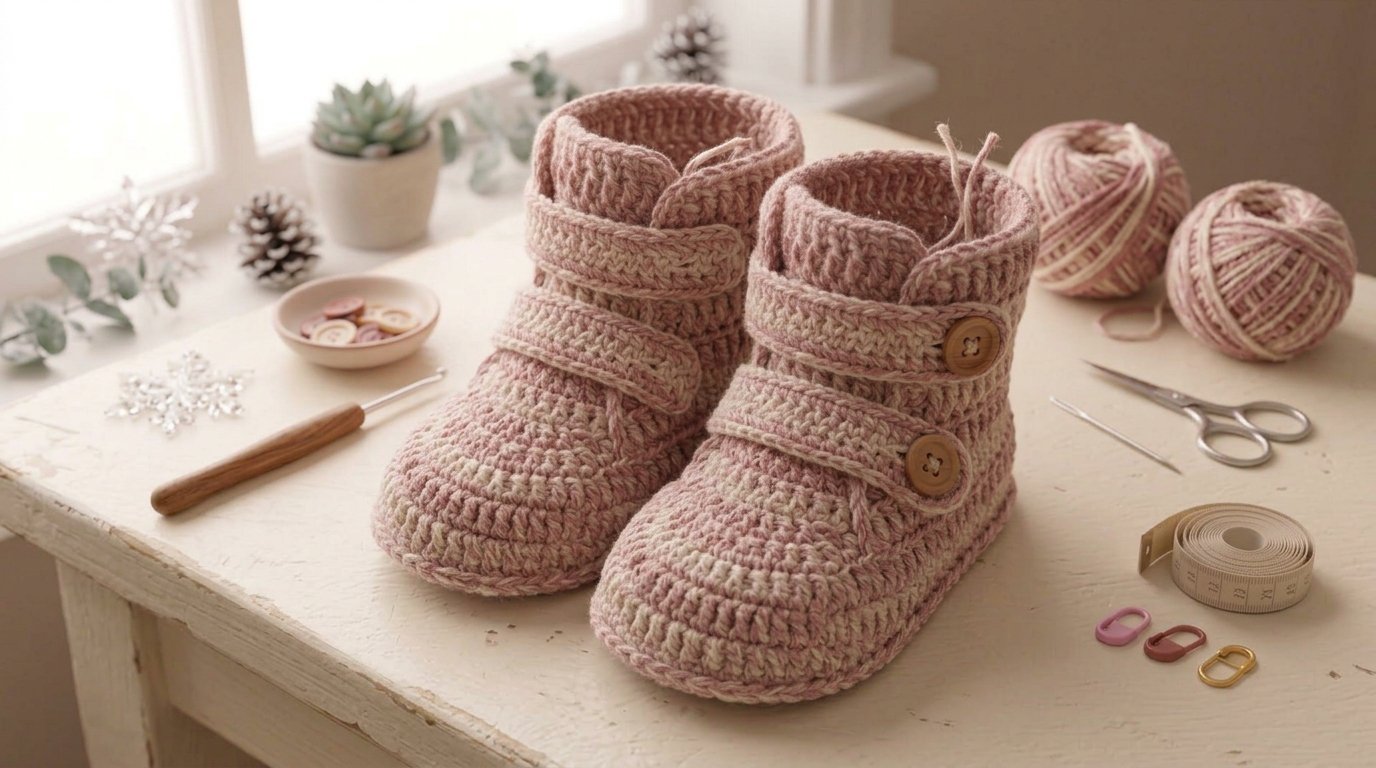
Make Sure the Pair Matches
Place both boots side by side.
Check:
- Same sole length
- Same sole width
- Same boot height
- Same strap position
- Same button placement
- Similar toe shape
They don’t have to look machine-made.
They’re handmade pieces.
But having the two boots reasonably symmetrical makes the finished pair look much more professional.
How to Choose the Right Toddler Size
The original pattern covers US toddler shoe sizes 5, 6, 7, and 8.
Still, shoe sizing can vary, so I wouldn’t rely exclusively on age or a generic size chart.
Measure the child’s foot when possible.
Measure From Heel to Longest Toe
Place the foot flat and measure from the back of the heel to the end of the longest toe.
Also consider the child’s foot width.
Then compare your measurement with the pattern’s finished sole dimensions.
The original Crochet Dreamz page includes a useful comment where the designer gives the size 8 sole as approximately 6 inches long and 2½–2¾ inches wide.
That illustrates why checking the sole early is so useful.
A Very Important Point About Crochet Snow Boots
The word “snow boots” can be misleading if someone assumes these are equivalent to commercial winter footwear.
They aren’t.
Crochet yarn creates a warm textile upper, but it doesn’t automatically provide:
- Waterproofing
- A slip-resistant outsole
- Protection from wet snow
- Protection from ice
- Outdoor traction
So I would treat these as cozy crochet booties or indoor winter footwear, unless you add a properly designed sole and understand the safety implications.
For a toddler walking outdoors on snow or ice, commercial footwear with an appropriate waterproof and non-slip sole is much more suitable.
This distinction is important because I would rather be honest about what a handmade crochet project can and cannot do.
Troubleshooting Your Crochet Snow Boots
The sole is too small
Check your gauge.
If you’re crocheting more tightly than the pattern expects, your finished sole can come out smaller.
Try a larger hook for your next attempt rather than randomly adding stitches.
The sole is too wide
Your tension may be looser than expected.
Make another small test section and compare your measurements.
The boot won’t hold its shape
Check your yarn and tension.
Remember that the original design uses two strands of worsted yarn together, which contributes to the sturdier construction.
The two boots don’t match
Don’t try to correct the second boot from memory.
Write down your measurements and compare the two soles before continuing.
The toddler can’t get their foot inside
The opening may be too tight.
Before adding final decorative details, check that the boot opens comfortably enough for the foot.
Two Amazon Products I Would Actually Consider
I like keeping affiliate recommendations short.
A crochet pattern doesn’t need ten products surrounding it. Most crocheters already have scissors, needles, and measuring tools.
For this particular project, I’d concentrate on the hook and the yarn.
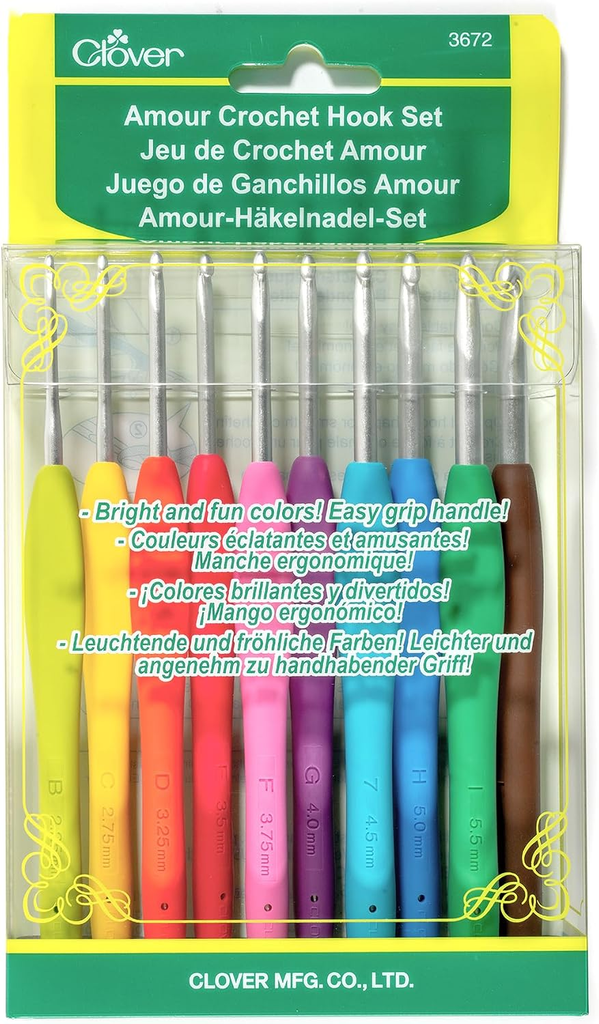
1. Clover Amour Crochet Hook Set
The Clover Amour Crochet Hook Set is a useful option if you crochet frequently and want a range of hook sizes available for gauge adjustments.
The 10-piece 3672 set includes sizes from 2.25 mm through 6 mm, and the model is widely sold through Amazon. Current Amazon-tracking data also shows the Clover 3672 as an active Amazon product, although price and availability can change.
What I like about having a range of sizes is that crochet footwear can be particularly sensitive to gauge.
If your sole is coming out too small, changing your hook size is much more controlled than randomly changing stitch counts.
2. Lion Brand Heartland Worsted-Weight Yarn
This is an especially relevant yarn recommendation specifies worsted-weight yarn, while Lion Brand Heartland is a medium/worsted yarn with a smooth acrylic construction.
Lion Brand currently describes Heartland as Category 4 Medium/Worsted, with approximately 251 yards per 5-ounce solid-color skein. It is also machine washable and dryable on the recommended gentle/low-heat settings.
For this project, I would pay attention to the color and the fabric it creates rather than buying the yarn simply because it is popular.
A soft cream, blush, muted red, or neutral shade would make these boots particularly attractive for a handmade gift.

My Final Tips Before You Start
If I were preparing this project for a beginner, I’d emphasize five things:
1. Measure the foot first.
Don’t assume the child’s age automatically tells you the correct size.
2. Make the first sole carefully.
The sole is your best opportunity to catch a sizing problem.
3. Keep both yarn strands consistent.
Treat them as one working yarn.
4. Make the second boot match the first.
Measure rather than relying on memory.
5. Be realistic about outdoor use.
These are handmade crochet boots, not waterproof snow footwear.
Final Thoughts
I love crochet projects that look complicated once they’re finished but are actually built from a handful of understandable stages.
These toddler snow boots are a good example.
The project starts with a simple sole, builds upward into a boot shape, adds straps and buttons, and finishes with careful weaving and shaping.
The two-strand construction gives the project a more substantial feel than a typical lightweight crochet slipper, while the classic shape makes it easy to customize.
I would especially make these as a handmade winter gift in cream, dusty rose, burgundy, or soft gray.
For a little extra personality, add contrasting straps and natural wooden buttons.
Just remember that the most important part of handmade toddler footwear isn’t decoration—it’s fit, secure construction, and appropriate use.
Check the sole before completing the entire boot, make sure decorative elements are securely attached, and don’t treat crocheted yarn soles as a substitute for waterproof, slip-resistant outdoor snow boots.
Once those details are taken care of, this is a lovely project for creating something warm, personal, and genuinely handmade.
Happy crocheting!