Panda Crochet Hat Pattern: Cute Black and White Animal Hat for Babies, Kids, and Adults
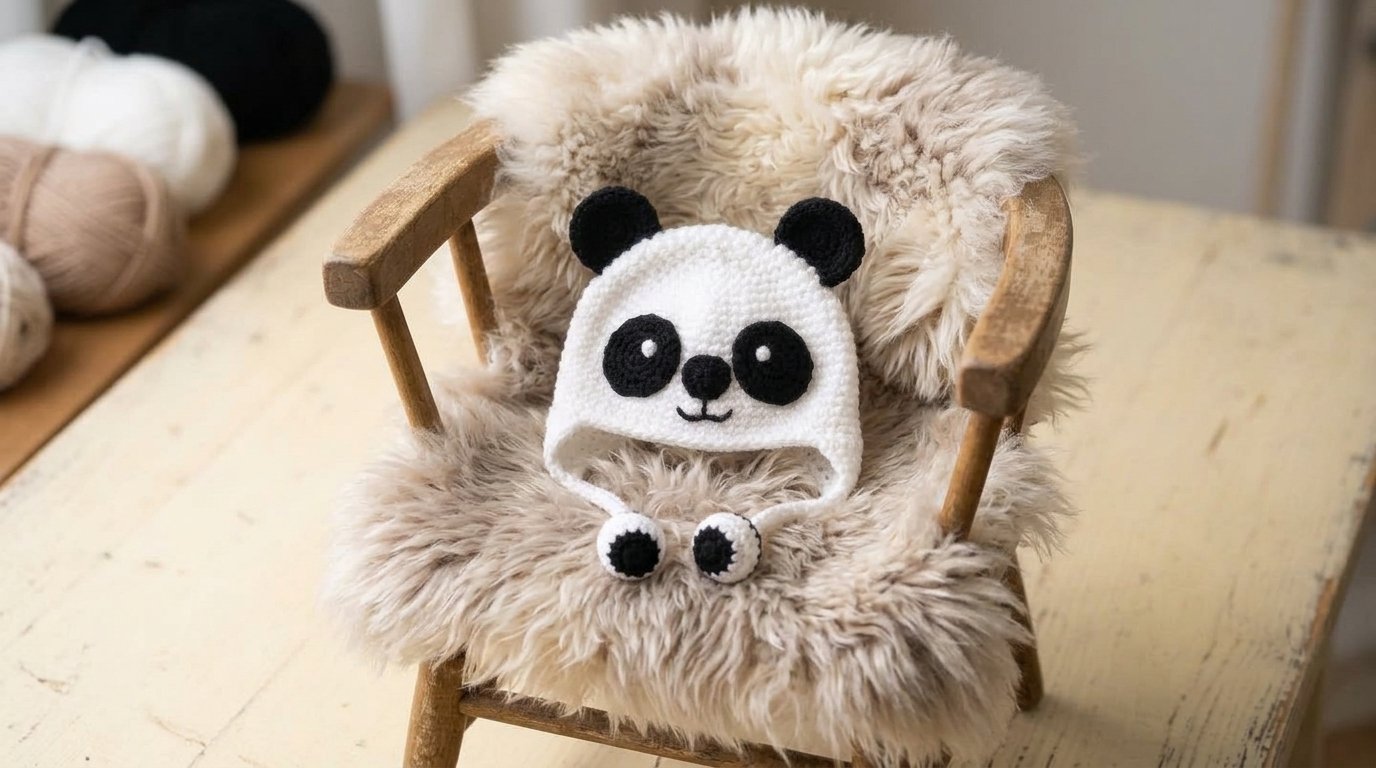
A handmade panda hat is one of those crochet projects that instantly brings a smile to your face. With its adorable round ears, black eye patches, and sweet little nose, this hat turns a simple winter accessory into something playful and special.
I especially love the classic black-and-white panda color combination. It looks cute on babies, toddlers, and older children, and it also makes a wonderful handmade gift for someone who loves animals.
In this guide, I’ll walk you through the materials, crochet techniques, hat construction, panda facial features, and finishing details. I’ll also share helpful tips for choosing yarn, getting the right fit, and making your finished panda hat look neat and professional.
Why You’ll Love This Panda Crochet Hat
There are so many reasons to add a panda hat to your crochet project list. It combines a practical winter accessory with an adorable animal-inspired design.
Here are some of my favorite things about this style:
- Adorable panda appearance: The black ears, eye patches, and little nose create an instantly recognizable panda face.
- Multiple size options: You can make matching hats for babies, children, and adults.
- Classic color combination: Black and white yarn creates a beautiful panda-inspired look.
- Lovely handmade gift: It is a thoughtful present for birthdays, baby showers, and winter holidays.
- Customizable design: You can adjust the colors and add earflaps or other decorative details to create your own variation.
Materials You’ll Need
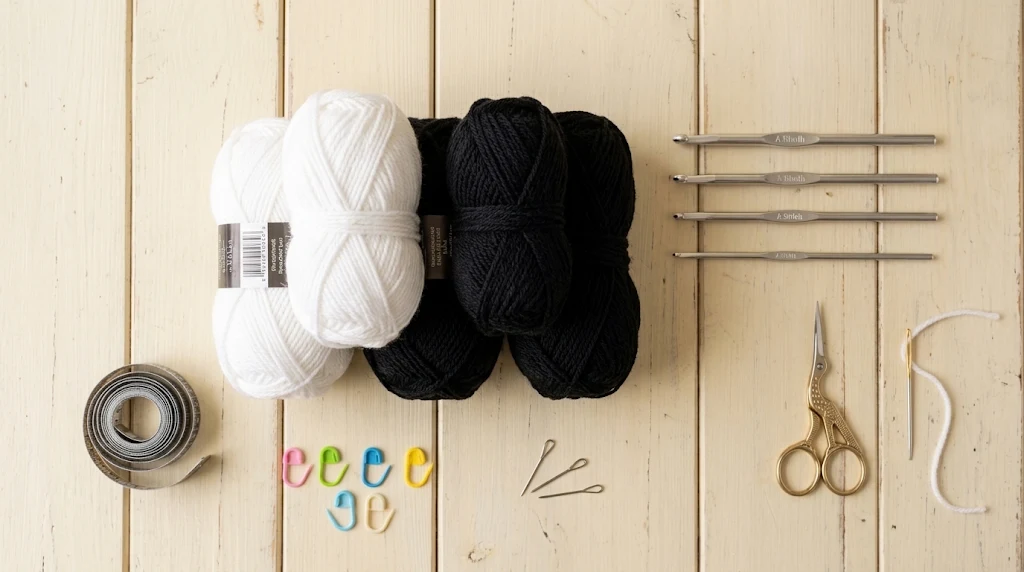
Before starting, gather all your crochet supplies. Having everything ready will make the project easier and help you maintain consistent stitches.
| Material | Purpose |
|---|---|
| White worsted-weight yarn | Main hat body |
| Black worsted-weight yarn | Panda ears and eye patches |
| Small amount of black yarn | Nose and facial details |
| 5 mm crochet hook (H) | Main hat for most sizes |
| 4.25 mm crochet hook (G) | Main hat for 6–12 months |
| 3.75 mm crochet hook (F) | Facial features |
| Stitch markers | Marking rounds |
| Tapestry needle | Sewing pieces together |
| Scissors | Cutting yarn |
Choosing the Best Yarn
Yarn selection is important because a hat should feel comfortable while maintaining its shape.
For the main hat, choose a soft white worsted-weight yarn. Black yarn will be needed for the ears and panda eye patches.
I recommend choosing yarn with:
- Smooth and consistent fibers.
- Good stitch definition.
- A comfortable feel against the skin.
- Easy-care washing instructions.
- Similar thickness in both colors.
For baby and children’s hats, washable acrylic yarn is a practical option. Always check the yarn label and make sure the finished fabric feels comfortable.
My favorite color combination for this project: Bright white for the main body, deep black for the ears and eye patches, and a small amount of black for the nose.
Understanding the Crochet Stitches
This panda hat is a manageable project for crocheters who understand basic stitches and working in rounds.
Here are the main abbreviations you may encounter:
| Abbreviation | Meaning |
|---|---|
| ch | Chain |
| sl st | Slip stitch |
| sc | Single crochet |
| dc | Double crochet |
| st | Stitch |
| sts | Stitches |
| inc | Increase |
| dec | Decrease |
| rnd | Round |
If you are still learning, practice these stitches with a small yarn sample before starting.
Single Crochet (sc)
Insert your hook into the stitch, yarn over, and pull up a loop. Yarn over again and pull through both loops.
Double Crochet (dc)
Yarn over, insert your hook into the stitch, and pull up a loop. Yarn over and pull through two loops. Yarn over once more and pull through the remaining two loops.
Slip Stitch (sl st)
Insert your hook into the indicated stitch, yarn over, and pull through both the stitch and the loop on your hook.
Increase (inc)
An increase means working two stitches into the same stitch. Increases help expand the circular crown of the hat.
Decrease (dec)
A decrease combines stitches to reduce the stitch count and shape a section of your crochet work.
How to Make a Panda Crochet Hat
The hat is constructed in separate sections. First, you create the main white hat, then make the black panda features and attach them securely.
The following is a construction guide, not a replacement for the original size-specific stitch instructions.
Step 1: Start With the Crown
The crown is the top circular section of the hat.
Begin with white yarn and the appropriate hook for your selected size. A magic ring is a useful starting technique because it creates a neat, adjustable center.
Work your first round into the ring, then continue increasing evenly to create a flat circular shape.
Helpful tips:
- Keep the center ring tight so there is no visible hole.
- Count your stitches after each round.
- Place a stitch marker at the beginning of the round.
- Check that your circle is lying flat.
If the crown starts curling upward too early, your tension may be too tight or your increases may need checking.
Step 2: Build the Main Hat Body
Once the crown reaches the required size, continue working around without adding unnecessary increases.
This creates the sides and body of the hat.
Keep your stitches consistent. An uneven body can make the finished hat look twisted or poorly shaped.

I recommend trying the hat against the intended head measurement as you work. This helps you avoid making it too short or too long.
Step 3: Shape the Lower Edge
The lower edge gives the hat its finished appearance and helps it sit comfortably around the head.
Depending on your chosen variation, you can create a simple edge or a ribbed-style finish.
A ribbed edge made with alternating front-post and back-post stitches is one attractive option. It creates a little texture and helps the bottom of the hat look more structured.

Make sure the edge is not too tight. A hat should stay comfortably in place without leaving pressure marks.
Step 4: Crochet the Panda Ears
The panda ears are one of the most important decorative features.
Use black yarn to create two rounded ear pieces.
Try to make both ears approximately the same size. Consistent stitch tension will help them look balanced.

After completing both pieces, leave a long yarn tail for sewing.
My placement tip: Before attaching the ears, position them on the hat and check their spacing. You want the panda to look balanced from the front.
Step 5: Create the Panda Eye Patches
The black eye patches give the hat its recognizable panda expression.
Make two matching patches using black yarn. They should be large enough to stand out against the white hat but not so large that they cover too much of the front.
Place both patches on the front of the hat.

Take a moment to compare their height and spacing. Even a small difference in placement can make the panda face look uneven.
Step 6: Crochet the Nose
The nose is a small detail, but it completes the panda’s face.
Use black yarn and a smaller crochet hook to create a neat nose shape.
Keep the nose centered between the two eye patches.
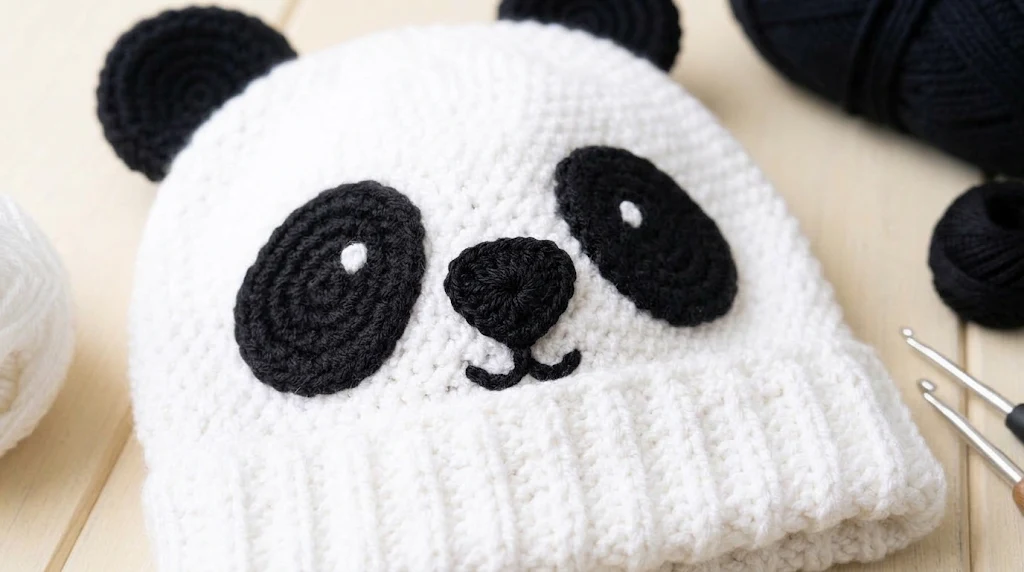
You can use a tapestry needle to add a few embroidered details if desired.
For baby hats, I recommend embroidered facial details instead of plastic safety eyes, buttons, or other detachable decorations.
Step 7: Attach All the Facial Features
Now comes the fun part!
Place the ears, eye patches, and nose on the white hat before sewing anything permanently.
Look at the hat from the front and check that:
- Both ears are evenly positioned.
- The eye patches are at matching heights.
- The nose is centered.
- The face looks balanced.
Use a tapestry needle and matching yarn to sew each piece securely.

Take small, even stitches around the edges. Avoid leaving loose loops or long yarn tails inside the hat.
Step 8: Add Optional Earflaps
If you want an extra-warm version, you can add earflaps.
Earflaps provide additional coverage around the sides of the head and give the hat a playful winter appearance.
They can be made with matching white or black yarn, depending on the style you prefer.

You can also add crocheted ties, but for baby and toddler hats, avoid long cords or strings that could create a strangulation hazard. Always supervise children wearing decorative accessories.
Step 9: Finish and Inspect Your Panda Hat
Once all the pieces are attached, weave in the remaining yarn ends.
Gently shape the hat with your hands and check the overall appearance.
Look for uneven stitches, loose facial pieces, gaps, or uncomfortable seams.

A final inspection makes a big difference, especially if you are making the hat as a gift.
Choosing the Right Panda Hat Size
One of the nicest things about this design is that it offers a wide range of sizes.
You can make matching panda hats for different family members.
| Size category | Suggested wearer |
|---|---|
| Newborn | Newborn babies |
| Infant | Growing babies |
| Toddler | Toddlers |
| Child | School-age children |
| Teen | Teenagers |
| Adult | Adults |
Always follow the measurements and gauge in the size-specific instructions.
Age is only a general guideline. Head circumference is a more reliable way to choose the correct size.
Before starting, measure around the widest part of the head, just above the eyebrows and ears. Compare that measurement with the pattern’s finished-size guidance.
Two Helpful Amazon Products for Your Panda Hat
You don’t need dozens of supplies for this project. A good yarn and comfortable crochet hooks are two useful investments.
Here are my two recommendations for this project. They are selected based on their suitability for the materials and hook sizes required; I am not claiming personal product testing. Check current Amazon.com stock, seller information, and customer reviews before ordering.
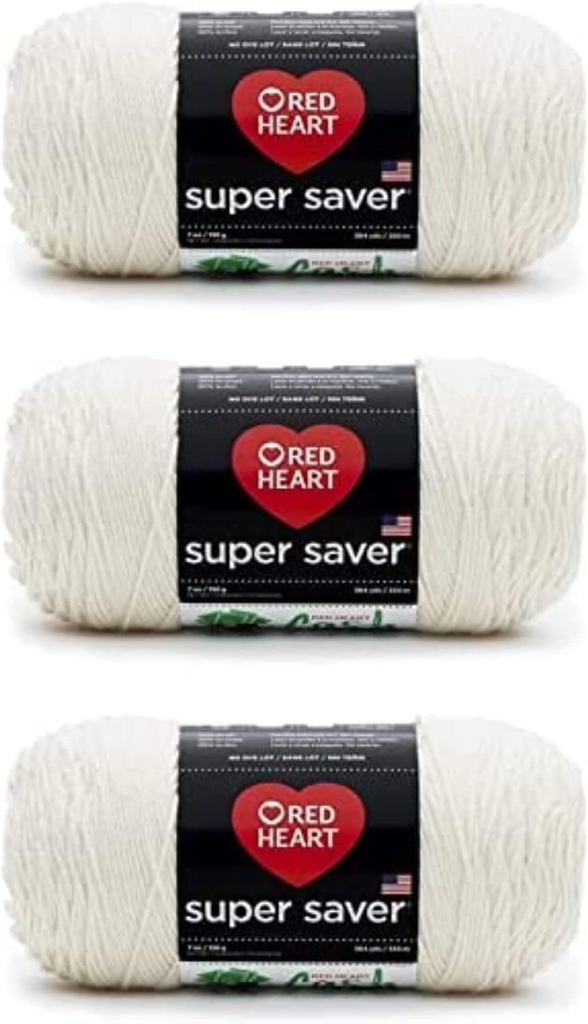
1. Red Heart Super Saver Yarn – For the Black and White Panda Colors
Red Heart Super Saver is a popular option for everyday crochet projects. Its medium-weight acrylic construction makes it worth considering for a panda hat that needs clearly defined stitches.
I would choose white for the main hat and black for the ears, eye patches, and nose.
Why consider it?
- Medium-weight yarn suitable for many hat patterns.
- Available in classic black and white shades.
- Useful for a variety of crochet accessories.
- Practical option for projects that need regular washing, subject to the care label.
2. Clover Amour Crochet Hooks – For Comfortable Stitching
When making a crochet hat, comfortable hooks can make the process more enjoyable, particularly when working through several rounds.
Clover Amour hooks feature ergonomic handles designed for a comfortable grip.
For this project, check that you have the required 3.75 mm, 4.25 mm, and 5 mm sizes.
Why consider them?
- Ergonomic handle design.
- Smooth hook finish.
- Useful for a wide range of crochet projects.
- Available in different hook sizes.

Tips for Making Your Panda Hat Look Professional
A few small details can make your finished hat look much better.
1. Choose the Correct Hook Size
Using the correct hook size helps you achieve the intended measurements. If your stitches are too loose, the hat may look floppy. If they are too tight, it may become uncomfortable.
Always make a gauge swatch before starting.
2. Work Carefully With Black Yarn
Black yarn can make it difficult to see individual stitches, especially when working in low light.
I recommend using a bright crafting light and checking your stitch placement frequently.
3. Keep the Panda Face Symmetrical
The face is what makes this project special.
Before sewing the pieces, arrange them on the hat and take a photograph from the front. Looking at the picture can help you notice uneven placement.
4. Secure Every Attached Piece
This is particularly important when making hats for babies and young children.
Sew the ears and facial features securely, weave in all ends, and inspect the finished item for loose yarn or detachable parts. Embroidered facial features are preferable to buttons and plastic eyes for young children.
5. Avoid Making the Brim Too Tight
The bottom edge should stretch comfortably without putting too much pressure around the head.
A little flexibility makes the hat more comfortable to wear.
Common Crochet Panda Hat Problems and How to Fix Them
Even experienced crocheters sometimes run into small problems. Here are a few issues you may encounter.
| Problem | Possible solution |
|---|---|
| Crown curls upward | Check stitch counts and increase placement |
| Hat looks too small | Check gauge and head measurements |
| Hat looks uneven | Maintain consistent tension |
| Ears look different sizes | Compare stitch counts and measurements |
| Panda face looks crooked | Reposition features before sewing |
| Black stitches are difficult to see | Use brighter lighting |
| Brim feels too tight | Check hook size and finishing tension |
Don’t be discouraged if the first attempt isn’t perfect. Crochet is a skill that improves with practice.
How to Care for Your Handmade Panda Hat
Once your panda hat is finished, proper care will help maintain its shape and appearance.
Here are some simple suggestions:
- Check the yarn manufacturer’s washing instructions.
- Use a gentle detergent.
- Avoid harsh bleaching products.
- Reshape the hat gently after washing.
- Allow it to dry completely before storing.
- Keep it in a clean, dry place.
If you are gifting the hat, consider including a small care card explaining how to wash and store it.
Frequently Asked Questions
Is a panda crochet hat suitable for beginners?
This project is suitable for advanced beginners who understand basic crochet stitches and working in rounds. The separate facial features require some sewing and careful placement.
What yarn weight is best for a panda hat?
Medium-weight category 4 worsted yarn is specified for this design. Choose soft yarn in black and white, and check the gauge before beginning.
What crochet hook sizes do I need?
The design specifies a 5 mm hook for most sizes, a 4.25 mm hook for the 6–12-month size, and a 3.75 mm hook for the facial features.
Can I make this panda hat for adults?
Yes. The design includes sizes ranging from newborn to adult. Follow the appropriate size instructions and measure the head before starting.
Can I use different colors?
Absolutely! You can experiment with gray, cream, pink, or even pastel shades. However, traditional black and white will give your hat the classic panda appearance.
How do I make the panda face look symmetrical?
Place all the facial pieces on the hat before sewing. Compare their positions from the front and make small adjustments until everything looks balanced.
Is this a good handmade gift?
Definitely! A panda hat makes a lovely gift for baby showers, birthdays, winter celebrations, and animal lovers. You can also create matching hats for siblings.
Final Thoughts
Making a panda crochet hat is a fun way to combine creativity, practical crochet skills, and an adorable animal design.
I especially love the contrast between the soft white hat and the black panda features. The rounded ears and little face give the project plenty of personality without requiring complicated decorative techniques.
Whether you are making one for a newborn, a toddler, a school-age child, or an adult, take your time with the sizing and facial placement. These details will help your finished hat look neat and beautifully handmade.

You can also make several versions in different sizes and create a matching family collection.
Gather your black and white yarn, prepare your crochet hooks, and enjoy creating your own little panda-inspired accessory!
Happy crocheting!